1. 编译源码
- 下载最新版代码
wget https://codeload.github.com/azkaban/azkaban/tar.gz/3.85.1

[root@hnode1 opt]# wget https://codeload.github.com/azkaban/azkaban/tar.gz/3.85.1
--2020-04-28 18:07:00--  https://codeload.github.com/azkaban/azkaban/tar.gz/3.85.1
...
2020-04-28 18:10:24 (92.4 KB/s) - “3.85.1” 已保存 [19297212]

[root@hnode1 opt]# ll
总用量 18852
-rw-r--r--  1 root root 19297212 4月  28 18:10 3.85.1

[root@hnode1 opt]# mv 3.85.1 azkaban-3.85.1.tar.gz
[root@hnode1 ~]#
[root@hnode1 opt]# ll

-rw-r--r--  1 root root   19297212 4月  28 18:10 azkaban-3.85.1.tar.gz
- 安装 git
yum install git
- 编译源码
# 解压
tar -zxvf azkaban-3.85.1.tar.gz

cd azkaban-3.85.1

# Gradle是一个项目自动化构建工具
# -x test 跳过测试
./gradlew build installDist -x test

# 中间失败了几次,再次编译即可
因为打包时间较长,这里分享一个我打好的包,
百度网盘链接:https://pan.baidu.com/s/1AoouSeFXtp0zLqwDXbgR1A 密码:37gc
- 查看打好的包
# web server
[root@hnode1 distributions]# pwd
/opt/azkaban-3.85.1/azkaban-web-server/build/distributions
[root@hnode1 distributions]# ll
总用量 39768
-rw-r--r-- 1 root root 20295993 5月  13 19:10 azkaban-web-server-0.1.0-SNAPSHOT.tar.gz
-rw-r--r-- 1 root root 20422305 5月  13 19:10 azkaban-web-server-0.1.0-SNAPSHOT.zip


# Executor Server
/opt/azkaban-3.85.1/azkaban-exec-server/build/distributions
[root@hnode1 distributions]# ll
总用量 31720
-rw-r--r-- 1 root root 16235672 5月  13 20:35 azkaban-exec-server-0.1.0-SNAPSHOT.tar.gz
-rw-r--r-- 1 root root 16242377 5月  13 20:35 azkaban-exec-server-0.1.0-SNAPSHOT.zip

[root@hnode1 distributions]# pwd
/opt/azkaban-3.85.1/azkaban-solo-server/build/distributions
[root@hnode1 distributions]# ll
总用量 71188
-rw-r--r-- 1 root root 36371987 5月  13 20:38 azkaban-solo-server-0.1.0-SNAPSHOT.tar.gz
-rw-r--r-- 1 root root 36522680 5月  13 20:38 azkaban-solo-server-0.1.0-SNAPSHOT.zip
2. Azkaban署模式介绍
solo-server模式
DB使用的是一个内嵌的H2,Web Server和Executor Server运行在同一个进程里。这种模式包含Azkaban的所有特性,但一般用来学习和测试。two-server模式
DB使用的是MySQL,MySQL支持master-slave架构,Web Server和Executor Server运行在不同的进程中。分布式multiple-executor模式
DB使用的是MySQL,MySQL支持master-slave架构,Web Server和Executor Server运行在不同机器上,且有多个Executor Server。
3. solo-server模式部署
3.1 解压
# 复制安装包到 opt 下
cp azkaban-solo-server-0.1.0-SNAPSHOT.tar.gz /opt/
cd /opt/
# 解压安装包
tar -zxvf azkaban-solo-server-0.1.0-SNAPSHOT.tar.gz
mv azkaban-solo-server-0.1.0-SNAPSHOT azkaban-solo-server

[root@hnode1 opt]# cd azkaban-solo-server

[root@hnode1 azkaban-solo-server]# ll
总用量 16
drwxr-xr-x 3 root root   67 5月  13 20:38 bin
drwxr-xr-x 2 root root   82 5月  13 20:38 conf
drwxr-xr-x 2 root root 8192 5月  13 20:38 lib
drwxr-xr-x 3 root root   22 5月  13 20:38 plugins
drwxr-xr-x 2 root root 4096 5月  13 20:38 sql
drwxr-xr-x 6 root root   73 5月  13 20:38 web
3.2 修改配置
# 修改时区
[root@node1 ~]# vim conf/azkaban.properties
default.timezone.id=Asia/Shanghai
3.3 启动
[root@hnode1 azkaban-solo-server]# bin/start-solo.sh
[root@hnode1 azkaban-solo-server]#
[root@hnode1 azkaban-solo-server]#
[root@hnode1 azkaban-solo-server]#
[root@hnode1 azkaban-solo-server]# jps
74416 Jps
74311 AzkabanSingleServer
3.4 验证启动是否成功
[root@node1 ~]# jps
AzkabanSingleServer
# Azkaban solo server模式时 Web Server 和 Exec Server都在AzkabanSingleServer进程
访问Web Server http://node1:8081
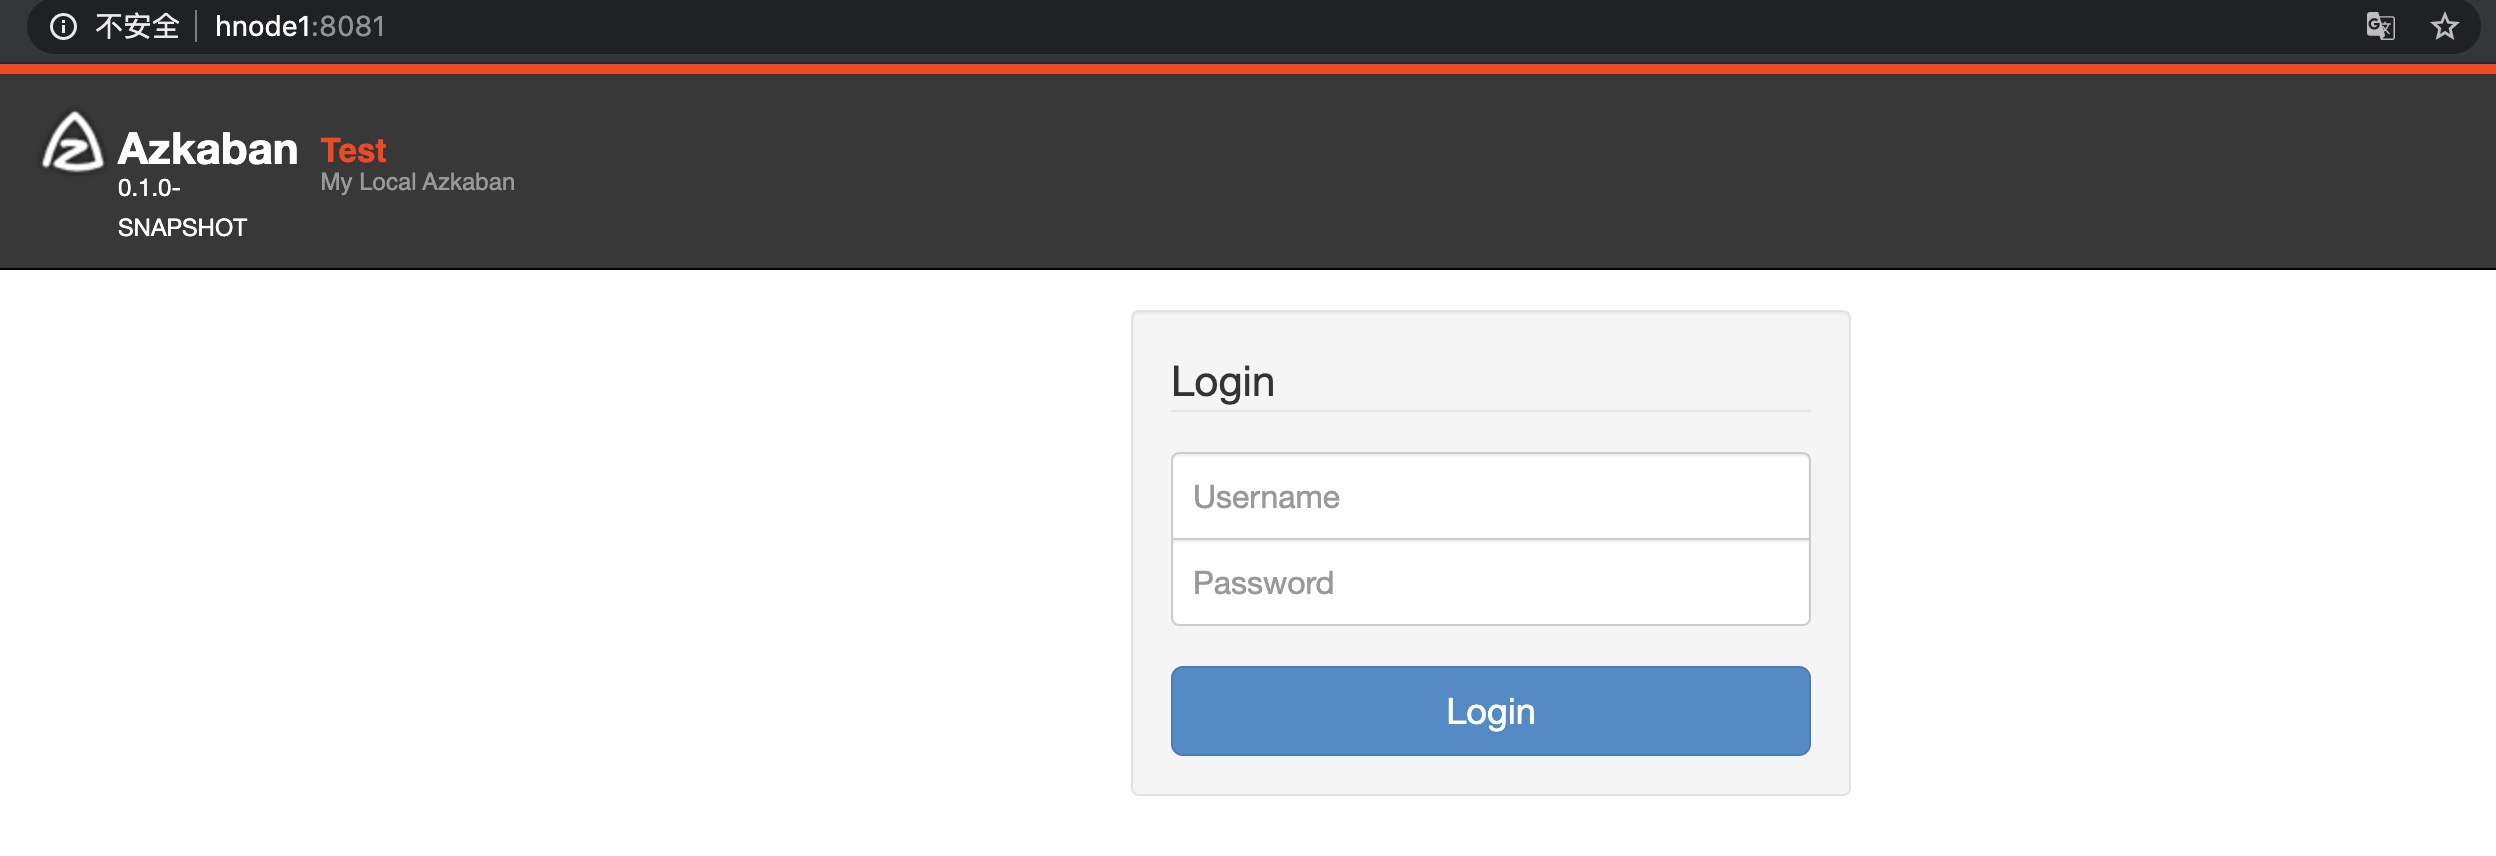
默认登录用户名与密码 azkaban/azkaban
用户名与密码在 conf/azkaban-users.xml 文件中进行配置
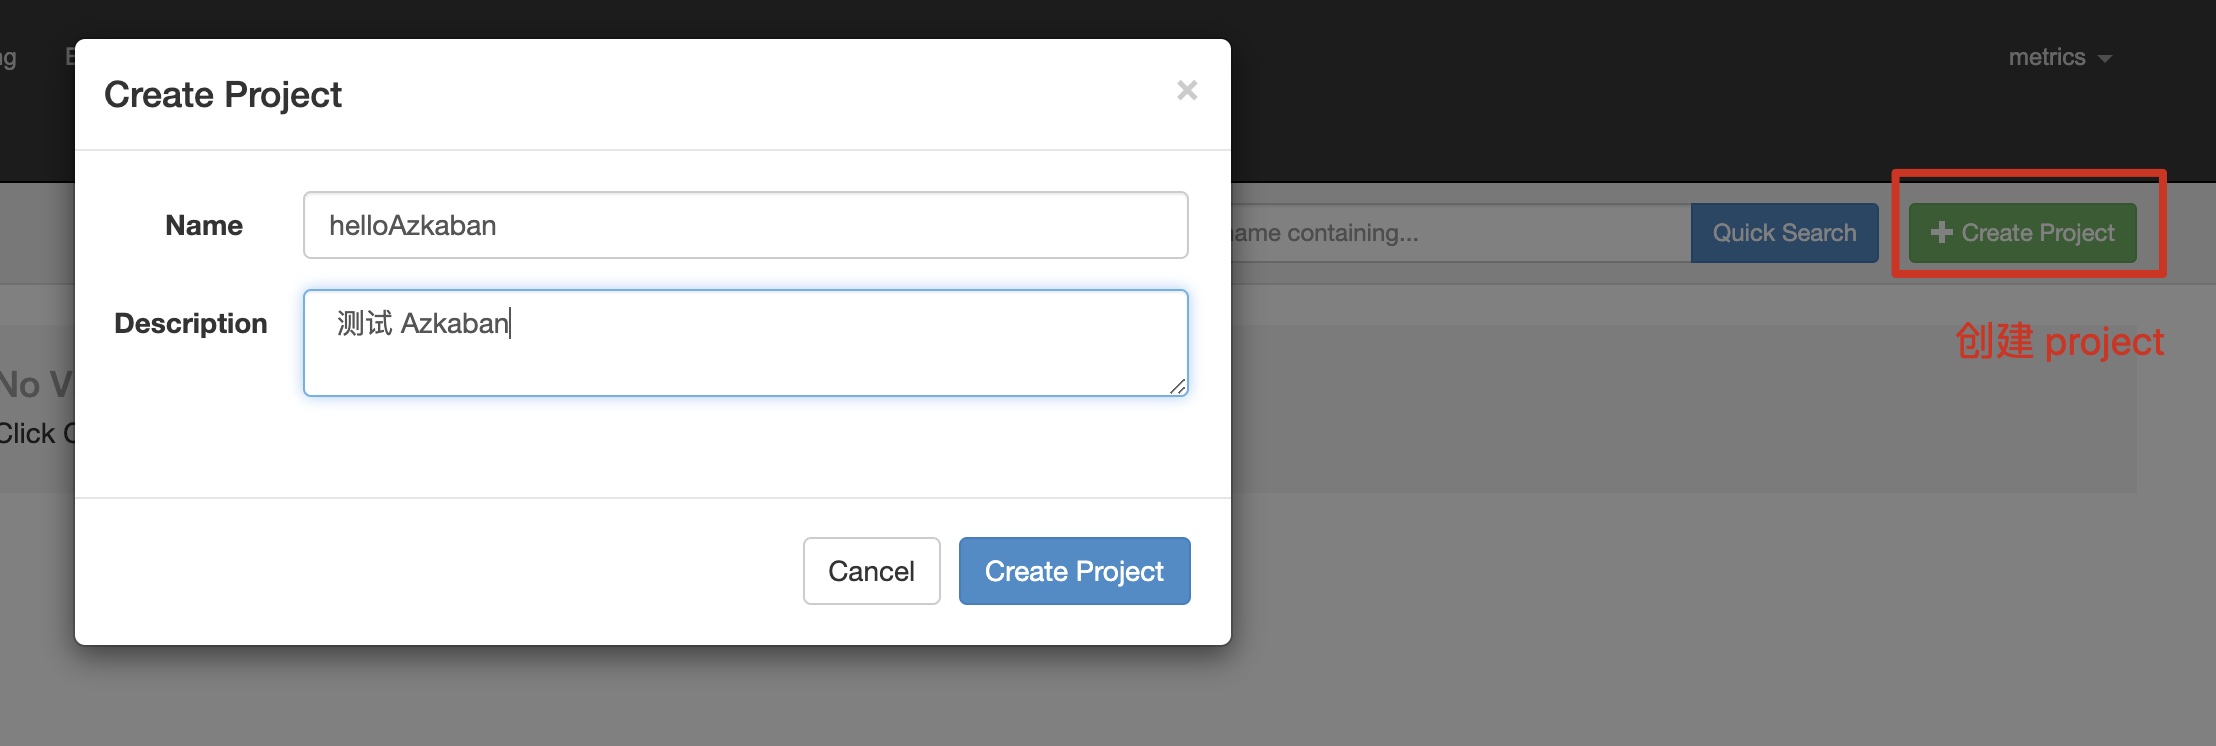
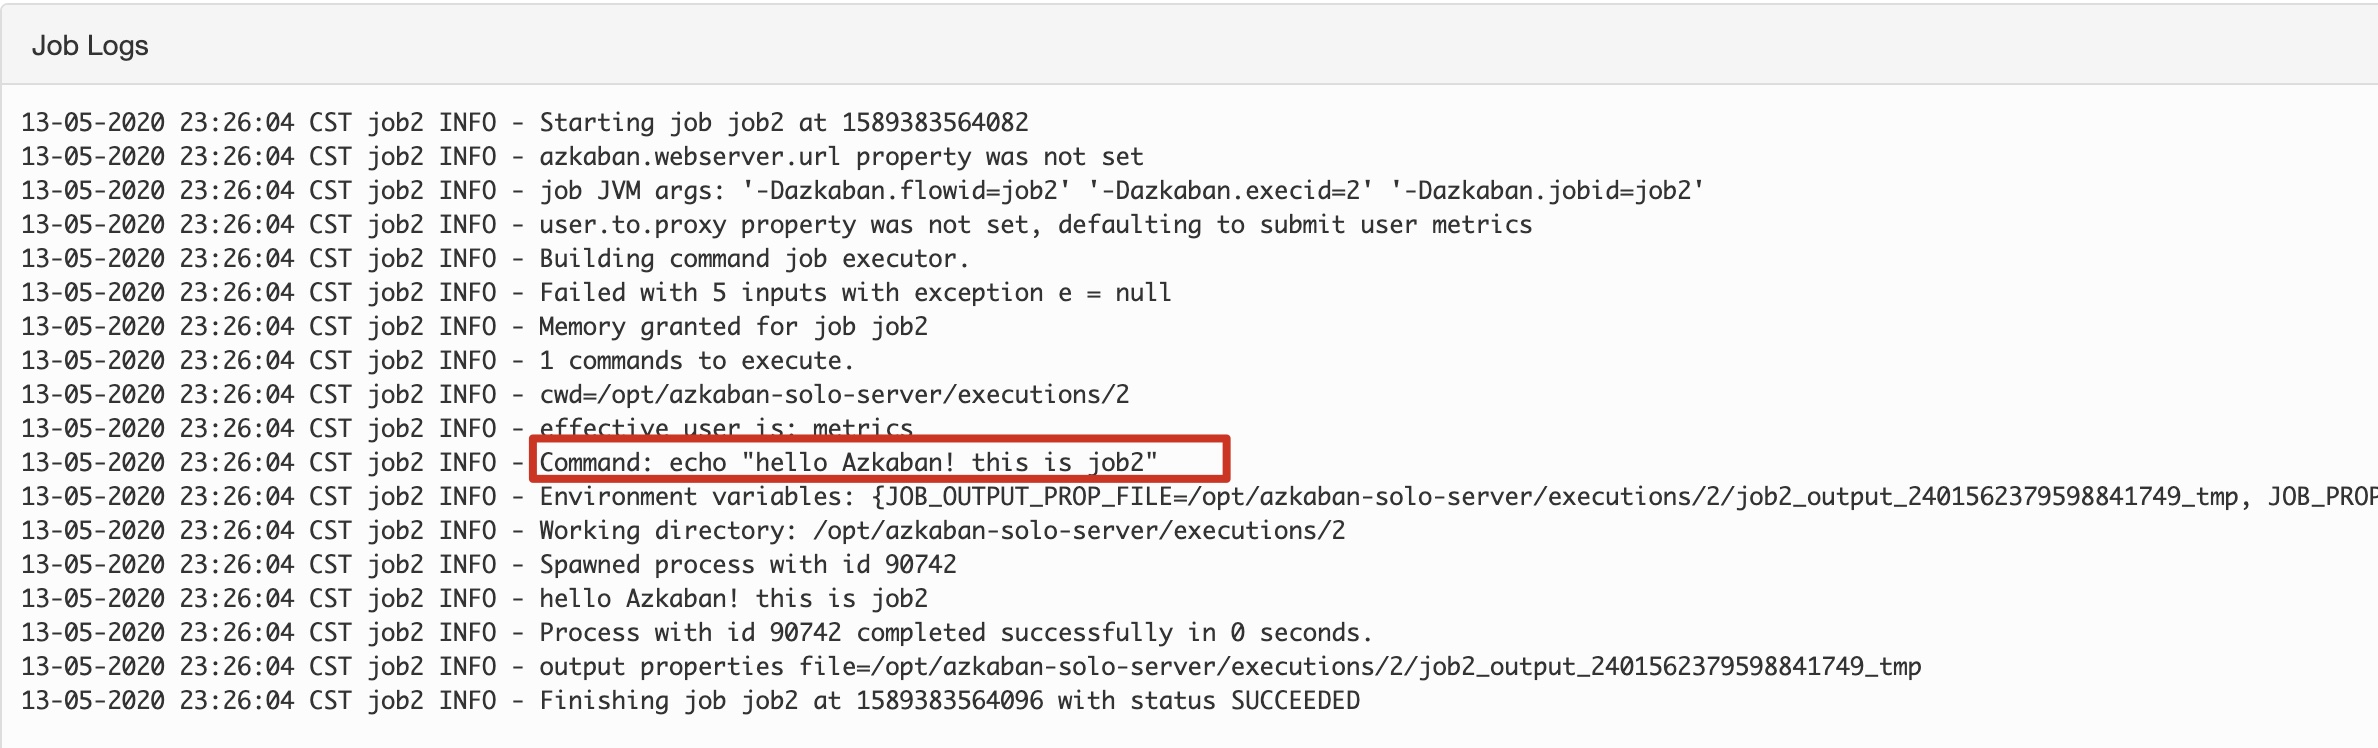
3.5 测试任务
- 创建job
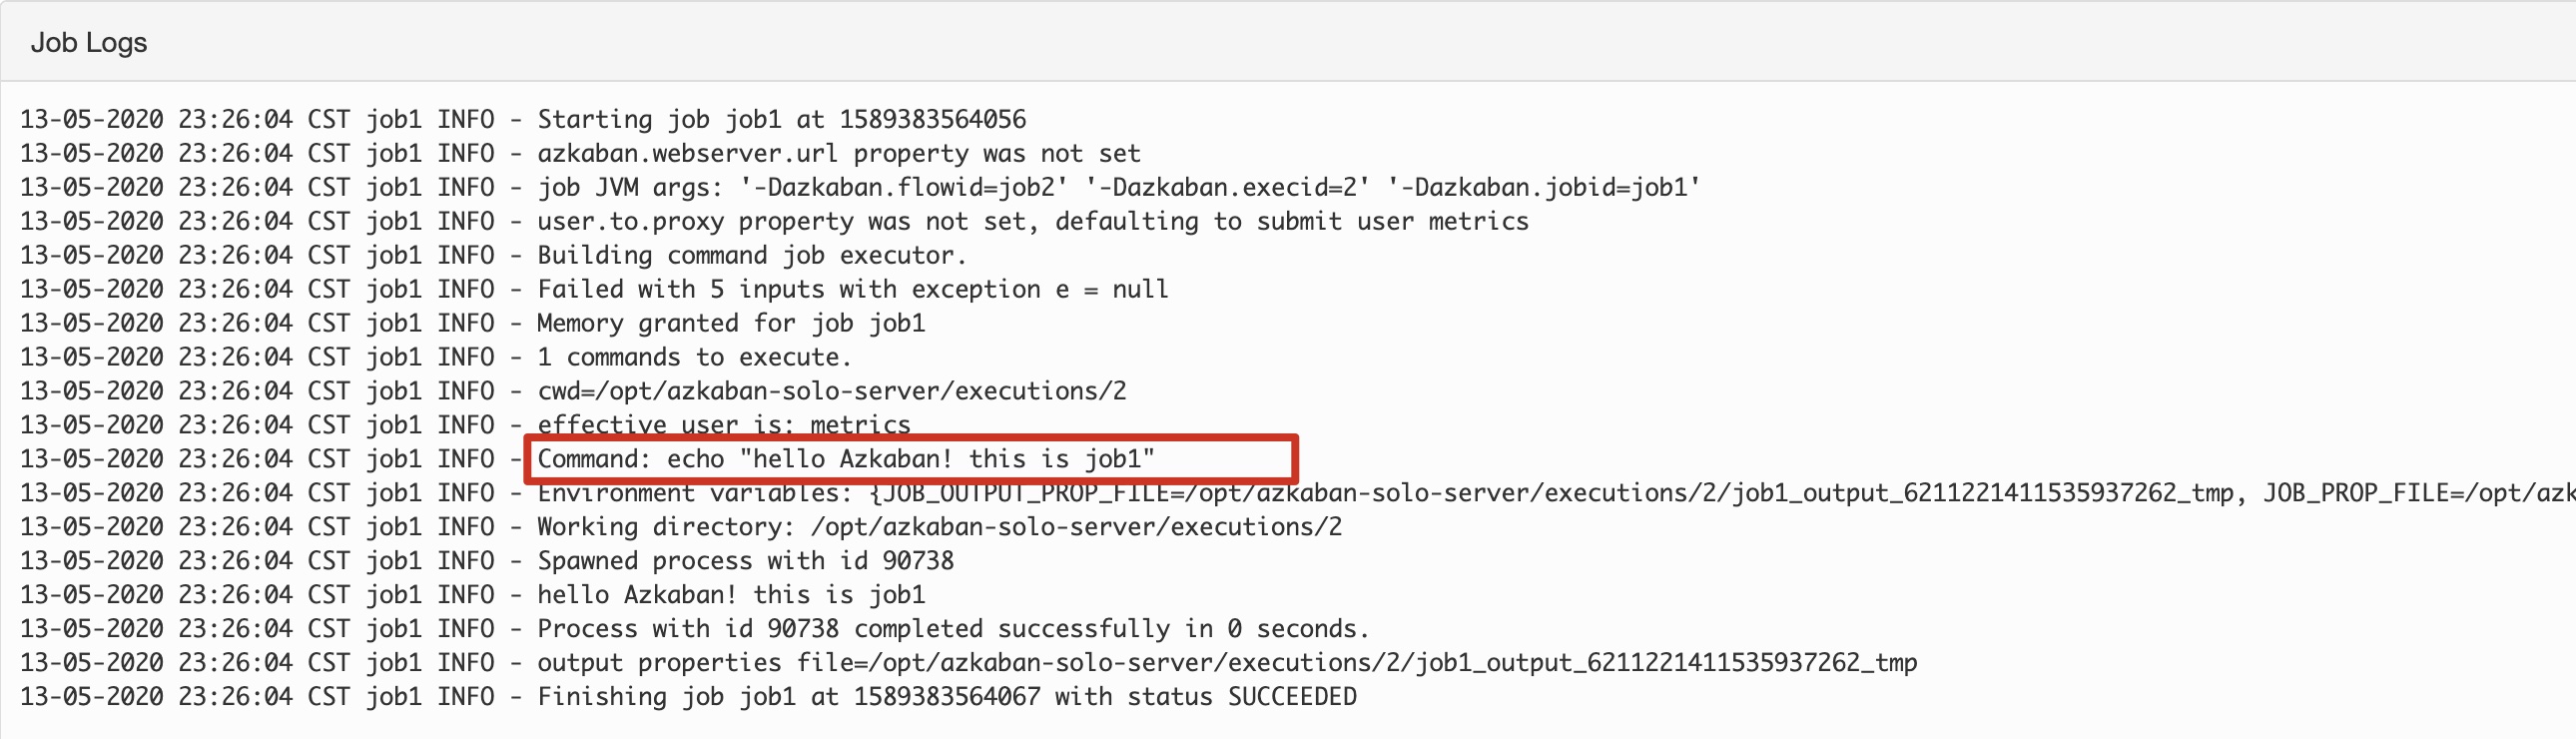
job1.job
type=command
command=echo "hello Azkaban! this is job1"
job2.job
type=command
command=echo "hello Azkaban! this is job2"
dependencies=job1
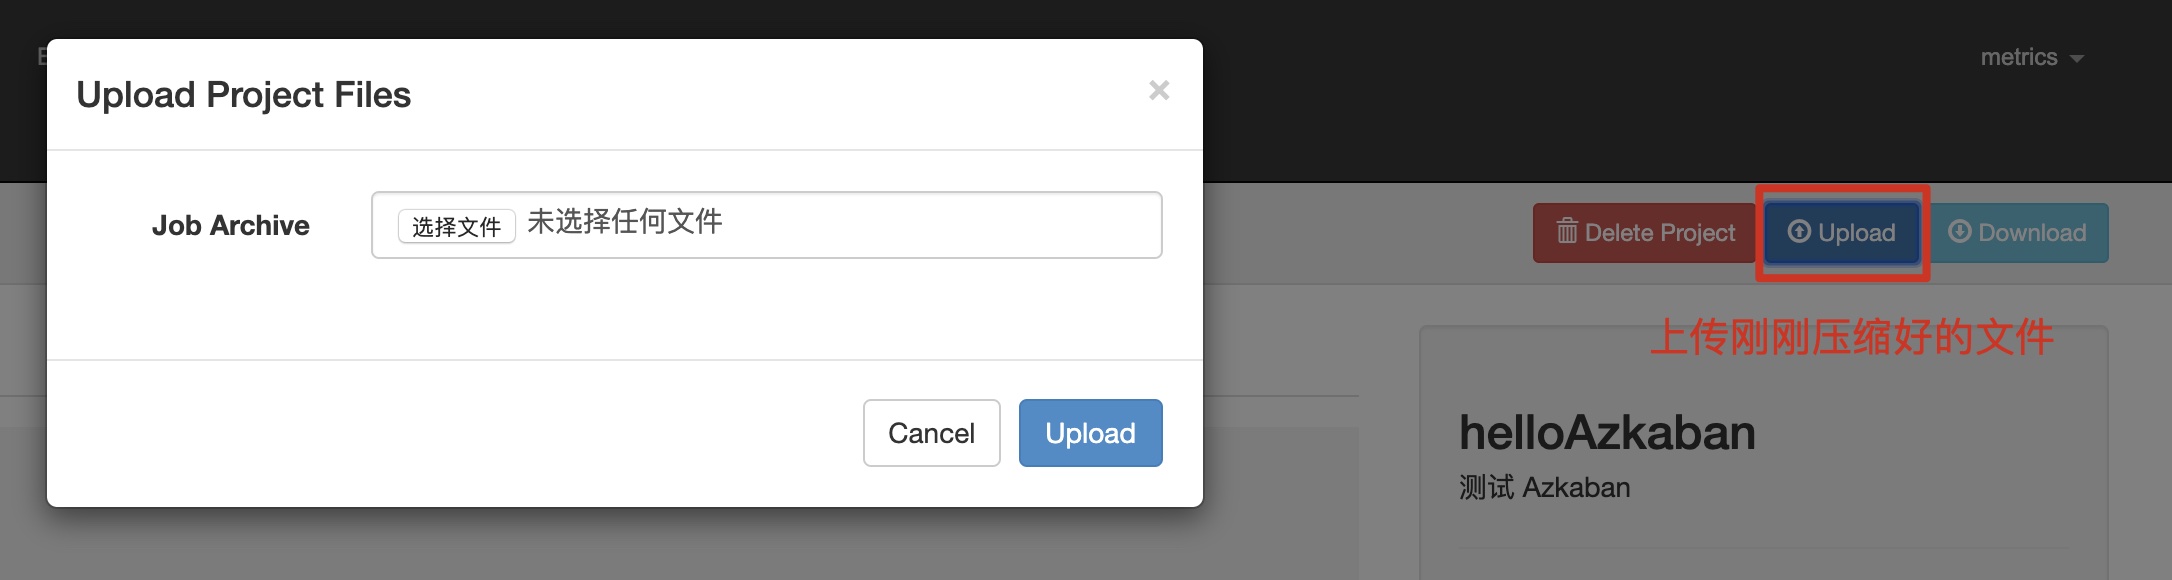
# 将上面两个 job 文件压缩到一个压缩包下


4. two-server模式
4.1 解压web‐server和exec‐server
- 复制 exec-server 到 /opt
[root@hnode1 opt]# cd /opt/azkaban-3.85.1/azkaban-exec-server/build/distributions
[root@hnode1 distributions]#
[root@hnode1 distributions]# ll
总用量 31720
-rw-r--r-- 1 root root 16235672 5月  13 20:35 azkaban-exec-server-0.1.0-SNAPSHOT.tar.gz
-rw-r--r-- 1 root root 16242377 5月  13 20:35 azkaban-exec-server-0.1.0-SNAPSHOT.zip
[root@hnode1 distributions]#
[root@hnode1 distributions]# cp azkaban-exec-server-0.1.0-SNAPSHOT.tar.gz /opt/
- 复制 web-server 到 /opt
[root@hnode1 distributions]# cd /opt/azkaban-3.85.1/azkaban-web-server/build/distributions
[root@hnode1 distributions]#
[root@hnode1 distributions]# ll
总用量 39768
-rw-r--r-- 1 root root 20295993 5月  13 19:10 azkaban-web-server-0.1.0-SNAPSHOT.tar.gz
-rw-r--r-- 1 root root 20422305 5月  13 19:10 azkaban-web-server-0.1.0-SNAPSHOT.zip
[root@hnode1 distributions]# cp azkaban-web-server-0.1.0-SNAPSHOT.tar.gz /opt/
4.2 配置MySQL
脚本地址:/opt/azkaban-3.85.1/azkaban-db/build/install/azkaban-db/create-all-sql-0.1.0-SNAPSHOT.sql
[root@hnode1 azkaban-db]# mysql -uroot -p
Enter password:

# 创建数据库
mysql> CREATE DATABASE azkaban;
Query OK, 1 row affected (0.01 sec)


mysql> use azkaban;
Database changed

# 新建用户
mysql> CREATE USER 'azkaban'@'%' IDENTIFIED BY 'azkaban';
# MySQL5.6.6版本之后增加了密码强度验证,密码过于简单则不会通过
ERROR 1819 (HY000): Your password does not satisfy the current policy requirements

# 新建用户
mysql> CREATE USER 'azkaban'@'%' IDENTIFIED BY 'Azkaban99!';
Query OK, 0 rows affected (0.02 sec)

# 给用户授权
mysql>GRANT SELECT,INSERT,UPDATE,DELETE ON azkaban.* to 'azkaban'@'%' WITH GRANT OPTION;
Query OK, 0 rows affected (0.01 sec)

mysql> show tables;
Empty set (0.00 sec)

# 执行建表脚本
mysql> source /opt/azkaban-3.85.1/azkaban-db/build/install/azkaban-db/create-all-sql-0.1.0-SNAPSHOT.sql;
Query OK, 0 rows affected (0.07 sec)
...

mysql> show tables;
+------------------------------+
| Tables_in_azkaban            |
+------------------------------+
| QRTZ_BLOB_TRIGGERS           |
| QRTZ_CALENDARS               |
| QRTZ_CRON_TRIGGERS           |
| QRTZ_FIRED_TRIGGERS          |
| QRTZ_JOB_DETAILS             |
| QRTZ_LOCKS                   |
| QRTZ_PAUSED_TRIGGER_GRPS     |
| QRTZ_SCHEDULER_STATE         |
| QRTZ_SIMPLE_TRIGGERS         |
| QRTZ_SIMPROP_TRIGGERS        |
| QRTZ_TRIGGERS                |
| active_executing_flows       |
| active_sla                   |
| execution_dependencies       |
| execution_flows              |
| execution_jobs               |
| execution_logs               |
| executor_events              |
| executors                    |
| project_events               |
| project_files                |
| project_flow_files           |
| project_flows                |
| project_permissions          |
| project_properties           |
| project_versions             |
| projects                     |
| properties                   |
| ramp                         |
| ramp_dependency              |
| ramp_exceptional_flow_items  |
| ramp_exceptional_job_items   |
| ramp_items                   |
| triggers                     |
| validated_dependencies       |
+------------------------------+
35 rows in set (0.00 sec)
4.3 配置web‐server
# 解压 web server
tar -zxvf azkaban-web-server-0.1.0-SNAPSHOT.tar.gz
mv azkaban-web-server-0.1.0-SNAPSHOT azkaban-web-server
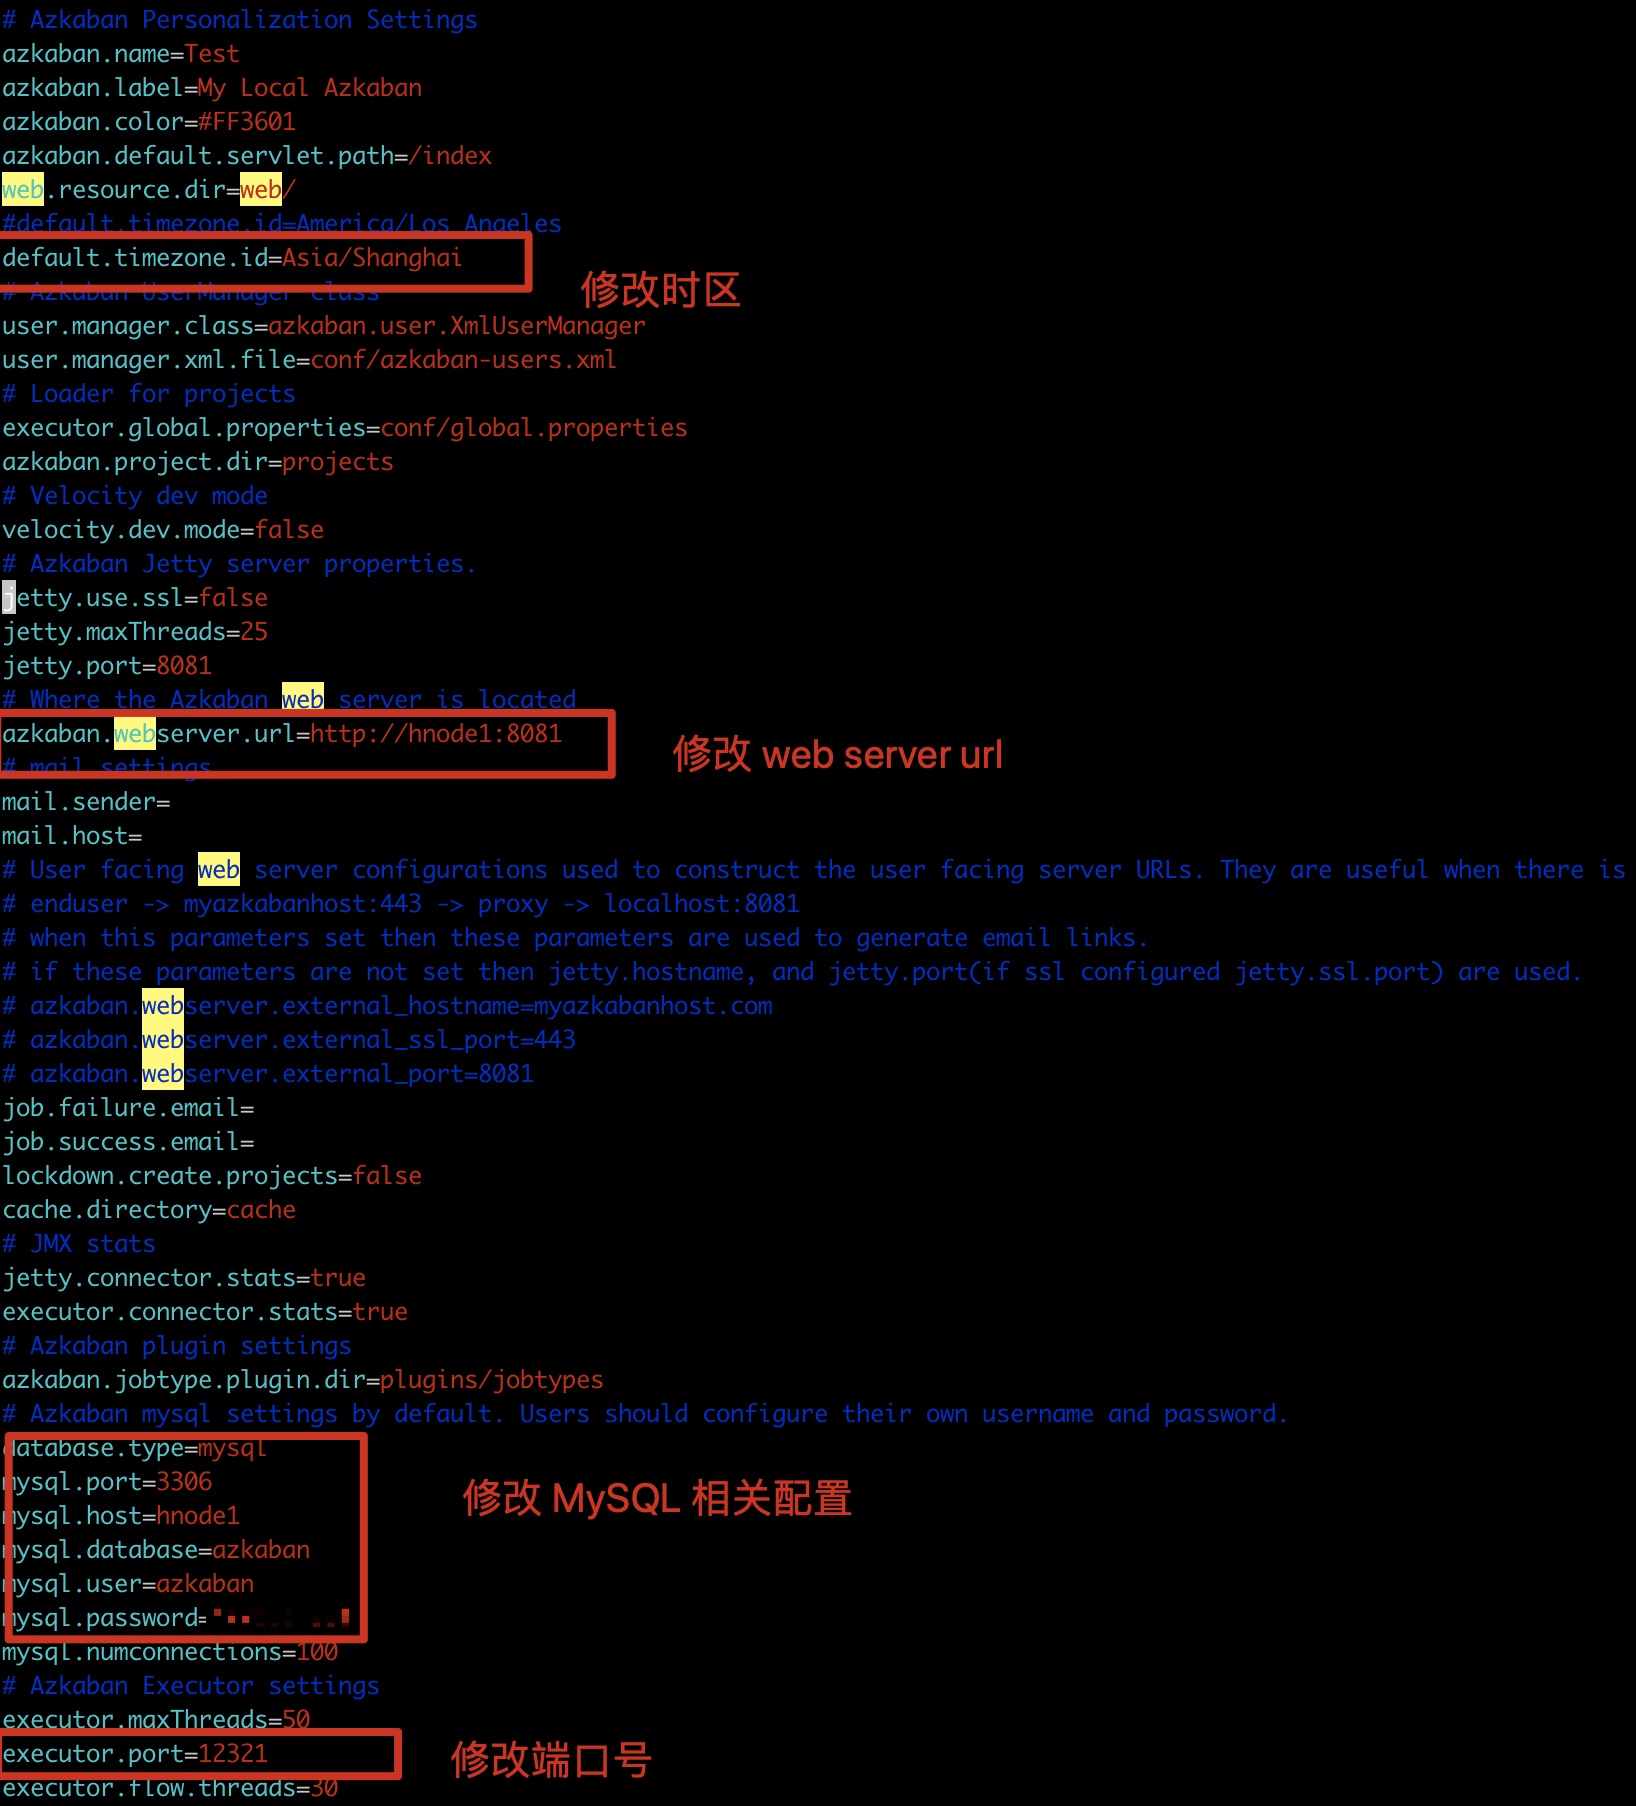
#接下来修改azkaban.properties 配置
vim azkaban-web-server/conf/azkaban.properties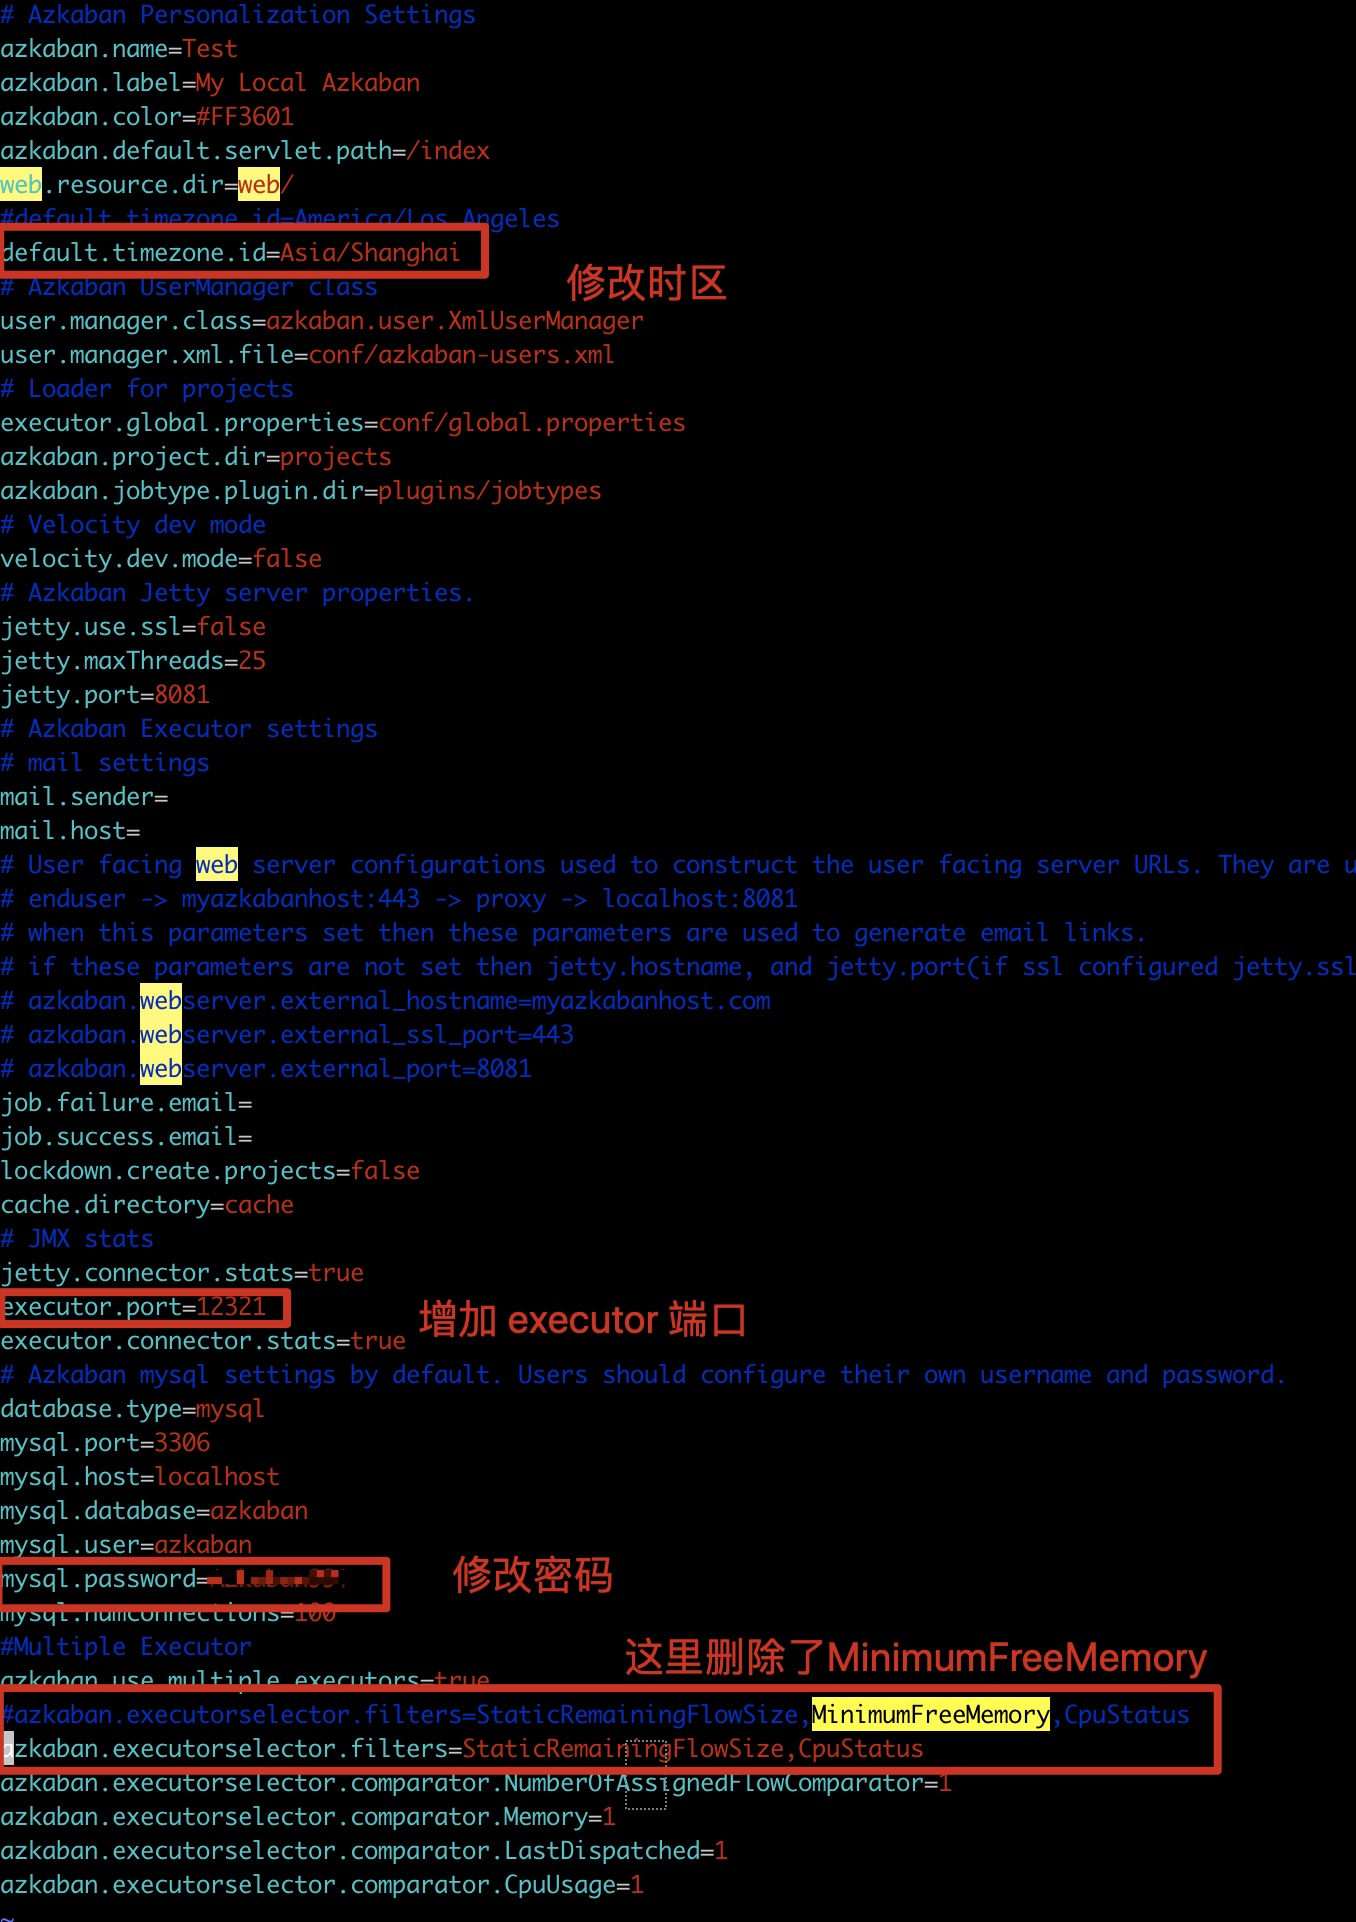
4.4 配置exec‐server
# 解压 exec server


tar -zxvf zkaban-exec-server-0.1.0-SNAPSHOT.tar.gz
mv zkaban-exec-server-0.1.0-SNAPSHOT zkaban-exec-server

#接下来修改azkaban.properties 配置
vim zkaban-exec-server/conf/azkaban.properties
4.5 启动 Azkaban
- 启动 exec server
必须先启动 exec server 否则启动 webserver 会报找不到exec server 而启动失败
[root@hnode1 azkaban-exec-server]# pwd
/opt/azkaban-exec-server
[root@hnode1 azkaban-exec-server]# bin/start-exec.sh

# 启动之后查看MySQL 中的数据

mysql> select * from executors;
+----+--------+-------+--------+
| id | host   | port  | active |
+----+--------+-------+--------+
| 14 | hnode1 | 12321 |      0 |
+----+--------+-------+--------+
1 row in set (0.00 sec)

# 需要把 active 从 0 改成 1 每次重启时都需要修改

mysql> update executors set active=1;
Query OK, 1 row affected (0.00 sec)
Rows matched: 1  Changed: 1  Warnings: 0

mysql>
mysql> select * from executors;
+----+--------+-------+--------+
| id | host   | port  | active |
+----+--------+-------+--------+
| 14 | hnode1 | 12321 |      1 |
+----+--------+-------+--------+
1 row in set (0.00 sec)
- 启动 web server
[root@hnode1 azkaban-web-server]# pwd
/opt/azkaban-web-server
[root@hnode1 azkaban-web-server]# bin/start-web.sh
[root@hnode1 azkaban-web-server]# jps
52960 Jps
43015 AzkabanWebServer
42846 AzkabanExecutorServer
打开 Azkaban web UI : http://hnode1:8081
接下来验证 Azkaban 参照 前面 3.5 的测试方法
4.6 问题解决
4.6.1 No active executor found
修改数据库executors表中的active字段为1
4.6.2 Velocity could not be initialized!
如果在登录页面时 500 并提示 Velocity could not be initialized! 那就删除 ./plugins/tirggers 文件夹。
因为Azkaban 需要在 ./plugins 的文件夹下自动生成一个 triggers 的目录,否则启动日志会报错。
删除后重启 登录 webUI 正常显示
4.6.3 Unable to get scheduled flow triggers
2020/05/14 05:45:16.398 +0800 ERROR [FlowTriggerScheduler]
     [255454196@qtp-279566689-6] [Azkaban] Unable to get scheduled flow triggers
java.lang.NullPointerException
        ...
解决办法:删掉executor选择器的过滤条件:MinimumFreeMemory
[root@hnode1 azkaban-web-server]# pwd
/opt/azkaban-web-server
vim azkaban-web-server/conf/azkaban.properties
#azkaban.executorselector.filters=StaticRemainingFlowSize,MinimumFreeMemory,CpuStatus
azkaban.executorselector.filters=StaticRemainingFlowSize,CpuStatus
4.6.4 executor became inactive before
Executor 需要通过官方提供的 rest 接口来手动激活。为什么不在 Executor 启动时自动激活呢….官方 issue110 解释如下:
We don’t update prior to web-server start.
Let me introduce how we do a regular Executor deployment. Both old webserver and old executor(3.a) are up initially, and old executor is running jobs (we can not interrupt it). Executor Deployment starts:
install new Executor (3.b) on our box without activating.
Run job tests, which targets 3.b and make sure 3.b is working.
Activate 3.b, and deactivate 3.a. Even though 3.a is deactivated, jobs still keep runnig there.
eployment completes.
We would better run tests against new executor before activating it. Is it a bit clear now?
解决办法:
curl http://${executorHost}:${executorPort}/executor?action=activate
如:curl http://hnode1:12321/executor?action=activate
4.6.5 Free memory amount minus Xmx (2802856 - 0 kb) is less than low mem …
Azkaban 启动任务后一直处于Runnning状态,出现错误如下:
Free memory amount minus Xmx (2802856 - 0 kb) is less than low mem threshold (3145728 kb), memory request declined
原因:Azkaban要求必须有3GB的空闲内存才会执行任务
解决方案:
方案1:内存扩容
方案2:取消Azkaban的内存检查
# 在 exec server 下进行修改配置
[root@hnode1 azkaban-exec-server]# pwd
/opt/azkaban-exec-server
#编辑配置文件
[root@hnode1 azkaban-exec-server]# vim plugins/jobtypes/commonprivate.properties
#增加
memCheck.enabled=false
# 添加配置后需要重启服务
5. 分布式模式部署
5.1 节点规划
| 节点 | 服务 |
|---|---|
| hnode1 | web server、MySQL |
| hnode2 | exec server |
| hnode3 | exec server |
5.2 exec-server 配置
只需要将 前面配置的 exec server 拷贝到计划节点即可
scp -r azkaban-exec-server root@hnode2:/opt
scp -r azkaban-exec-server root@hnode3:/opt
5.3 启动服务
# 1. 启动 hnode2 上的 exec server
[root@hnode2 azkaban-exec-server]# bin/start-exec.sh
[root@hnode2 azkaban-exec-server]#

# 2. 启动 hnode3 上的 exec server
[root@hnode3 azkaban-exec-server]# bin/start-exec.sh
[root@hnode3 azkaban-exec-server]#

# 3. 在 MySQL 中更新 execotor 状态
mysql> select * from executors;
+----+--------+-------+--------+
| id | host   | port  | active |
+----+--------+-------+--------+
| 15 | hnode2 | 12321 |      0 |
| 16 | hnode3 | 12321 |      0 |
+----+--------+-------+--------+
2 rows in set (0.00 sec)


mysql>
mysql> update executors set active=1; # 更新状态为 1
Query OK, 2 rows affected (0.00 sec)
Rows matched: 2  Changed: 2  Warnings: 0

mysql>
mysql> select * from executors;
+----+--------+-------+--------+
| id | host   | port  | active |
+----+--------+-------+--------+
| 15 | hnode2 | 12321 |      1 |
| 16 | hnode3 | 12321 |      1 |
+----+--------+-------+--------+

# 4. 启动 web server
[root@hnode1 azkaban-web-server]# bin/start-web.sh
[root@hnode1 azkaban-web-server]#

# 5. 激活Execotur
[root@hnode1 azkaban-exec-server]# curl http://hnode2:12321/executor?action=activate
{"status":"success"}
[root@hnode1 azkaban-exec-server]# curl http://hnode3:12321/executor?action=activate
{"status":"success"}
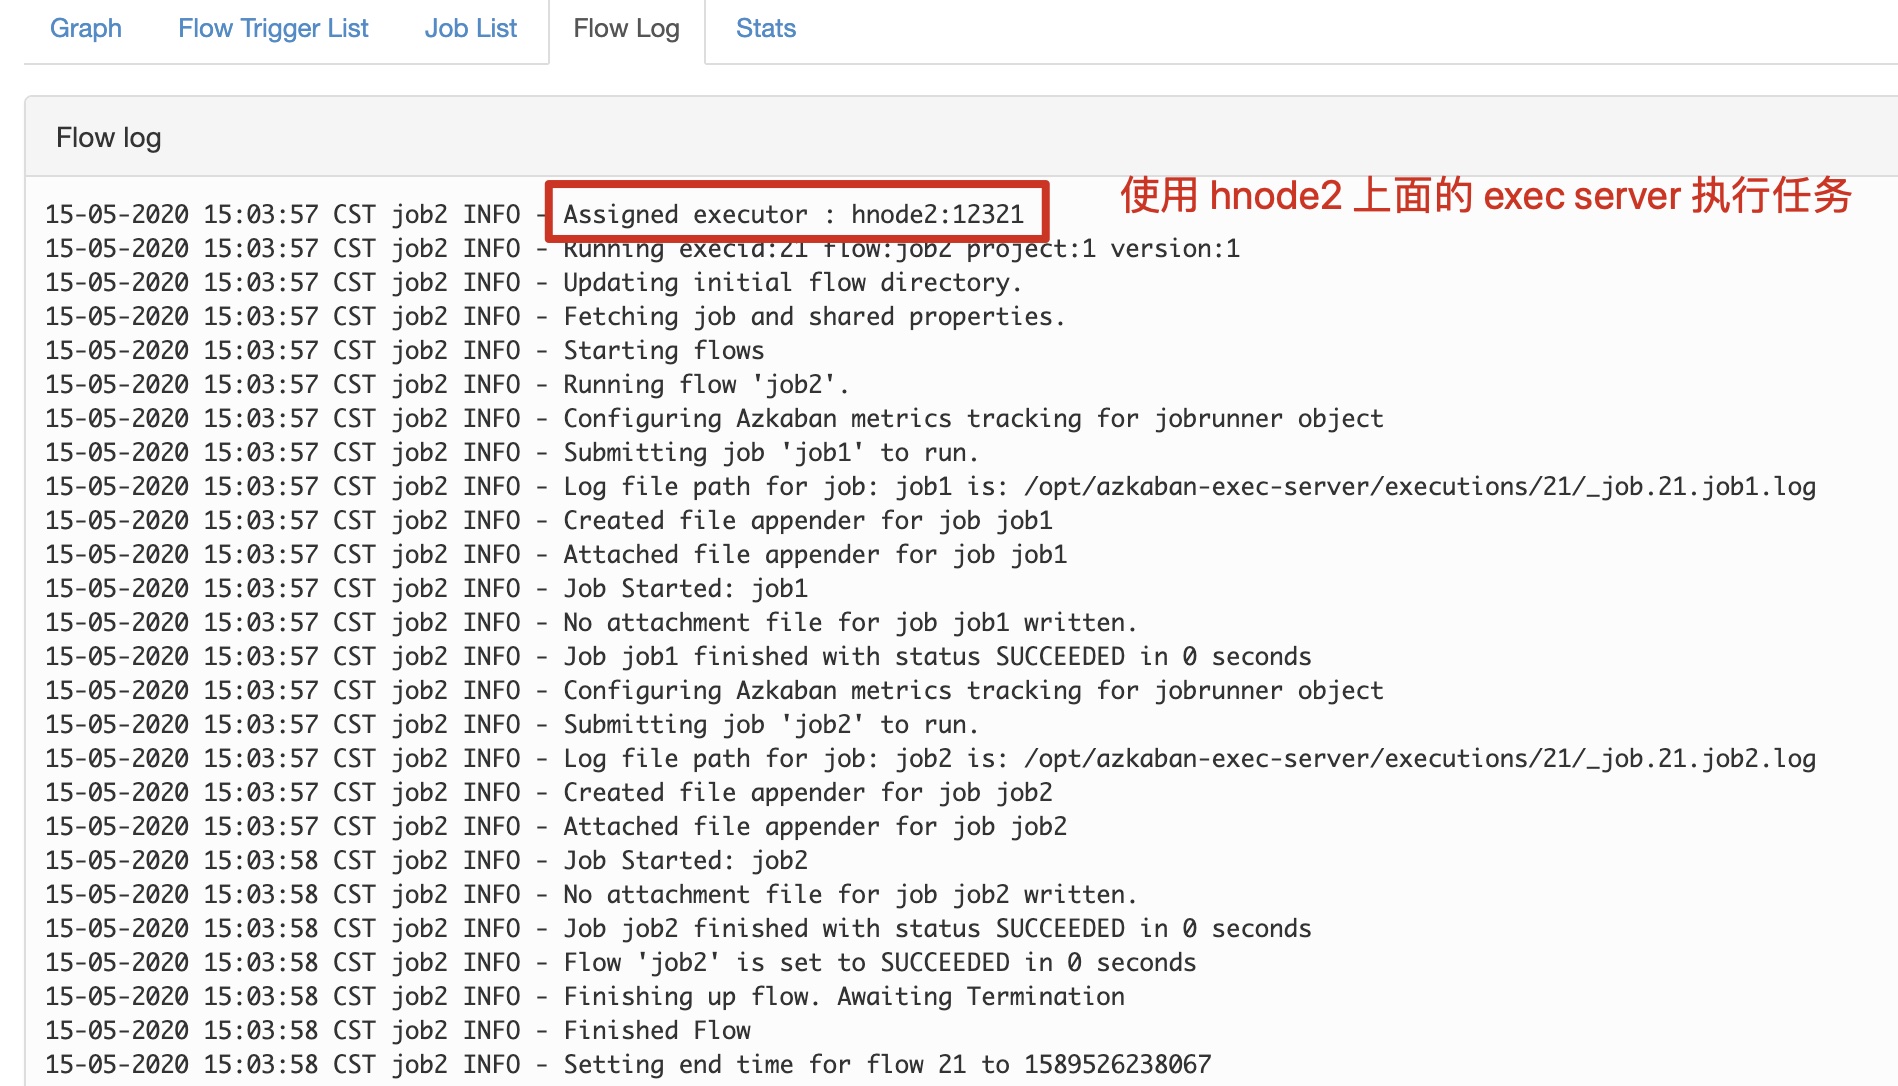
5.4 测试 Azkaban
按照前面测试的方式执行任务,并查看日志
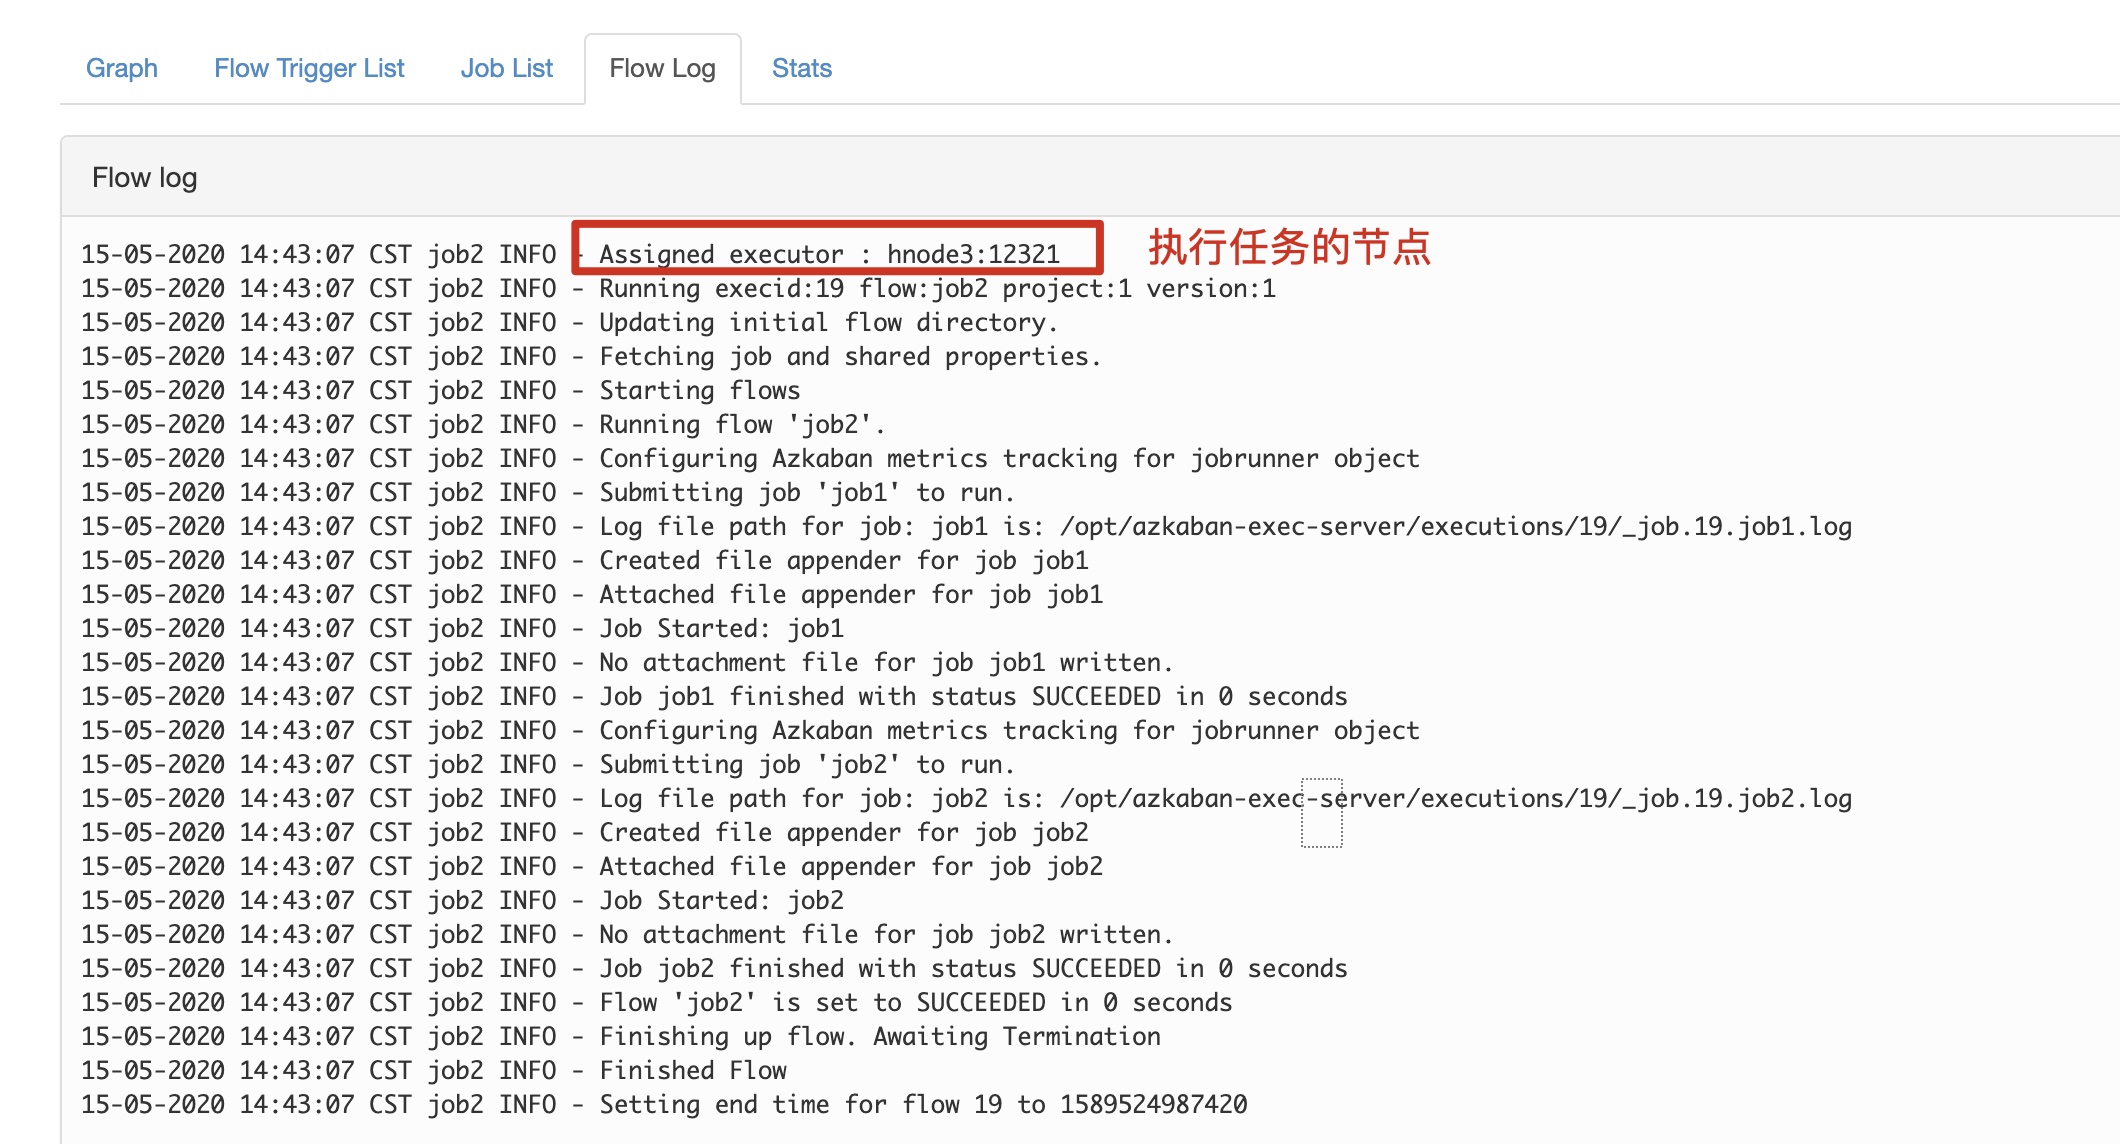
关闭 hnode3 上面的 exec server 再次执行任务
Azkaban WebServer挂掉,不影响已经提交的任务执行,主要是不能通过WebUI查看Job、管理Job、跟踪Job状态。因此,对于这个架构,主要是要解决MySQL HA和ExecutorServer HA。官方支持ExecutorServer HA,我们只需要配一个MySQL HA就行了。