1. 编译源码
1
2
3
4
5
6
7
8
9
10
11
12
13
14
15
16
17
18
wget https://codeload.github.com/azkaban/azkaban/tar.gz/3.85.1 [root@hnode1 opt]# wget https://codeload.github.com/azkaban/azkaban/tar.gz/3.85.1 --2020-04-28 18:07:00-- https://codeload.github.com/azkaban/azkaban/tar.gz/3.85.1 ... 2020-04-28 18:10:24 (92.4 KB/s) - “3.85.1” 已保存 [19297212] [root@hnode1 opt]# ll 总用量 18852 -rw-r--r-- 1 root root 19297212 4月 28 18:10 3.85.1 [root@hnode1 opt]# mv 3.85.1 azkaban-3.85.1.tar.gz [root@hnode1 ~]# [root@hnode1 opt]# ll -rw-r--r-- 1 root root 19297212 4月 28 18:10 azkaban-3.85.1.tar.gz
1 2 3 4 5 6 7 8 9 10 11 12 tar -zxvf azkaban-3.85.1.tar.gz cd azkaban-3.85.1./gradlew build installDist -x test
因为打包时间较长,这里分享一个我打好的包,https://pan.baidu.com/s/1AoouSeFXtp0zLqwDXbgR1A 密码:37gc
1 2 3 4 5 6 7 8 9 10 11 12 13 14 15 16 17 18 19 20 21 22 23 [root@hnode1 distributions]# pwd /opt/azkaban-3.85.1/azkaban-web-server/build/distributions [root@hnode1 distributions]# ll 总用量 39768 -rw-r--r-- 1 root root 20295993 5月 13 19:10 azkaban-web-server-0.1.0-SNAPSHOT.tar.gz -rw-r--r-- 1 root root 20422305 5月 13 19:10 azkaban-web-server-0.1.0-SNAPSHOT.zip /opt/azkaban-3.85.1/azkaban-exec-server/build/distributions [root@hnode1 distributions]# ll 总用量 31720 -rw-r--r-- 1 root root 16235672 5月 13 20:35 azkaban-exec-server-0.1.0-SNAPSHOT.tar.gz -rw-r--r-- 1 root root 16242377 5月 13 20:35 azkaban-exec-server-0.1.0-SNAPSHOT.zip [root@hnode1 distributions]# pwd /opt/azkaban-3.85.1/azkaban-solo-server/build/distributions [root@hnode1 distributions]# ll 总用量 71188 -rw-r--r-- 1 root root 36371987 5月 13 20:38 azkaban-solo-server-0.1.0-SNAPSHOT.tar.gz -rw-r--r-- 1 root root 36522680 5月 13 20:38 azkaban-solo-server-0.1.0-SNAPSHOT.zip
2. Azkaban署模式介绍
solo-server模式
two-server模式
分布式multiple-executor模式
3. solo-server模式部署 3.1 解压 1 2 3 4 5 6 7 8 9 10 11 12 13 14 15 16 17 18 cp azkaban-solo-server-0.1.0-SNAPSHOT.tar.gz /opt/cd /opt/tar -zxvf azkaban-solo-server-0.1.0-SNAPSHOT.tar.gz mv azkaban-solo-server-0.1.0-SNAPSHOT azkaban-solo-server[root@hnode1 opt]# cd azkaban-solo-server [root@hnode1 azkaban-solo-server]# ll 总用量 16 drwxr-xr-x 3 root root 67 5月 13 20:38 bin drwxr-xr-x 2 root root 82 5月 13 20:38 conf drwxr-xr-x 2 root root 8192 5月 13 20:38 lib drwxr-xr-x 3 root root 22 5月 13 20:38 plugins drwxr-xr-x 2 root root 4096 5月 13 20:38 sql drwxr-xr-x 6 root root 73 5月 13 20:38 web
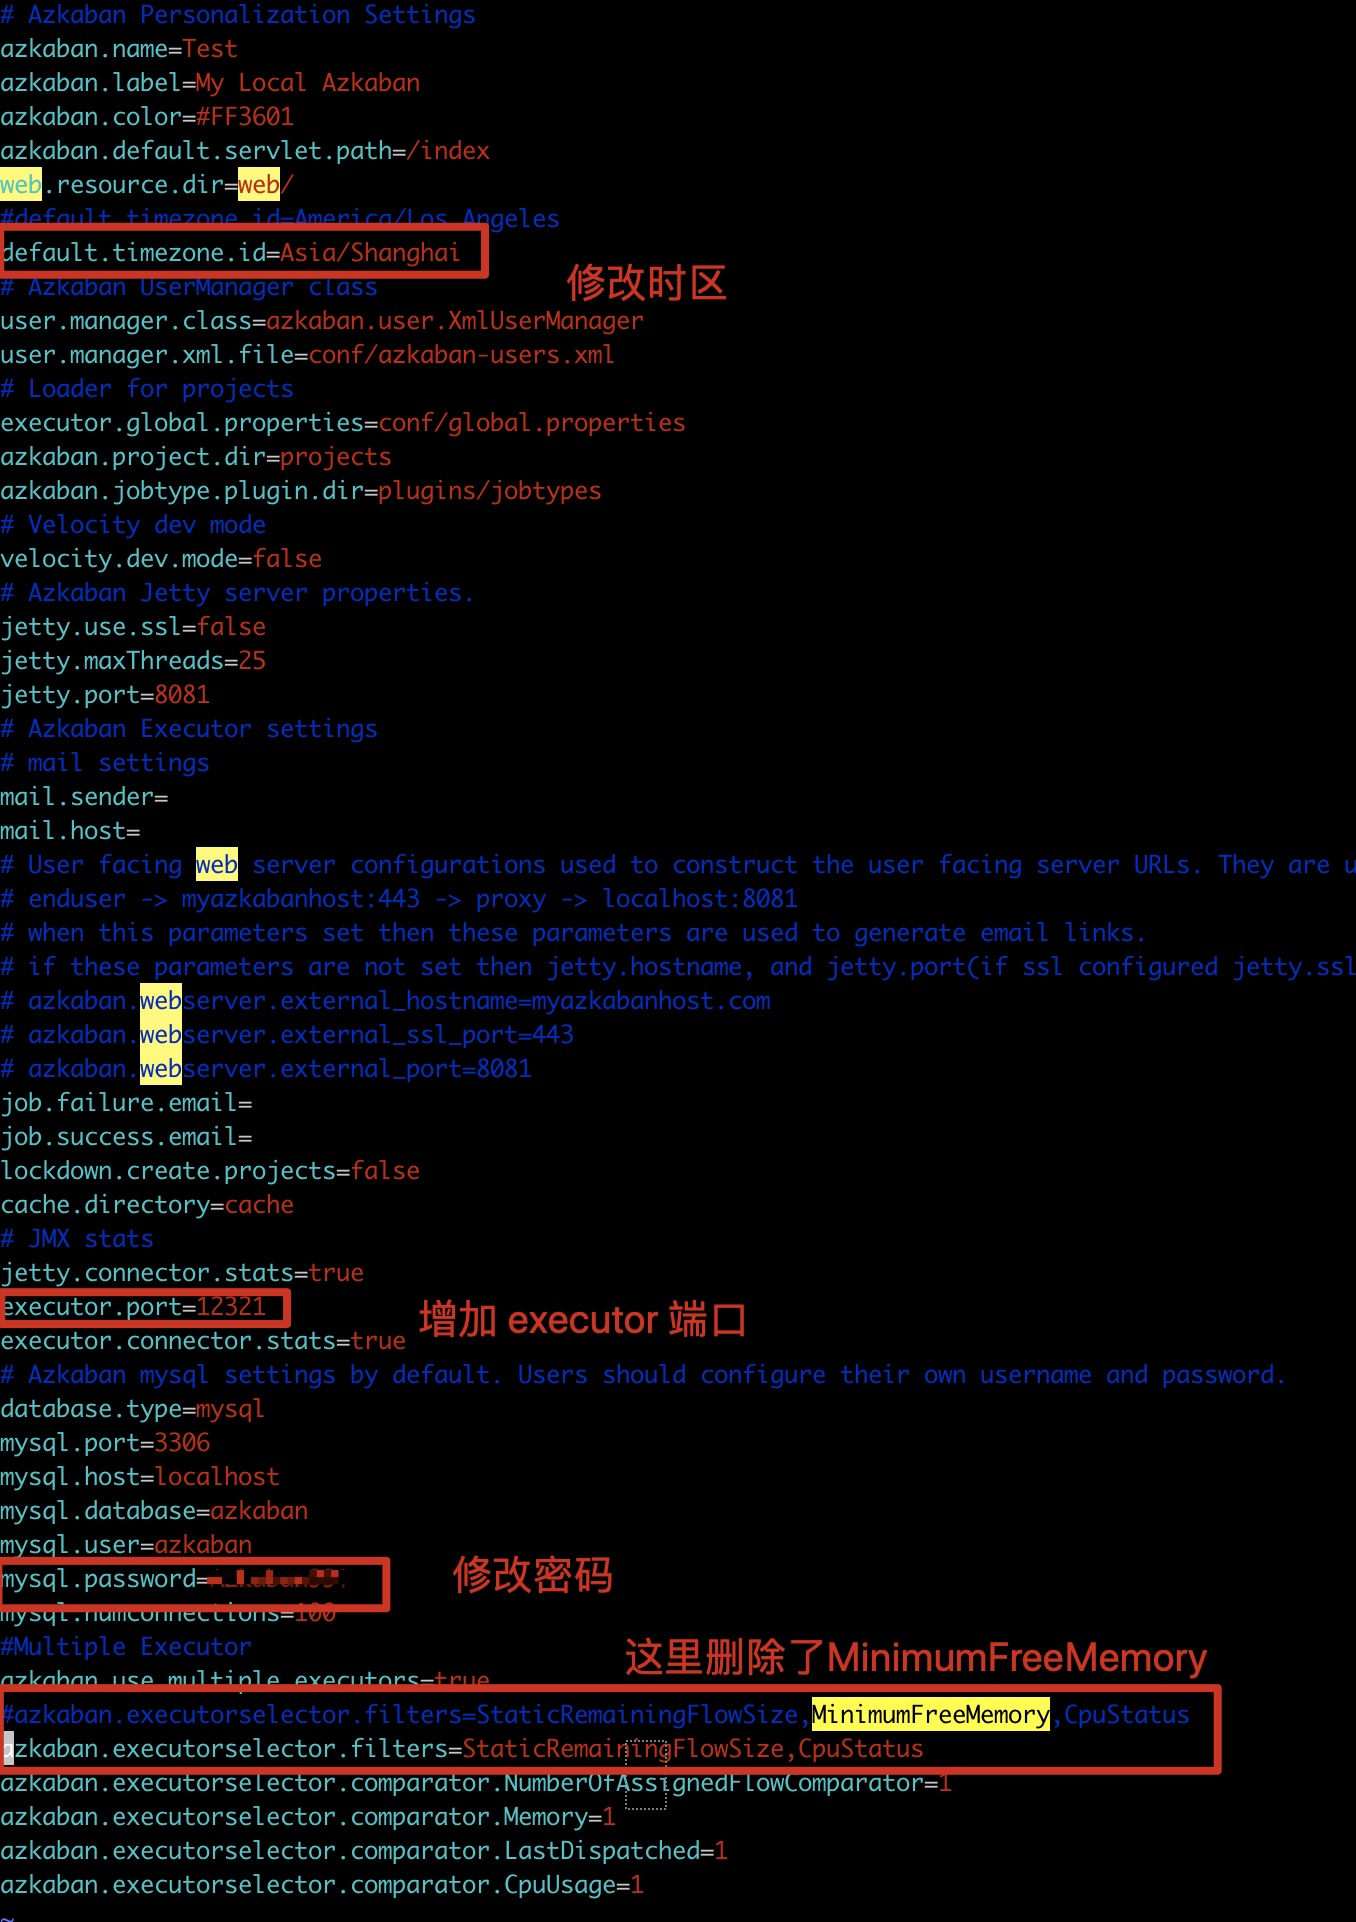
3.2 修改配置 1 2 3 [root@node1 ~]# vim conf/azkaban.properties default.timezone.id=Asia/Shanghai
3.3 启动 1 2 3 4 5 6 7 [root@hnode1 azkaban-solo-server]# bin/start-solo.sh [root@hnode1 azkaban-solo-server]# [root@hnode1 azkaban-solo-server]# [root@hnode1 azkaban-solo-server]# [root@hnode1 azkaban-solo-server]# jps 74416 Jps 74311 AzkabanSingleServer
3.4 验证启动是否成功 1 2 3 [root@node1 ~]# jps AzkabanSingleServer
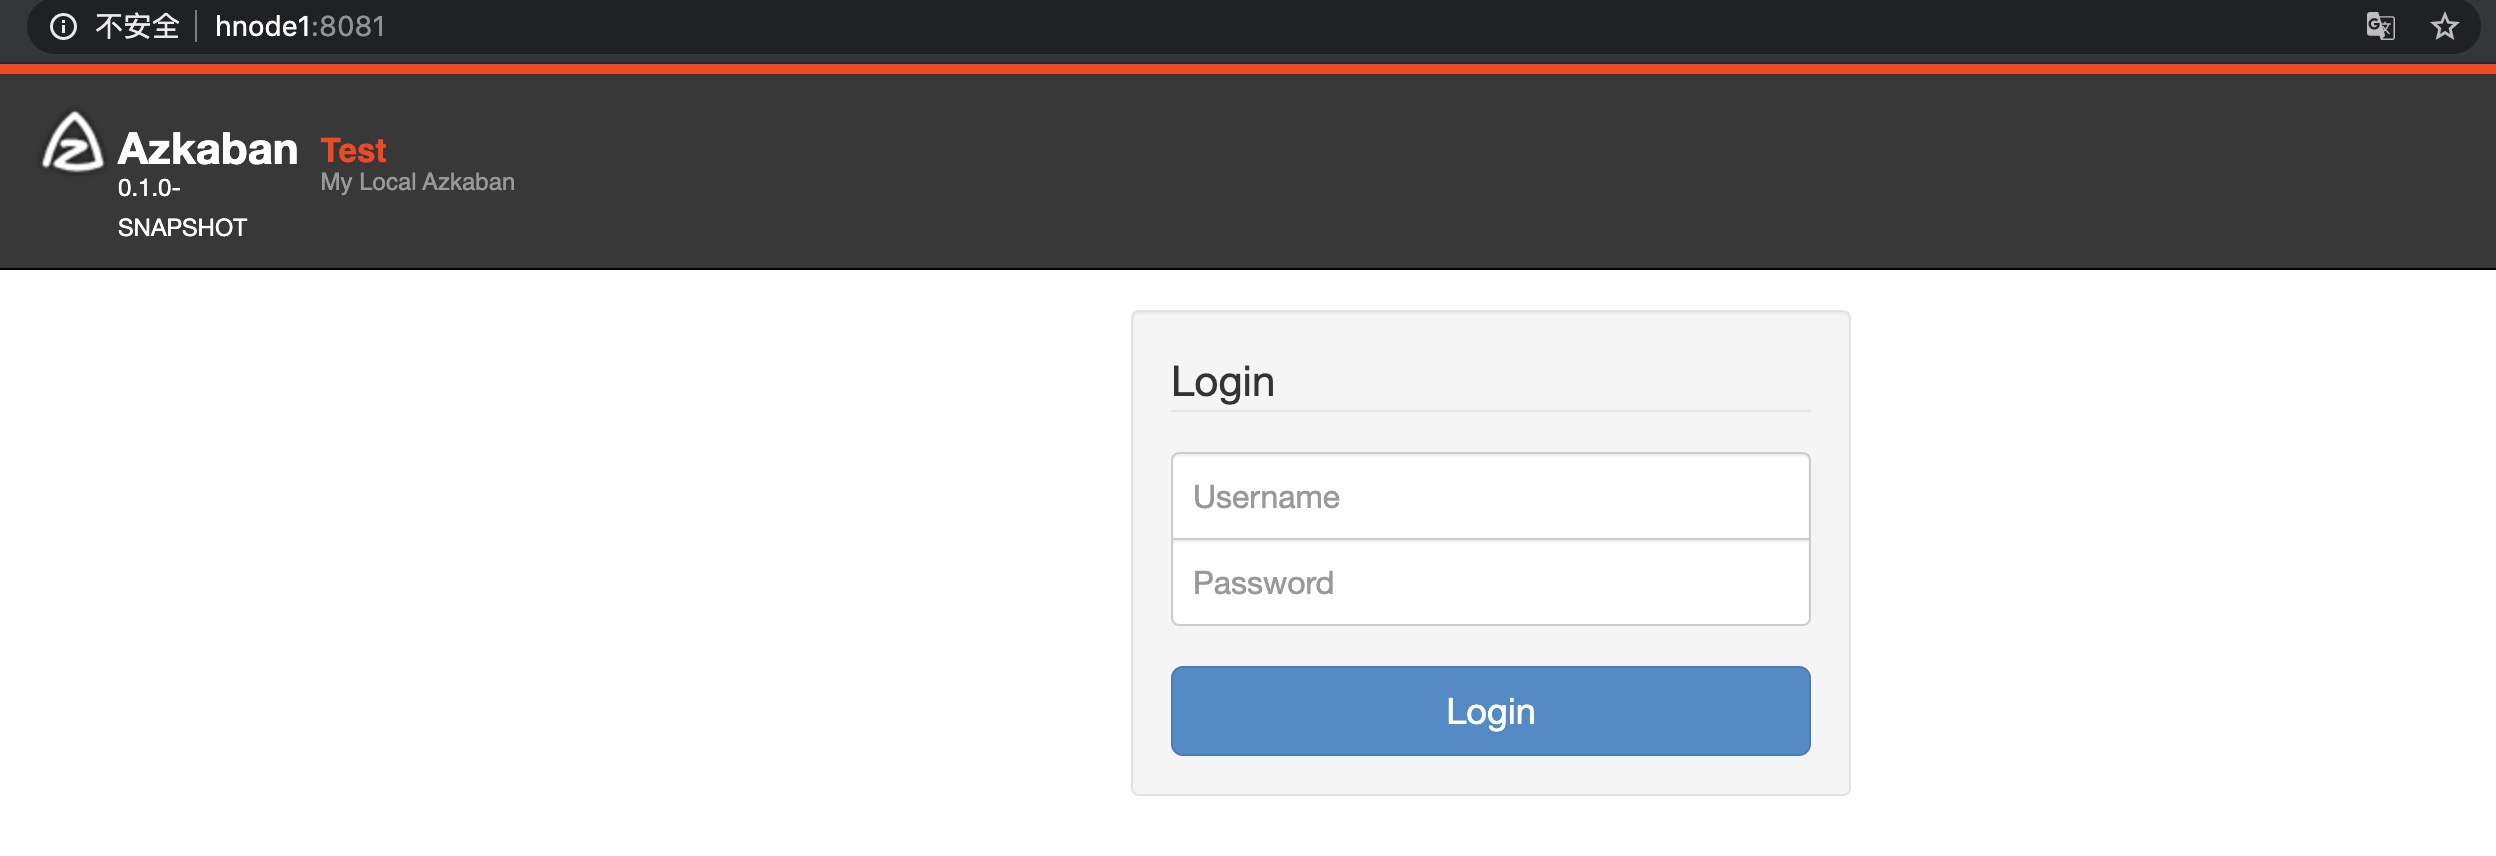
访问Web Server http://node1:8081
默认登录用户名与密码 azkaban/azkaban
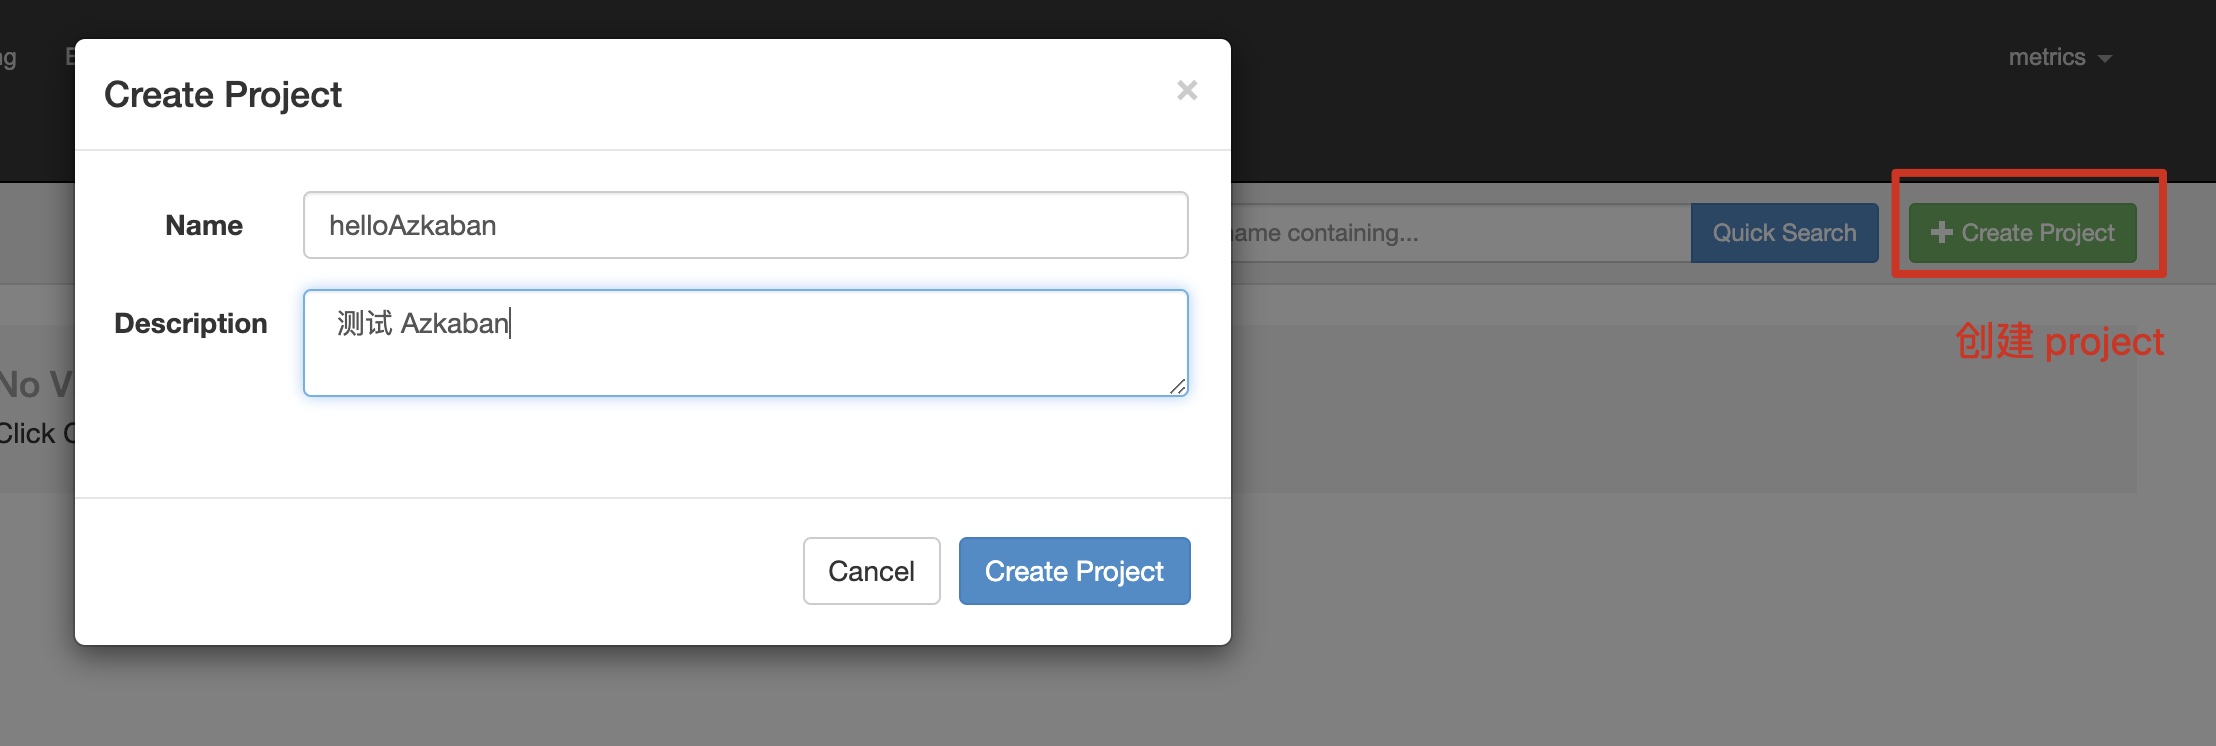
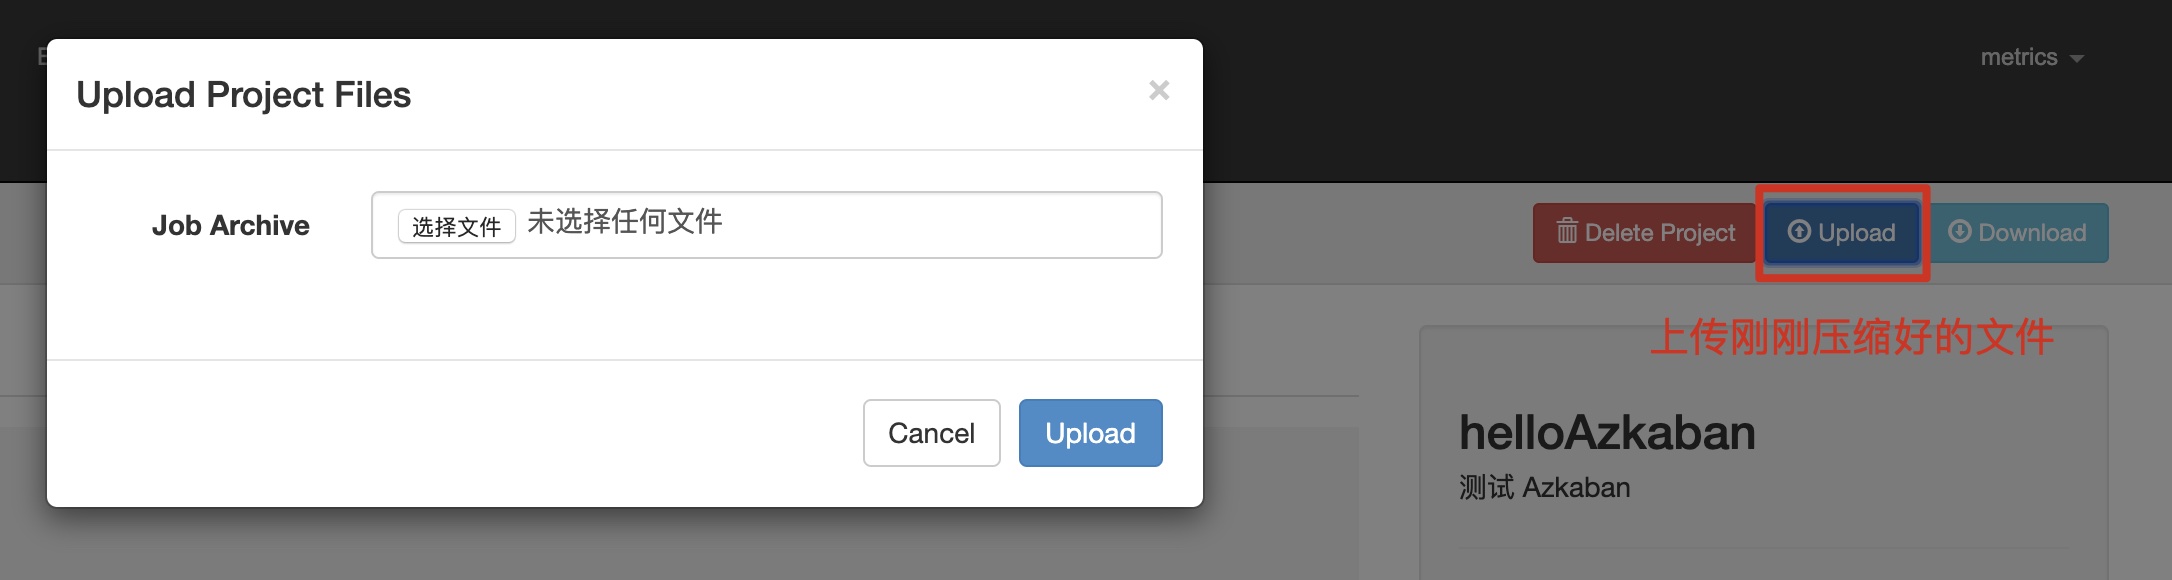
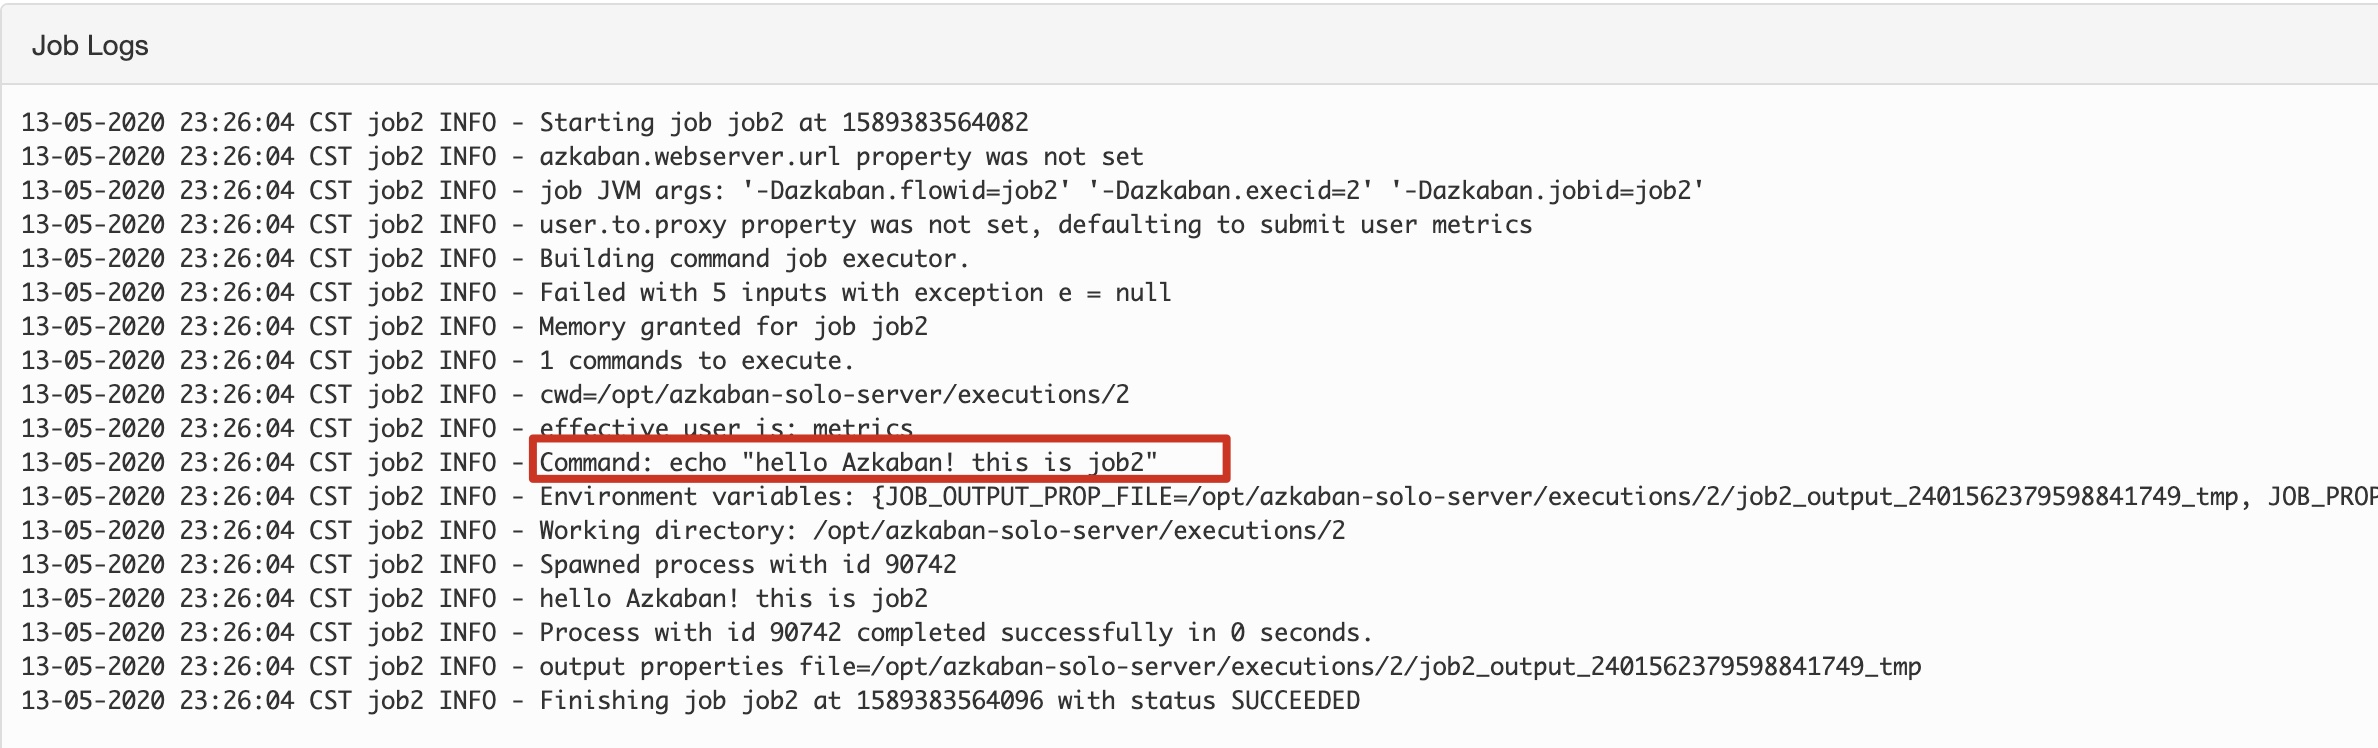
3.5 测试任务
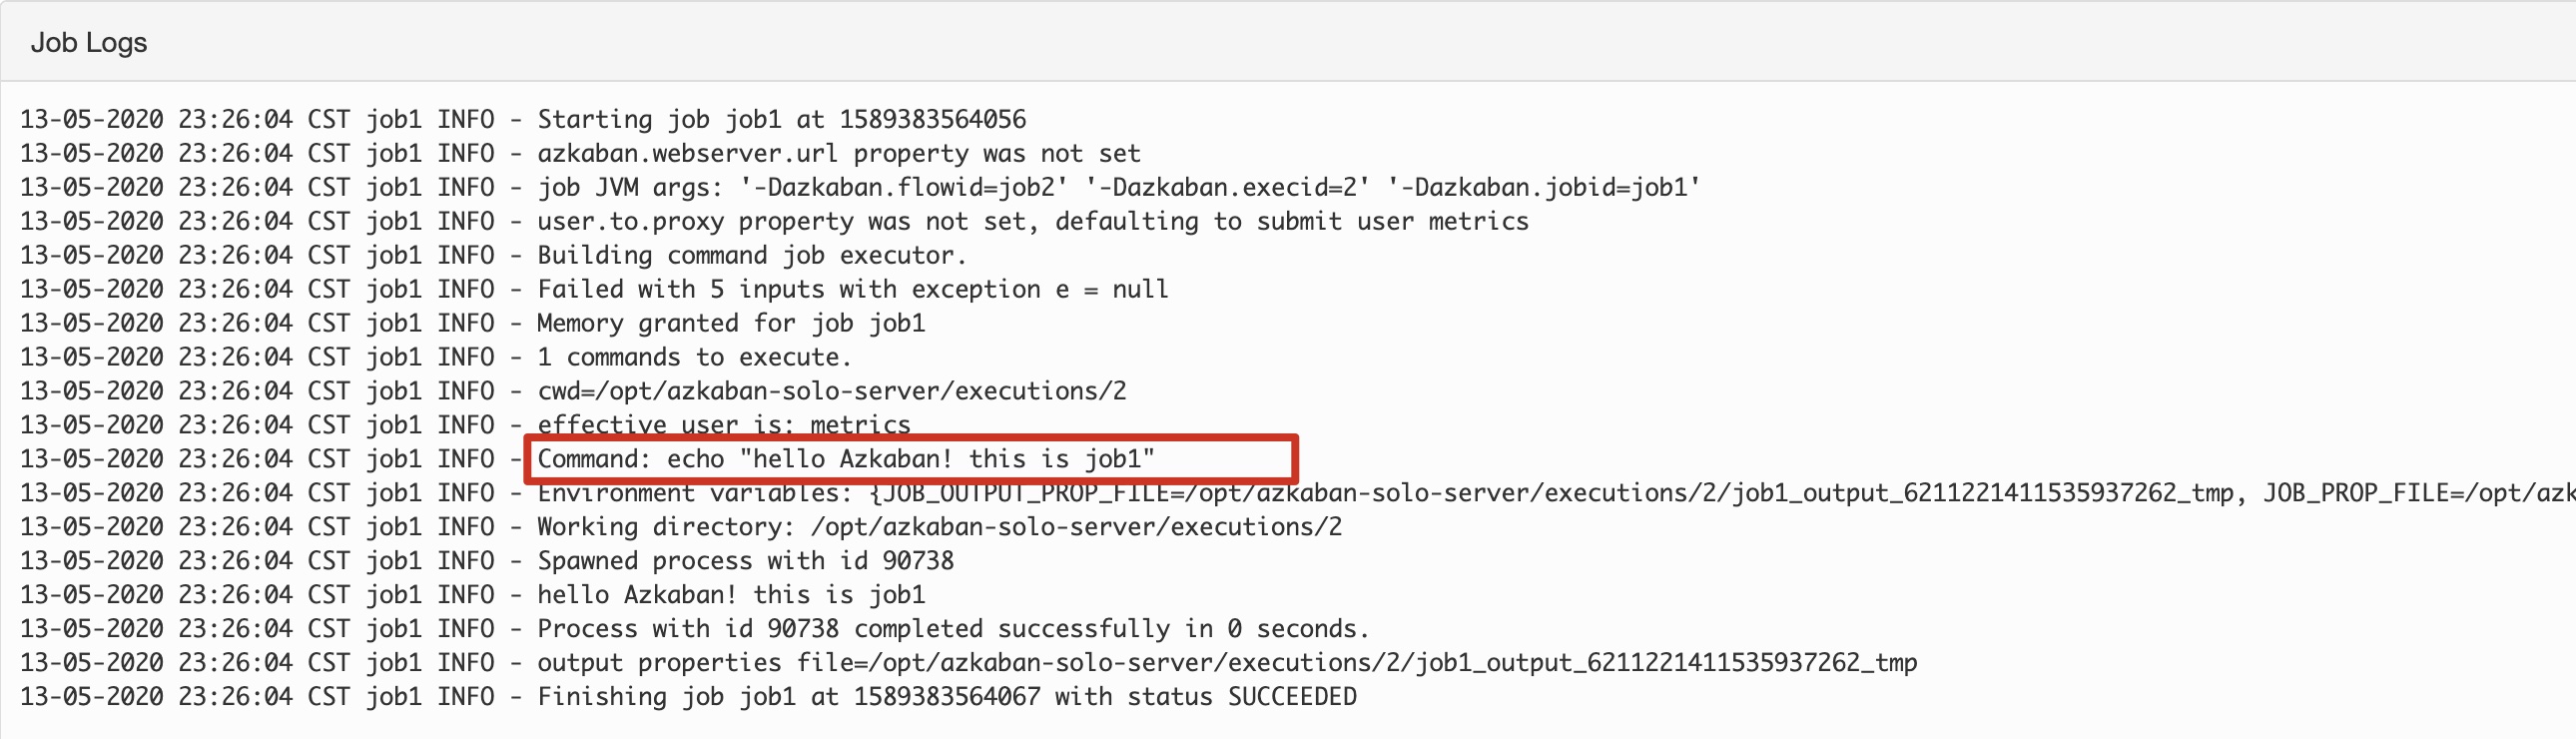
1 2 3 4 5 6 7 8 9 10 11 12 13 job1.job type =command command =echo "hello Azkaban! this is job1" job2.job type =command command =echo "hello Azkaban! this is job2" dependencies=job1
4. two-server模式 4.1 解压web‐server和exec‐server
1 2 3 4 5 6 7 8 9 10 [root@hnode1 opt]# cd /opt/azkaban-3.85.1/azkaban-exec-server/build/distributions [root@hnode1 distributions]# [root@hnode1 distributions]# ll 总用量 31720 -rw-r--r-- 1 root root 16235672 5月 13 20:35 azkaban-exec-server-0.1.0-SNAPSHOT.tar.gz -rw-r--r-- 1 root root 16242377 5月 13 20:35 azkaban-exec-server-0.1.0-SNAPSHOT.zip [root@hnode1 distributions]# [root@hnode1 distributions]# cp azkaban-exec-server-0.1.0-SNAPSHOT.tar.gz /opt/
1 2 3 4 5 6 7 8 9 [root@hnode1 distributions]# cd /opt/azkaban-3.85.1/azkaban-web-server/build/distributions [root@hnode1 distributions]# [root@hnode1 distributions]# ll 总用量 39768 -rw-r--r-- 1 root root 20295993 5月 13 19:10 azkaban-web-server-0.1.0-SNAPSHOT.tar.gz -rw-r--r-- 1 root root 20422305 5月 13 19:10 azkaban-web-server-0.1.0-SNAPSHOT.zip [root@hnode1 distributions]# cp azkaban-web-server-0.1.0-SNAPSHOT.tar.gz /opt/
4.2 配置MySQL 脚本地址:/opt/azkaban-3.85.1/azkaban-db/build/install/azkaban-db/create-all-sql-0.1.0-SNAPSHOT.sql
1 2 3 4 5 6 7 8 9 10 11 12 13 14 15 16 17 18 19 20 21 22 23 24 25 26 27 28 29 30 31 32 33 34 35 36 37 38 39 40 41 42 43 44 45 46 47 48 49 50 51 52 53 54 55 56 57 58 59 60 61 62 63 64 65 66 67 68 69 70 71 72 73 74 75 [root@hnode1 azkaban-db]# mysql -uroot -p Enter password: mysql> CREATE DATABASE azkaban; Query OK, 1 row affected (0.01 sec) mysql> use azkaban; Database changed mysql> CREATE USER 'azkaban' @'%' IDENTIFIED BY 'azkaban' ; ERROR 1819 (HY000): Your password does not satisfy the current policy requirements mysql> CREATE USER 'azkaban' @'%' IDENTIFIED BY 'Azkaban99!' ; Query OK, 0 rows affected (0.02 sec) mysql>GRANT SELECT,INSERT,UPDATE,DELETE ON azkaban.* to 'azkaban' @'%' WITH GRANT OPTION; Query OK, 0 rows affected (0.01 sec) mysql> show tables; Empty set (0.00 sec) mysql> source /opt/azkaban-3.85.1/azkaban-db/build/install/azkaban-db/create-all-sql-0.1.0-SNAPSHOT.sql; Query OK, 0 rows affected (0.07 sec) ... mysql> show tables; +------------------------------+ | Tables_in_azkaban | +------------------------------+ | QRTZ_BLOB_TRIGGERS | | QRTZ_CALENDARS | | QRTZ_CRON_TRIGGERS | | QRTZ_FIRED_TRIGGERS | | QRTZ_JOB_DETAILS | | QRTZ_LOCKS | | QRTZ_PAUSED_TRIGGER_GRPS | | QRTZ_SCHEDULER_STATE | | QRTZ_SIMPLE_TRIGGERS | | QRTZ_SIMPROP_TRIGGERS | | QRTZ_TRIGGERS | | active_executing_flows | | active_sla | | execution_dependencies | | execution_flows | | execution_jobs | | execution_logs | | executor_events | | executors | | project_events | | project_files | | project_flow_files | | project_flows | | project_permissions | | project_properties | | project_versions | | projects | | properties | | ramp | | ramp_dependency | | ramp_exceptional_flow_items | | ramp_exceptional_job_items | | ramp_items | | triggers | | validated_dependencies | +------------------------------+ 35 rows in set (0.00 sec)
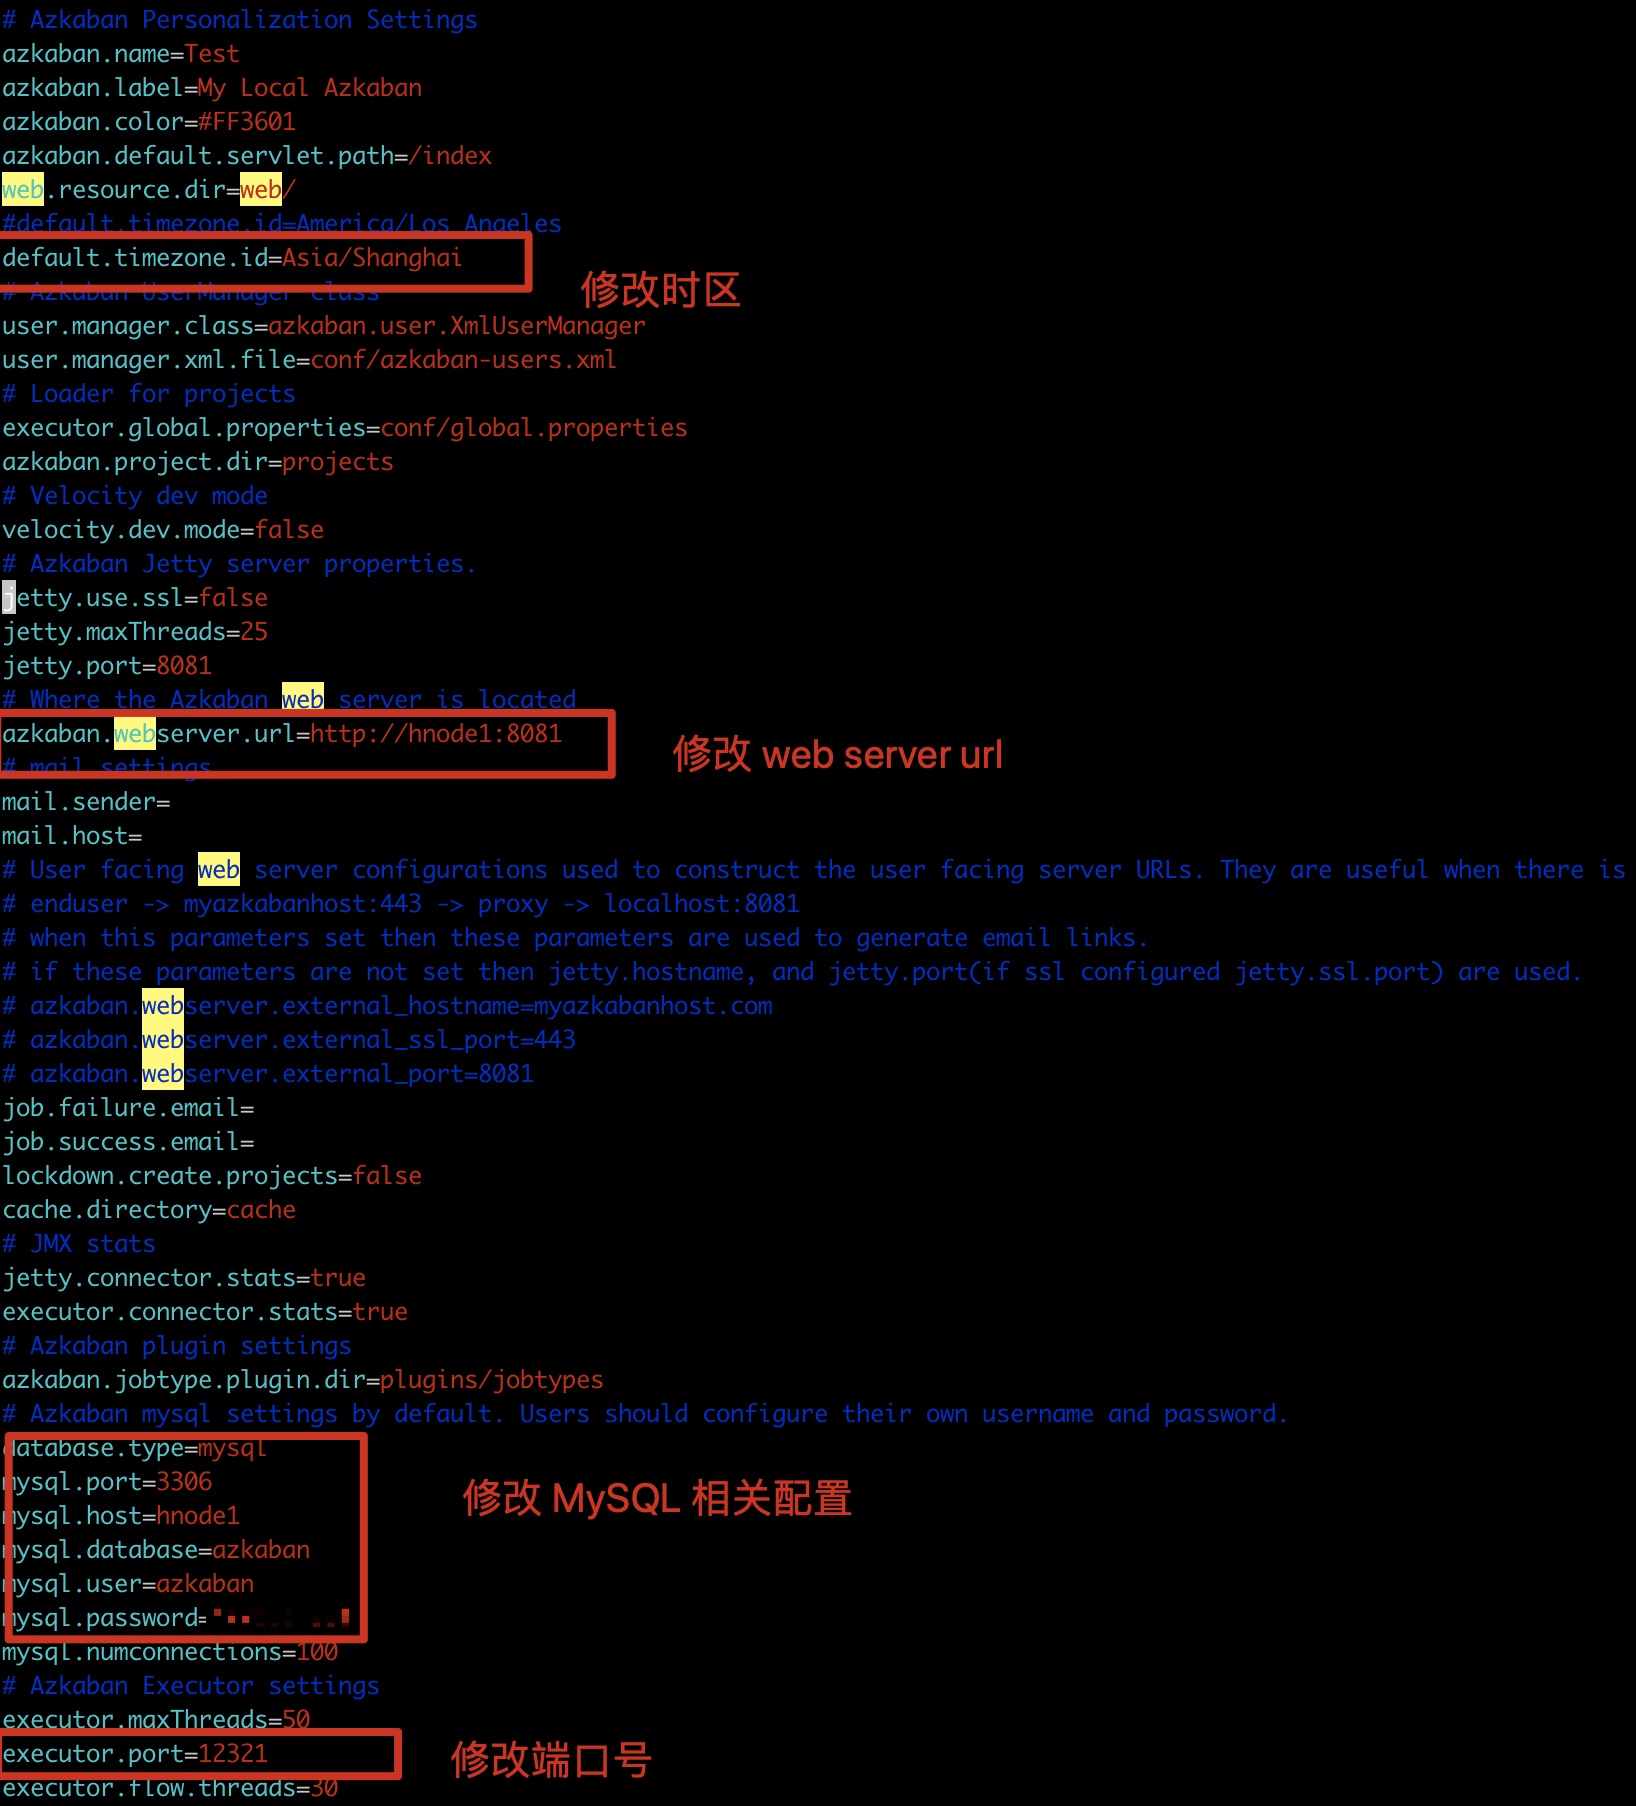
4.3 配置web‐server 1 2 3 4 5 6 7 8 tar -zxvf azkaban-web-server-0.1.0-SNAPSHOT.tar.gz mv azkaban-web-server-0.1.0-SNAPSHOT azkaban-web-servervim azkaban-web-server/conf/azkaban.properties
4.4 配置exec‐server 1 2 3 4 5 6 7 8 9 10 tar -zxvf zkaban-exec-server-0.1.0-SNAPSHOT.tar.gz mv zkaban-exec-server-0.1.0-SNAPSHOT zkaban-exec-servervim zkaban-exec-server/conf/azkaban.properties
4.5 启动 Azkaban
必须先启动 exec server 否则启动 webserver 会报找不到exec server 而启动失败
1 2 3 4 5 6 7 8 9 10 11 12 13 14 15 16 17 18 19 20 21 22 23 24 25 26 27 28 29 30 31 [root@hnode1 azkaban-exec-server]# pwd /opt/azkaban-exec-server [root@hnode1 azkaban-exec-server]# bin/start-exec.sh mysql> select * from executors; +----+--------+-------+--------+ | id | host | port | active | +----+--------+-------+--------+ | 14 | hnode1 | 12321 | 0 | +----+--------+-------+--------+ 1 row in set (0.00 sec) mysql> update executors set active=1; Query OK, 1 row affected (0.00 sec) Rows matched: 1 Changed: 1 Warnings: 0 mysql> mysql> select * from executors; +----+--------+-------+--------+ | id | host | port | active | +----+--------+-------+--------+ | 14 | hnode1 | 12321 | 1 | +----+--------+-------+--------+ 1 row in set (0.00 sec)
1 2 3 4 5 6 7 [root@hnode1 azkaban-web-server]# pwd /opt/azkaban-web-server [root@hnode1 azkaban-web-server]# bin/start-web.sh [root@hnode1 azkaban-web-server]# jps 52960 Jps 43015 AzkabanWebServer 42846 AzkabanExecutorServer
打开 Azkaban web UI : http://hnode1:8081
接下来验证 Azkaban 参照 前面 3.5 的测试方法
4.6 问题解决 4.6.1 No active executor found 修改数据库executors表中的active字段为1
4.6.2 Velocity could not be initialized! 如果在登录页面时 500 并提示 Velocity could not be initialized! 那就删除 ./plugins/tirggers 文件夹。
4.6.3 Unable to get scheduled flow triggers 1 2 3 4 2020/05/14 05:45:16.398 +0800 ERROR [FlowTriggerScheduler] [255454196@qtp-279566689-6] [Azkaban] Unable to get scheduled flow triggers java.lang.NullPointerException ...
解决办法:删掉executor选择器的过滤条件:MinimumFreeMemory
1 2 3 4 5 [root@hnode1 azkaban-web-server]# pwd /opt/azkaban-web-server vim azkaban-web-server/conf/azkaban.properties azkaban.executorselector.filters=StaticRemainingFlowSize,CpuStatus
4.6.4 executor became inactive before Executor 需要通过官方提供的 rest 接口来手动激活。为什么不在 Executor 启动时自动激活呢….官方 issue110 解释如下:
We don’t update prior to web-server start.
解决办法:http://hnode1:12321/executor?action=activate
4.6.5 Free memory amount minus Xmx (2802856 - 0 kb) is less than low mem … Azkaban 启动任务后一直处于Runnning状态,出现错误如下:
原因:Azkaban要求必须有3GB的空闲内存才会执行任务
解决方案:
方案1:内存扩容
1 2 3 4 5 6 7 8 [root@hnode1 azkaban-exec-server]# pwd /opt/azkaban-exec-server [root@hnode1 azkaban-exec-server]# vim plugins/jobtypes/commonprivate.properties memCheck.enabled=false
5. 分布式模式部署 5.1 节点规划
节点
服务
hnode1
web server、MySQL
hnode2
exec server
hnode3
exec server
5.2 exec-server 配置 只需要将 前面配置的 exec server 拷贝到计划节点即可
scp -r azkaban-exec-server root@hnode2:/opt
5.3 启动服务 1 2 3 4 5 6 7 8 9 10 11 12 13 14 15 16 17 18 19 20 21 22 23 24 25 26 27 28 29 30 31 32 33 34 35 36 37 38 39 40 41 42 43 [root@hnode2 azkaban-exec-server]# bin/start-exec.sh [root@hnode2 azkaban-exec-server]# [root@hnode3 azkaban-exec-server]# bin/start-exec.sh [root@hnode3 azkaban-exec-server]# mysql> select * from executors; +----+--------+-------+--------+ | id | host | port | active | +----+--------+-------+--------+ | 15 | hnode2 | 12321 | 0 | | 16 | hnode3 | 12321 | 0 | +----+--------+-------+--------+ 2 rows in set (0.00 sec) mysql> mysql> update executors set active=1; Query OK, 2 rows affected (0.00 sec) Rows matched: 2 Changed: 2 Warnings: 0 mysql> mysql> select * from executors; +----+--------+-------+--------+ | id | host | port | active | +----+--------+-------+--------+ | 15 | hnode2 | 12321 | 1 | | 16 | hnode3 | 12321 | 1 | +----+--------+-------+--------+ [root@hnode1 azkaban-web-server]# bin/start-web.sh [root@hnode1 azkaban-web-server]# [root@hnode1 azkaban-exec-server]# curl http://hnode2:12321/executor?action=activate {"status" :"success" } [root@hnode1 azkaban-exec-server]# curl http://hnode3:12321/executor?action=activate {"status" :"success" }
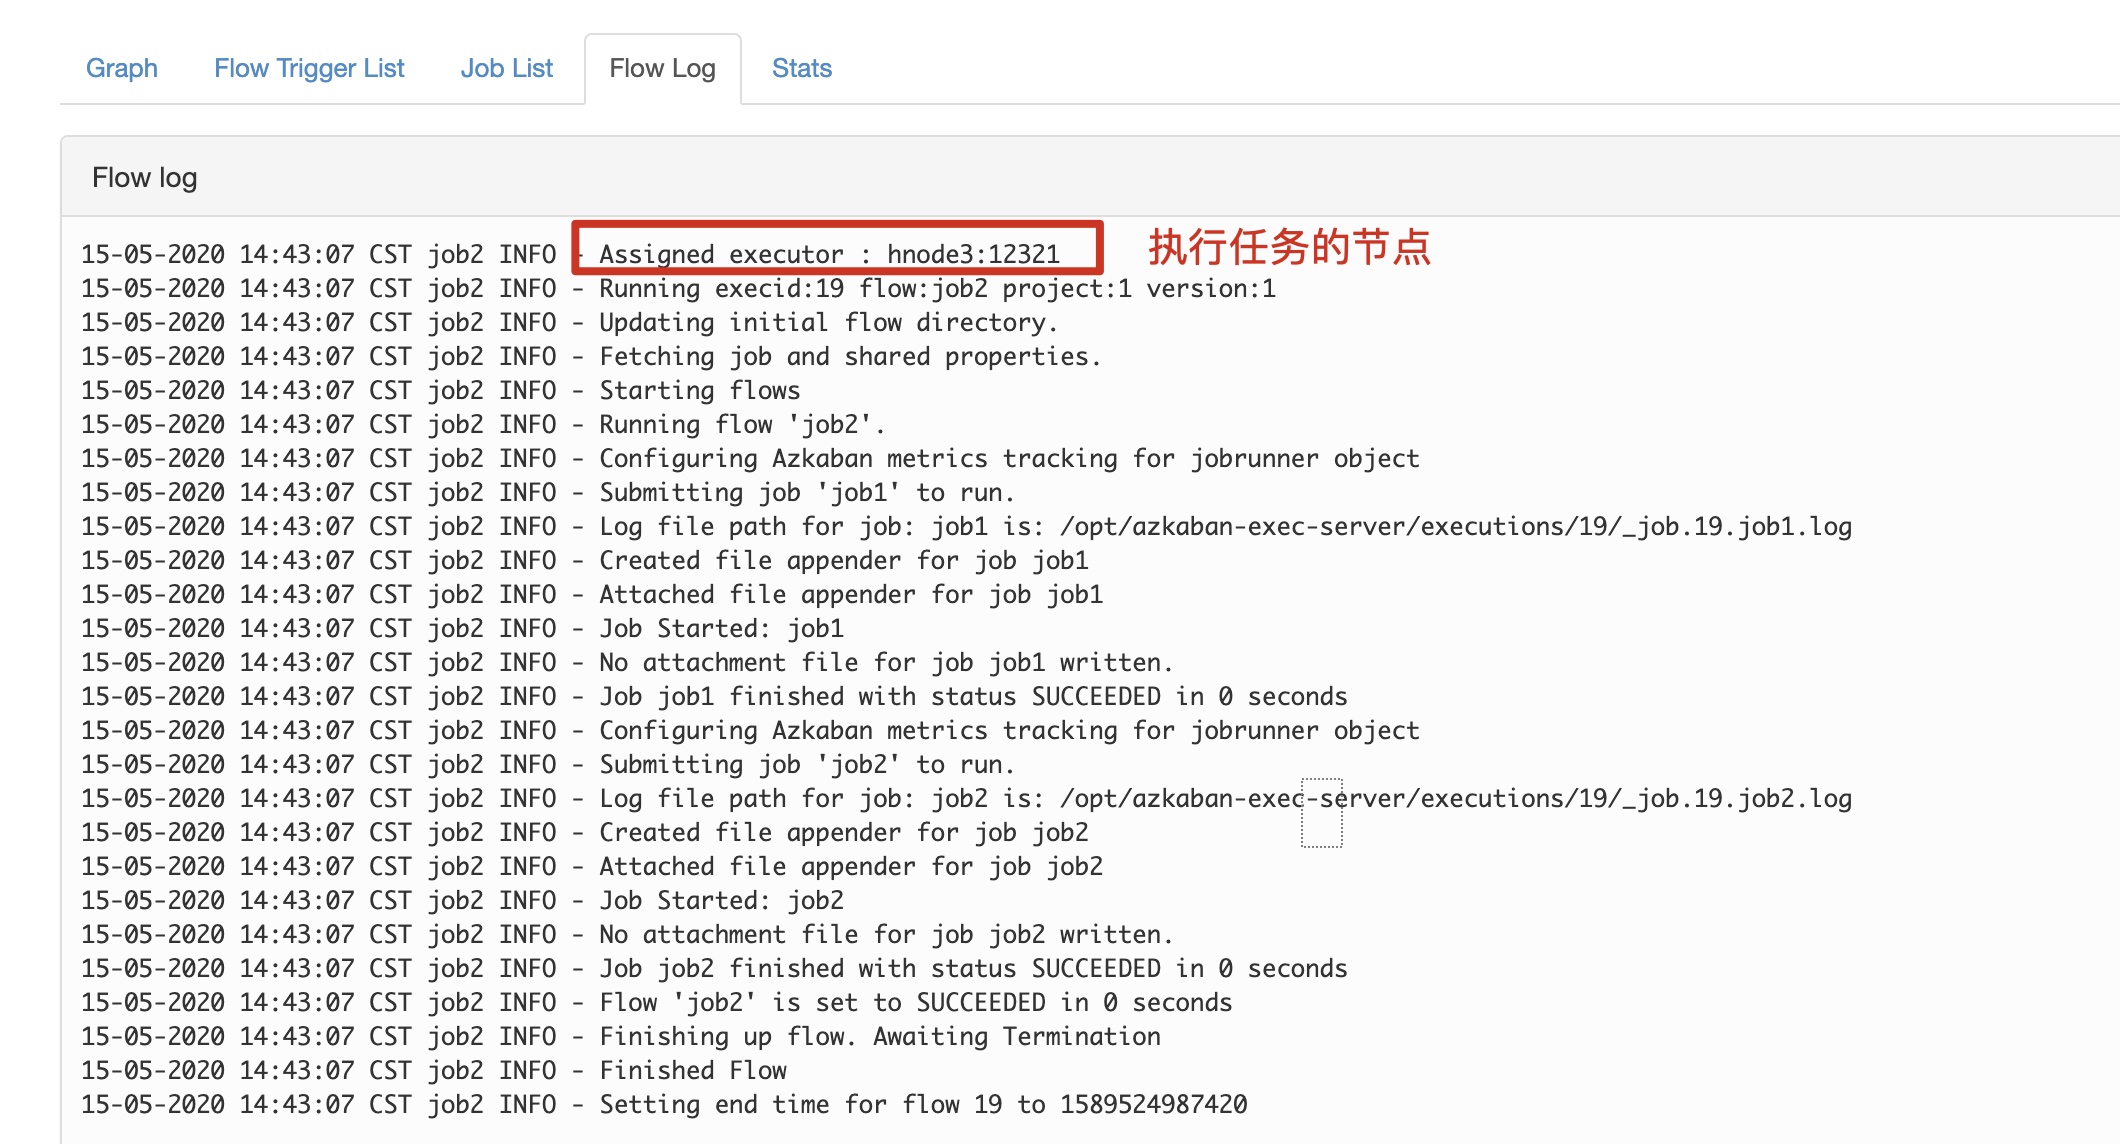
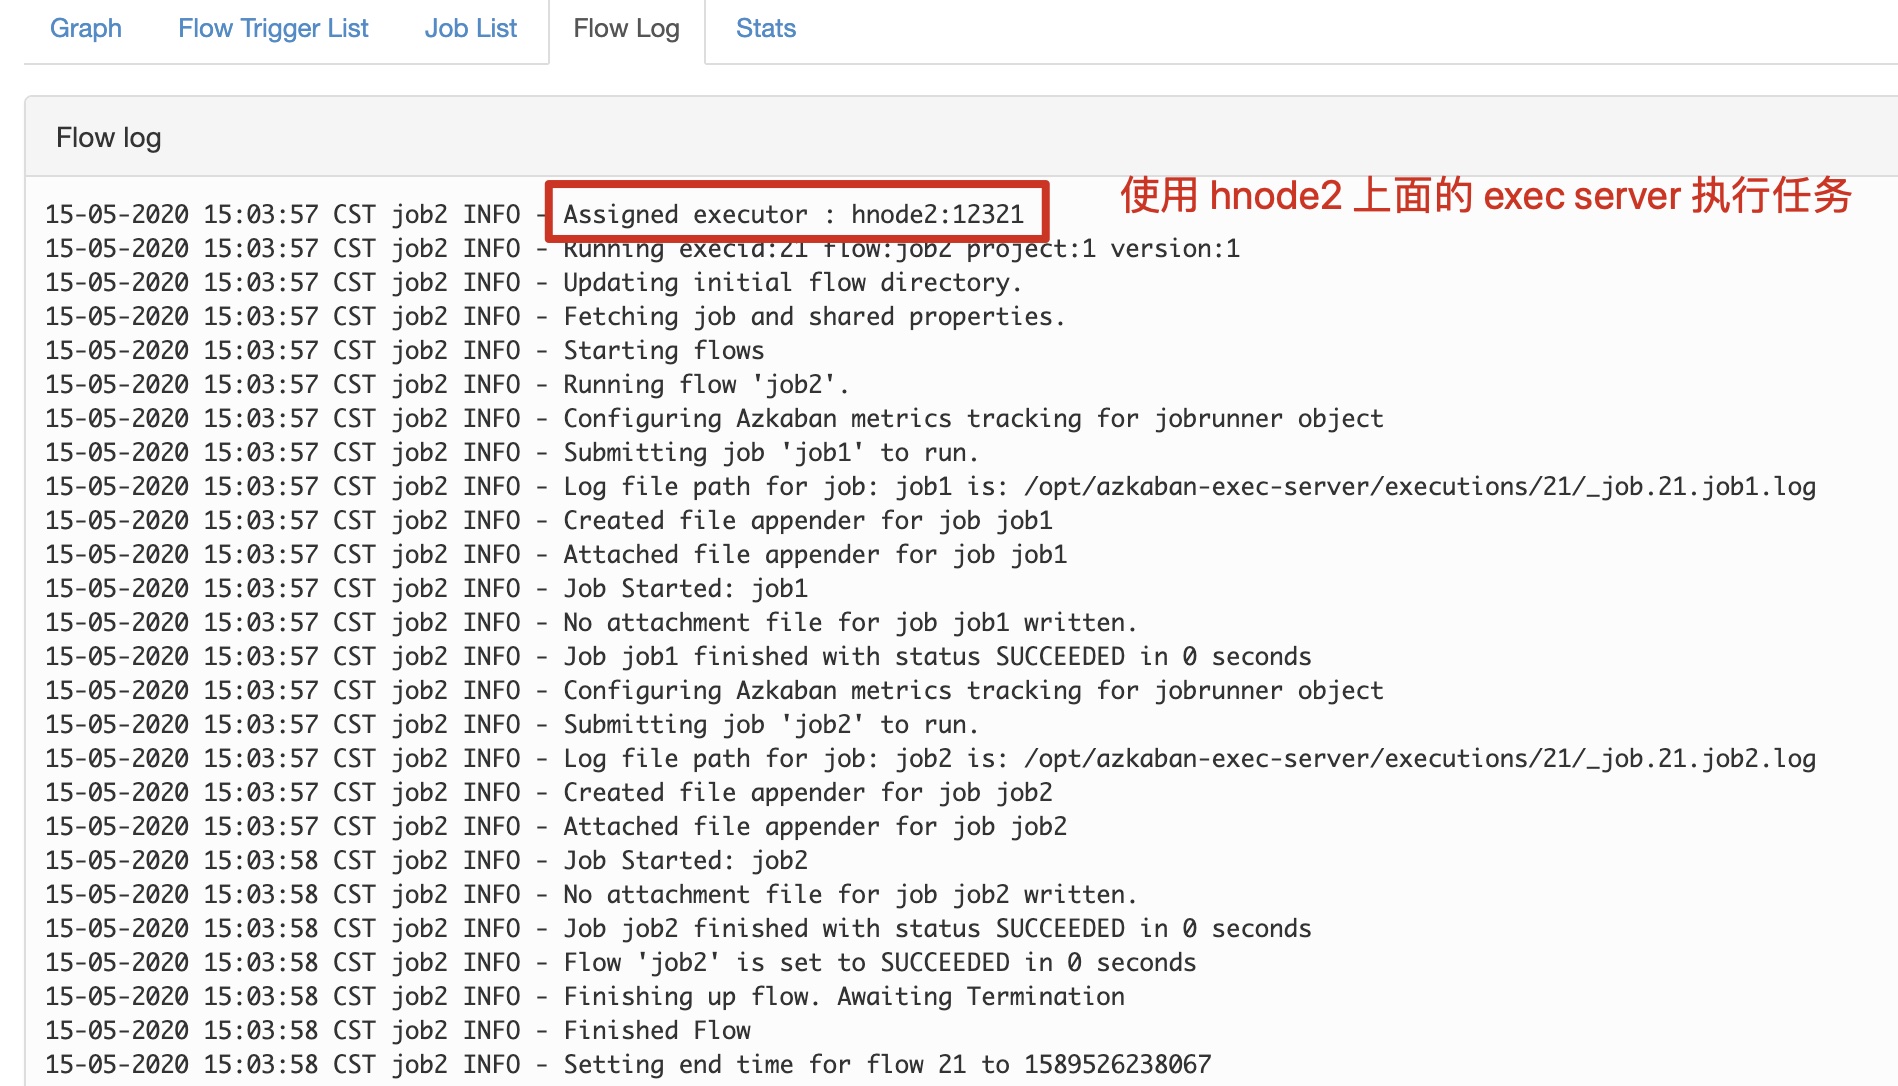
5.4 测试 Azkaban 按照前面测试的方式执行任务,并查看日志
关闭 hnode3 上面的 exec server 再次执行任务
Azkaban WebServer挂掉,不影响已经提交的任务执行,主要是不能通过WebUI查看Job、管理Job、跟踪Job状态。因此,对于这个架构,主要是要解决MySQL HA和ExecutorServer HA。官方支持ExecutorServer HA,我们只需要配一个MySQL HA就行了。