本文记录一次在本机 Ubuntu 中部署 Apache Airflow 2.3.4 的全过程。重点不是只给最终命令,而是把环境差异、命令输出、遇到的错误和修复过程都记录下来,后续排查同类问题时可以直接对照。
1. 部署目标
本次要完成的目标:
- 在虚拟机
10.211.55.4上安装 Airflow2.3.4。 - 安装 MySQL,并把 Airflow 元数据库从默认 SQLite 切换为 MySQL。
- 创建 Airflow 管理员账号。
- 启动 webserver 和 scheduler。
- 记录安装命令、关键输出和过程中遇到的问题。
最终验证结果:
$ curl -fsS http://127.0.0.1:8080/health
{
    "metadatabase": {
        "status": "healthy"
    },
    "scheduler": {
        "status": "healthy",
        "latest_scheduler_heartbeat": "2023-02-15T09:36:35.583905+08:00"
    }
}
Airflow 页面地址:
http://10.211.55.4:8080
username: admin
password: admin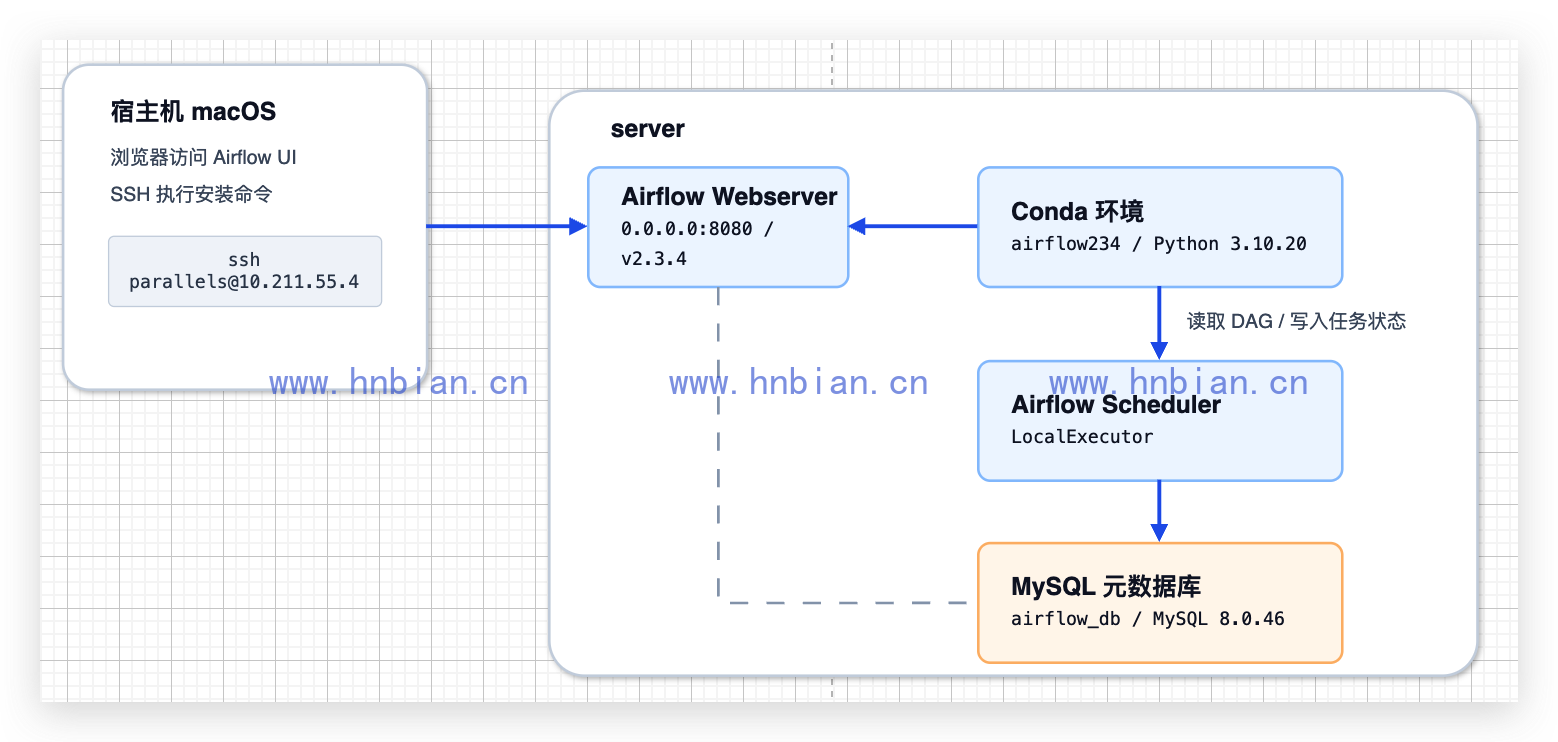
2. 环境说明
远程机器是 Parallels 里的 Ubuntu 虚拟机:
$ whoami
parallels

$ hostname
ubuntu-linux-2204

$ uname -a
Linux ubuntu-linux-2204 5.15.0-60-generic #66-Ubuntu SMP Fri Jan 20 14:29:49 UTC 2023 aarch64 aarch64 aarch64 GNU/Linux

$ cat /etc/os-release
PRETTY_NAME="Ubuntu 22.04.1 LTS"
NAME="Ubuntu"
VERSION_ID="22.04"
VERSION="22.04 LTS (Jammy Jellyfish)"
VERSION_CODENAME=jammy
ID=ubuntu
ID_LIKE=debian
UBUNTU_CODENAME=jammy

$ python3 --version
Python 3.10.6
这里有两个关键点:
- 机器架构是
aarch64,也就是 ARM64,不是 x86_64。 - Ubuntu 22.04 默认 Python 是
3.10.6,满足 Airflow2.3.4的 Python 版本要求;但为了不污染系统 Python,本文仍然使用 Miniforge 创建独立环境。
确认系统 Python 版本:
$ python3 --version
Python 3.10.6
本文没有直接使用系统 Python 安装 Airflow,而是安装 ARM64 版本的 Miniforge,然后用 conda 创建 python=3.10 环境。这样做的好处是 Airflow、MySQL 驱动、constraints 依赖都被隔离在 airflow234 环境里,后续删除或重装也不会影响系统包。
3. 与参考文档的差异
参考资料是 尚硅谷大数据技术之airflow.docx,其中安装思路是:
- 安装 Miniconda。
- 创建 Python 环境。
pip install apache-airflow。airflow db init。- 启动 webserver 和 scheduler。
- 修改 MySQL 元数据库配置。
参考文档里有几处和这次环境不同:
| 项目 | 参考文档 | 本次部署 |
|---|---|---|
| CPU 架构 | x86_64 | aarch64 / ARM64 |
| Conda 安装包 | Miniconda3-latest-Linux-x86_64.sh |
Miniforge3-Linux-aarch64.sh |
| Python 环境 | Python 3.8 | Python 3.10 |
| Airflow 版本 | 文档示例是 2.4.3 | 本文固定 2.3.4 |
| 元数据库驱动 | mysql-connector-python 示例 |
本文使用 mysqlclient,连接串为 mysql+mysqldb://... |
为什么要换成 Miniforge?因为仓库里现有的 Miniconda3-latest-Linux-x86_64.sh 是 x86_64 安装包,不能在 ARM64 Ubuntu 上使用。
4. 安装 MySQL
先更新 apt 源:
$ sudo apt-get update
Hit:2 http://security.ubuntu.com/ubuntu jammy-security InRelease
Hit:3 http://ports.ubuntu.com/ubuntu-ports jammy InRelease
Hit:4 http://us.archive.ubuntu.com/ubuntu jammy InRelease
Hit:5 http://us.archive.ubuntu.com/ubuntu jammy-updates InRelease
Hit:6 http://ports.ubuntu.com/ubuntu-ports jammy-updates InRelease
Hit:7 http://us.archive.ubuntu.com/ubuntu jammy-backports InRelease
Hit:8 http://ports.ubuntu.com/ubuntu-ports jammy-backports InRelease
Hit:9 http://us.archive.ubuntu.com/ubuntu jammy-proposed InRelease
Hit:10 http://ports.ubuntu.com/ubuntu-ports jammy-security InRelease
Reading package lists...
安装 MySQL 和后面编译 mysqlclient 需要的系统依赖:
$ sudo apt-get install -y mysql-server curl ca-certificates bzip2 build-essential pkg-config default-libmysqlclient-dev
Reading package lists...
Building dependency tree...
Reading state information...
mysql-server is already the newest version (8.0.32-0ubuntu0.22.04.2).
curl is already the newest version (7.81.0-1ubuntu1.7).
bzip2 is already the newest version (1.0.8-5build1).
build-essential is already the newest version (12.9ubuntu3).
pkg-config is already the newest version (0.29.2-1ubuntu3).
default-libmysqlclient-dev is already the newest version (1.0.8).
0 upgraded, 0 newly installed, 0 to remove and 18 not upgraded.
启动并设置 MySQL 开机自启:
$ sudo systemctl enable --now mysql
Synchronizing state of mysql.service with SysV service script with /usr/lib/systemd/systemd-sysv-install.
Executing: /usr/lib/systemd/systemd-sysv-install enable mysql
查看 MySQL 服务状态:
$ sudo systemctl status mysql --no-pager -l
● mysql.service - MySQL Community Server
     Loaded: loaded (/lib/systemd/system/mysql.service; enabled; preset: enabled)
     Active: active (running) since Wed 2023-02-15 09:22:19 CST; 10min ago
   Main PID: 12733 (mysqld)
     Status: "Server is operational"
      Tasks: 38 (limit: 2206)
     Memory: 370.8M
查看 MySQL 版本:
$ mysql --version
mysql  Ver 8.0.32-0ubuntu0.22.04.2 for Linux on aarch64 ((Ubuntu))

$ sudo mysql -e "SELECT VERSION();"
VERSION()
8.0.32-0ubuntu0.22.04.2
5. 安装 ARM64 Miniforge
下载地址:
$ curl -L -o /tmp/Miniforge3-Linux-aarch64.sh \
  https://github.com/conda-forge/miniforge/releases/download/22.11.1-4/Miniforge3-22.11.1-4-Linux-aarch64.sh
本次虚拟机直接从 GitHub 下载时速度很慢,只有一百多 KB/s:
0 88.6M 0 1276k 0 0 117k 0 0:12:49 0:00:10 0:12:39 107k后来改为先在宿主机下载,再通过局域网 scp 传到虚拟机:
$ scp /tmp/Miniforge3-Linux-aarch64.sh parallels@10.211.55.4:/tmp/Miniforge3-Linux-aarch64.sh
Miniforge3-Linux-aarch64.sh  100%   89MB 116.0MB/s   00:00
校验安装包:
$ ls -lh /tmp/Miniforge3-Linux-aarch64.sh && sha256sum /tmp/Miniforge3-Linux-aarch64.sh | sed 's/ .*//'
-rw-rw-r-- 1 parallels parallels 89M Feb 15 09:15 /tmp/Miniforge3-Linux-aarch64.sh
2c113a69297e612b01ca0f320c22a3107a11f2ab9b573d79ac868a175945ce29
安装到用户目录:
$ bash /tmp/Miniforge3-Linux-aarch64.sh -b -p /home/parallels/miniforge3
PREFIX=/home/parallels/miniforge3
Unpacking bootstrapper...
Unpacking payload...
Installing base environment...
Transaction finished
installation finished.
关闭默认自动激活 base 环境:
$ source /home/parallels/miniforge3/etc/profile.d/conda.sh
$ conda config --set auto_activate_base false
WARNING conda.cli.condarc:set_key(484): Key auto_activate_base is an alias of auto_activate; setting value with latter

$ conda --version
conda 22.11.1
6. 创建 Airflow Python 环境
创建 Python 3.10 环境:
$ conda create -y -n airflow234 python=3.10
Channels:
 - conda-forge
Platform: linux-aarch64
Collecting package metadata (repodata.json): done
Solving environment: done

## Package Plan ##

  environment location: /home/parallels/miniforge3/envs/airflow234

  added / updated specs:
    - python=3.10

The following NEW packages will be INSTALLED:
  python 3.10.9 h4bb2201_0_cpython conda-forge

# To activate this environment, use
#
#     $ conda activate airflow234
确认 Python 版本:
$ conda run -n airflow234 python --version
Python 3.10.9
升级 pip:
$ conda run -n airflow234 python -m pip install --upgrade pip
Requirement already satisfied: pip in ./miniforge3/envs/airflow234/lib/python3.10/site-packages (22.3.1)
7. 安装 Airflow 2.3.4
Airflow 老版本强烈建议使用 constraints 文件固定依赖,否则很容易装到不兼容的新版本依赖。
安装命令:
$ conda run -n airflow234 python -m pip install \
  'apache-airflow[mysql]==2.3.4' \
  --constraint 'https://raw.githubusercontent.com/apache/airflow/constraints-2.3.4/constraints-3.10.txt'
关键输出:
Collecting apache-airflow==2.3.4 (from apache-airflow[mysql]==2.3.4)
  Downloading apache_airflow-2.3.4-py3-none-any.whl.metadata (112 kB)
...
Successfully built cron-descriptor dill pendulum psutil pyrsistent python-nvd3 termcolor unicodecsv
Successfully installed ... apache-airflow-2.3.4 apache-airflow-providers-mysql-3.2.0 ...
WARNING: Retrying ... raw.githubusercontent.com ... constraints-3.10.txt
WARNING: The candidate selected for download or install is a yanked version: 'python-daemon' candidate (version 2.3.1 ...)
ERROR: pip's dependency resolver does not currently take into account all the packages that are installed.
Some dependency constraints were adjusted to match apache-airflow==2.3.4.
这里虽然最后有 ERROR: pip's dependency resolver... 字样,但 pip 命令退出码是 0,Airflow 也成功安装了。这个提示来自 conda 环境里已有包版本与 Airflow constraints 固定依赖不完全一致。对本次 Airflow 2.3.4 部署没有阻断。
确认 Airflow 版本:
$ AIRFLOW_HOME=/home/parallels/airflow234 conda run -n airflow234 airflow version
2.3.4
8. 安装 MySQL Python 驱动
一开始我以为安装 apache-airflow[mysql] 后就具备 MySQLdb 驱动,但初始化元数据库时报错:
ModuleNotFoundError: No module named 'MySQLdb'
ERROR conda.cli.main_run:execute(148): `conda run airflow db init` failed.
原因是连接串使用的是:
sql_alchemy_conn = mysql+mysqldb://airflow:******@localhost:3306/airflow_db?charset=utf8mb4mysql+mysqldb:// 需要 Python 包 mysqlclient 提供 MySQLdb 模块。所以补装:
$ conda run -n airflow234 python -m pip install 'mysqlclient==2.1.1'
Collecting mysqlclient==2.1.1
  Downloading mysqlclient-2.1.1.tar.gz (88 kB)
Building wheels for collected packages: mysqlclient
  Building wheel for mysqlclient (pyproject.toml): finished with status 'done'
  Created wheel for mysqlclient: filename=mysqlclient-2.1.1-cp310-cp310-linux_aarch64.whl size=62064
Successfully built mysqlclient
Successfully installed mysqlclient-2.1.1
验证 MySQLdb 可导入:
$ conda run -n airflow234 python -c 'import MySQLdb; print(MySQLdb.__file__)'
/home/parallels/miniforge3/envs/airflow234/lib/python3.10/site-packages/MySQLdb/__init__.py
9. 创建 Airflow 元数据库和用户
创建数据库和用户:
$ sudo mysql -e "
CREATE DATABASE IF NOT EXISTS airflow_db CHARACTER SET utf8mb4 COLLATE utf8mb4_unicode_ci;
CREATE USER IF NOT EXISTS 'airflow'@'localhost' IDENTIFIED BY '<AIRFLOW_DB_PASSWORD>';
ALTER USER 'airflow'@'localhost' IDENTIFIED BY '<AIRFLOW_DB_PASSWORD>';
GRANT ALL PRIVILEGES ON airflow_db.* TO 'airflow'@'localhost';
FLUSH PRIVILEGES;
"
验证数据库和用户:
$ sudo mysql -e "
SELECT SCHEMA_NAME, DEFAULT_CHARACTER_SET_NAME, DEFAULT_COLLATION_NAME
FROM information_schema.SCHEMATA
WHERE SCHEMA_NAME='airflow_db';
SELECT user, host, plugin FROM mysql.user WHERE user='airflow';
"
SCHEMA_NAME  DEFAULT_CHARACTER_SET_NAME  DEFAULT_COLLATION_NAME
airflow_db   utf8mb4                     utf8mb4_unicode_ci
user         host       plugin
airflow      localhost  caching_sha2_password
说明:参考文档里提到过 MySQL 的 sql_mode 和 timestamp 默认值问题。本文使用的是 MySQL 8.0.32,执行 airflow db init 时没有遇到 Invalid default value 错误,所以没有修改 sql_mode。如果使用较老 MySQL 版本遇到该错误,再考虑按参考文档调整。
10. 配置 Airflow 使用 MySQL
设置 Airflow home:
$ export AIRFLOW_HOME=/home/parallels/airflow234
$ mkdir -p $AIRFLOW_HOME
生成默认配置文件:
$ AIRFLOW_HOME=/home/parallels/airflow234 conda run -n airflow234 airflow config list >/tmp/airflow_config_list.txt
$ ls -l /home/parallels/airflow234/airflow.cfg
-rw-rw-r-- 1 parallels parallels 8742 Feb 15 09:30 /home/parallels/airflow234/airflow.cfg
修改关键配置:
[core]
executor = LocalExecutor
load_examples = False

[database]
sql_alchemy_conn = mysql+mysqldb://airflow:<AIRFLOW_DB_PASSWORD>@localhost:3306/airflow_db?charset=utf8mb4

[webserver]
web_server_port = 8080
这里顺便把 executor 改成 LocalExecutor。默认的 SequentialExecutor 更适合 SQLite 单进程实验,不适合作为 MySQL 元数据库下的单机部署形态。
11. 初始化 Airflow 元数据库
执行初始化:
$ AIRFLOW_HOME=/home/parallels/airflow234 conda run -n airflow234 airflow db init
DB: mysql+mysqldb://airflow:***@localhost:3306/airflow_db?charset=utf8mb4
[2023-02-15 09:32:40,308] {db.py:1466} INFO - Creating tables
INFO  [alembic.runtime.migration] Context impl MySQLImpl.
INFO  [alembic.runtime.migration] Will assume non-transactional DDL.
INFO  [alembic.runtime.migration] Running upgrade  -> e3a246e0dc1, current schema
...
INFO  [alembic.runtime.migration] Running upgrade 3c94c427fdf6 -> f5fcbda3e651, Add indexes for CASCADE deletes on task_instance
WARNI [airflow.models.crypto] empty cryptography key - values will not be stored encrypted.
初始化后验证 MySQL 里表数量:
$ sudo mysql -N -e "SELECT COUNT(*) FROM information_schema.tables WHERE table_schema='airflow_db';"
33
12. 创建 Airflow 管理员用户
创建管理员:
$ AIRFLOW_HOME=/home/parallels/airflow234 conda run -n airflow234 airflow users create \
  --username admin \
  --firstname Admin \
  --lastname User \
  --role Admin \
  --email admin@example.com \
  --password admin
关键输出:
[2023-02-15 09:32:50,412] {manager.py:213} INFO - Added user admin
User "admin" created with role "Admin"
查看用户:
$ AIRFLOW_HOME=/home/parallels/airflow234 conda run -n airflow234 airflow users list
id | username | email             | first_name | last_name | roles
===+==========+===================+============+===========+======
1  | admin    | admin@example.com | Admin      | User      | Admin
13. 启动 webserver 和 scheduler
启动前先检查数据库连接:
$ AIRFLOW_HOME=/home/parallels/airflow234 conda run -n airflow234 airflow db check
[2023-02-15 09:36:28,341] {db.py:1610} INFO - Connection successful.
启动 webserver:
$ AIRFLOW_HOME=/home/parallels/airflow234 conda run -n airflow234 airflow webserver -p 8080 -D
Running the Gunicorn Server with:
Workers: 4 sync
Host: 0.0.0.0:8080
Timeout: 120
Logfiles: - -
Access Logformat:
=================================================================
[2023-02-15 09:36:30,096] {dagbag.py:508} INFO - Filling up the DagBag from /dev/null
启动 scheduler:
$ AIRFLOW_HOME=/home/parallels/airflow234 conda run -n airflow234 airflow scheduler -D查看进程:
$ ps -ef | grep -E "airflow (webserver|scheduler)|gunicorn" | grep -v grep
paralle+ 30044 1 3 09:36 ? 00:00:00 /home/parallels/miniforge3/envs/airflow234/bin/python /home/parallels/miniforge3/envs/airflow234/bin/airflow webserver -p 8080 -D
paralle+ 30051 1 2 09:36 ? 00:00:00 gunicorn: master [airflow-webserver]
paralle+ 30056 30051 11 09:36 ? 00:00:01 [ready] gunicorn: worker [airflow-webserver]
paralle+ 30057 30051 11 09:36 ? 00:00:01 [ready] gunicorn: worker [airflow-webserver]
paralle+ 30058 30051 11 09:36 ? 00:00:01 [ready] gunicorn: worker [airflow-webserver]
paralle+ 30059 30051 11 09:36 ? 00:00:01 [ready] gunicorn: worker [airflow-webserver]
paralle+ 30069 1 6 09:36 ? 00:00:00 /home/parallels/miniforge3/envs/airflow234/bin/python /home/parallels/miniforge3/envs/airflow234/bin/airflow scheduler -D
paralle+ 30201 30069 0 09:36 ? 00:00:00 airflow scheduler -- DagFileProcessorManager
健康检查:
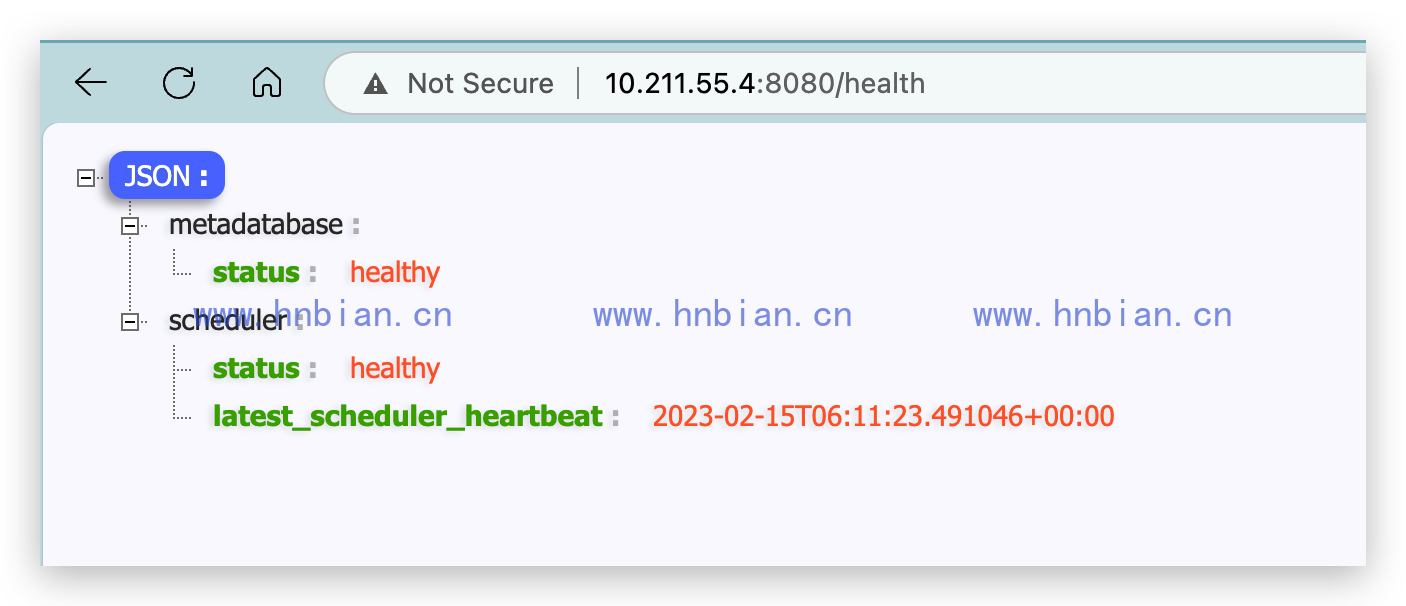
$ curl -fsS http://127.0.0.1:8080/health
{
    "metadatabase": {
        "status": "healthy"
    },
    "scheduler": {
        "status": "healthy",
        "latest_scheduler_heartbeat": "2023-02-15T09:36:35.583905+08:00"
    }
}
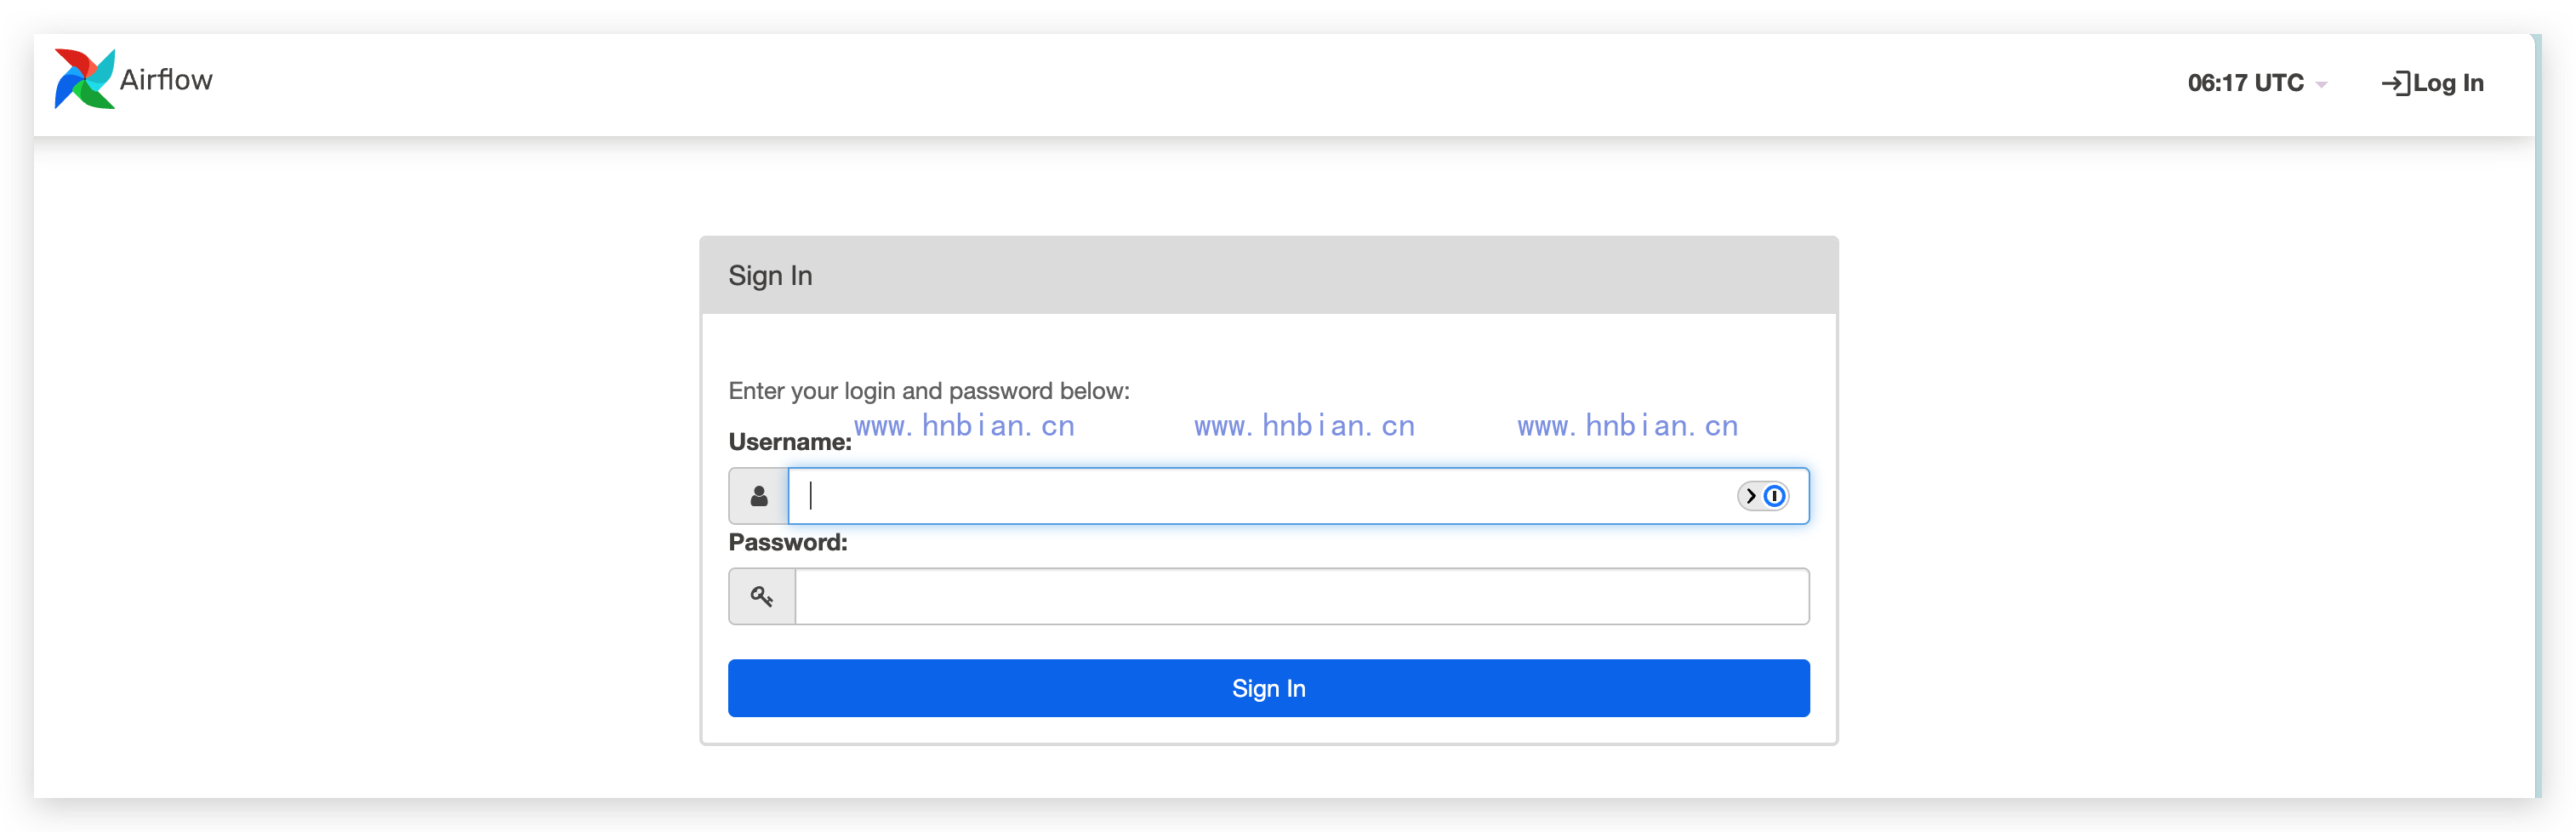
部署完成后,浏览器打开 Airflow 会先进入登录页: http://10.211.55.4:8080/login/
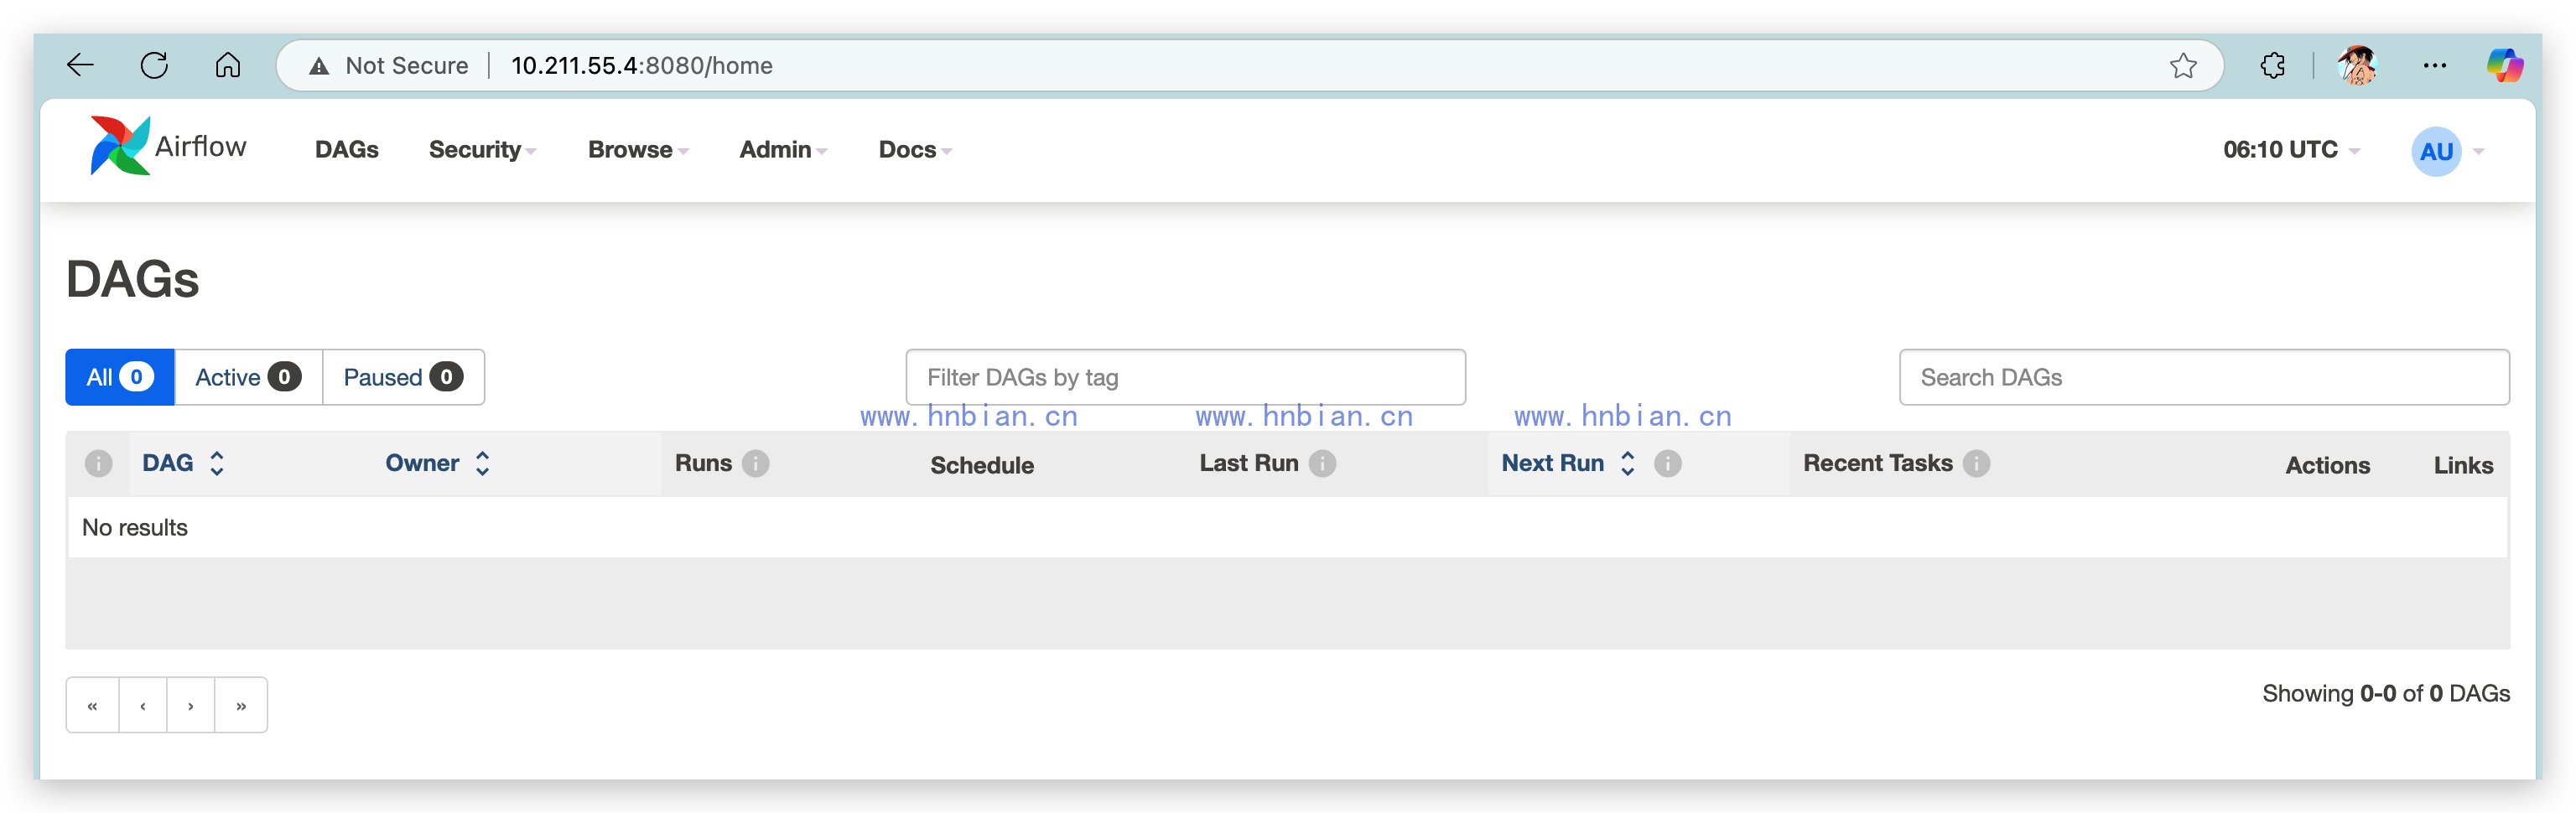
浏览器访问 Airflow Web UI 后,可以看到当前实例已经是 v2.3.4,并且由于本次关闭了示例 DAG,DAG 列表为空:
也可以直接打开 /health 页面确认元数据库和 scheduler 状态:
14. 常用管理命令
每次操作前建议先设置环境变量并加载 conda:
export AIRFLOW_HOME=/home/parallels/airflow234
source /home/parallels/miniforge3/etc/profile.d/conda.sh
conda activate airflow234
查看版本:
airflow version检查数据库连接:
airflow db check启动 webserver:
airflow webserver -p 8080 -D启动 scheduler:
airflow scheduler -D查看进程:
ps -ef | grep -E "airflow (webserver|scheduler)|gunicorn" | grep -v grep停止服务建议使用 pid 文件或精确 pid,不要直接在脚本里写宽泛的 pkill -f airflow:
kill $(cat /home/parallels/airflow234/airflow-webserver-monitor.pid)如果要批量清理,先看清楚进程再 kill:
ps -ef | grep -E "airflow (webserver|scheduler)|gunicorn" | grep -v grep
kill <PID>
15. 本次踩坑记录
15.1 不要直接把 Airflow 装进系统 Python
现象:
$ python3 --version
Python 3.10.6

$ which python3
/usr/bin/python3
Ubuntu 22.04 自带 Python 3.10,版本本身可以满足 Airflow 2.3.4。但如果直接在系统 Python 里执行 pip install apache-airflow,后续依赖回滚、重装和排错都会比较麻烦。
处理方式:使用 ARM64 Miniforge 创建独立的 python=3.10 环境。
15.2 参考文档里的 x86_64 Miniconda 不适合 ARM64 虚拟机
参考文档使用的是:
Miniconda3-latest-Linux-x86_64.sh本机虚拟机是:
$ uname -m
aarch64
处理方式:改用:
Miniforge3-Linux-aarch64.sh15.3 非交互 SSH 执行 sudo 时需要处理密码输入
第一次脚本里直接执行:
sudo apt-get update报错:
sudo: a terminal is required to read the password; either use the -S option to read from standard input or configure an askpass helper
sudo: a password is required
处理方式:在脚本里使用 sudo -S -v 先刷新 sudo 凭据,后续短时间内可用 sudo -n 执行;需要再次输入密码的地方使用 sudo -S。
15.4 GitHub 下载在虚拟机里很慢
虚拟机里下载 Miniforge 时输出:
0 88.6M 0 1276k 0 0 117k 0 0:12:49 0:00:10 0:12:39 107k处理方式:宿主机下载后传入虚拟机:
scp /tmp/Miniforge3-Linux-aarch64.sh parallels@10.211.55.4:/tmp/Miniforge3-Linux-aarch64.sh传输速度:
Miniforge3-Linux-aarch64.sh 100% 89MB 116.0MB/s 00:0015.5 apache-airflow[mysql] 不等于一定有 MySQLdb
初始化数据库时报错:
ModuleNotFoundError: No module named 'MySQLdb'处理方式:补装 mysqlclient:
pip install mysqlclient==2.1.1系统层还需要这些依赖,否则 mysqlclient 可能编译失败:
sudo apt-get install -y build-essential pkg-config default-libmysqlclient-dev15.6 环境中缺少 pkg_resources,导致 webserver 和 scheduler 启动失败
webserver 日志:
ModuleNotFoundError: No module named 'pkg_resources'scheduler 日志也有同样错误:
File ".../gunicorn/util.py", line 25, in <module>
  import pkg_resources
ModuleNotFoundError: No module named 'pkg_resources'
原因:当前 conda 环境里的 setuptools 状态不完整,导致 Airflow 2.3.4 / gunicorn 依赖的 pkg_resources 模块不可导入。
处理方式:降级 setuptools:
$ conda run -n airflow234 python -m pip install "setuptools==65.5.1"
Successfully installed setuptools-65.5.1

$ conda run -n airflow234 python -c "import pkg_resources; print(pkg_resources.__file__)"
/home/parallels/miniforge3/envs/airflow234/lib/python3.10/site-packages/pkg_resources/__init__.py
15.7 脚本里不要用宽泛的 pkill -f
我曾经在安装脚本里写过:
pkill -f 'airflow webserver' || true
pkill -f 'airflow scheduler' || true
结果执行到这一步时脚本自己被匹配并终止:
$ stop old airflow processes if any
Terminated
exit_code=143
FAILED: stop old airflow processes if any
后面又在远端内联 SSH 命令里触发过同类问题,因为当前 SSH 命令行本身包含 airflow scheduler 字样,也会被 pkill -f 匹配。
处理方式:
- 优先使用 pid 文件停止 webserver。
- 使用
ps先确认 pid,再手动kill <PID>。 - 自动化脚本中避免宽泛的
pkill -f airflow。
16. 最终目录和日志
Airflow 安装位置:
/home/parallels/miniforge3/envs/airflow234Airflow Home:
/home/parallels/airflow234主要配置文件:
/home/parallels/airflow234/airflow.cfg关键日志文件:
/home/parallels/airflow234/airflow-webserver.err
/home/parallels/airflow234/airflow-webserver.log
/home/parallels/airflow234/airflow-scheduler.err
/home/parallels/airflow234/airflow-scheduler.log
本次安装过程日志:
/home/parallels/airflow234_install_20230215_092103.log
/home/parallels/airflow234_install_20230215_092139.log
/home/parallels/airflow234_install_20230215_092515.log
/home/parallels/airflow234_install_20230215_092603.log
/home/parallels/airflow234_install_20230215_092640.log
/home/parallels/airflow234_install_20230215_092948.log
/home/parallels/airflow234_install_20230215_093213.log
/home/parallels/airflow234_manual_start_20230215_093356.log
/home/parallels/airflow234_start_final_20230215_093627.log
17. 小结
这次部署的关键不是 pip install apache-airflow 本身,而是版本兼容:
- Airflow 2.3.4 使用 Python 3.10 更稳。
- ARM64 机器不能使用 x86_64 Miniconda 安装包。
- MySQL 元数据库连接串使用
mysql+mysqldb时必须安装mysqlclient。 - 服务是否真正可用要以
/health、进程和日志为准,不能只看启动命令是否返回 0。