1. Object 类介绍
1.1 介绍
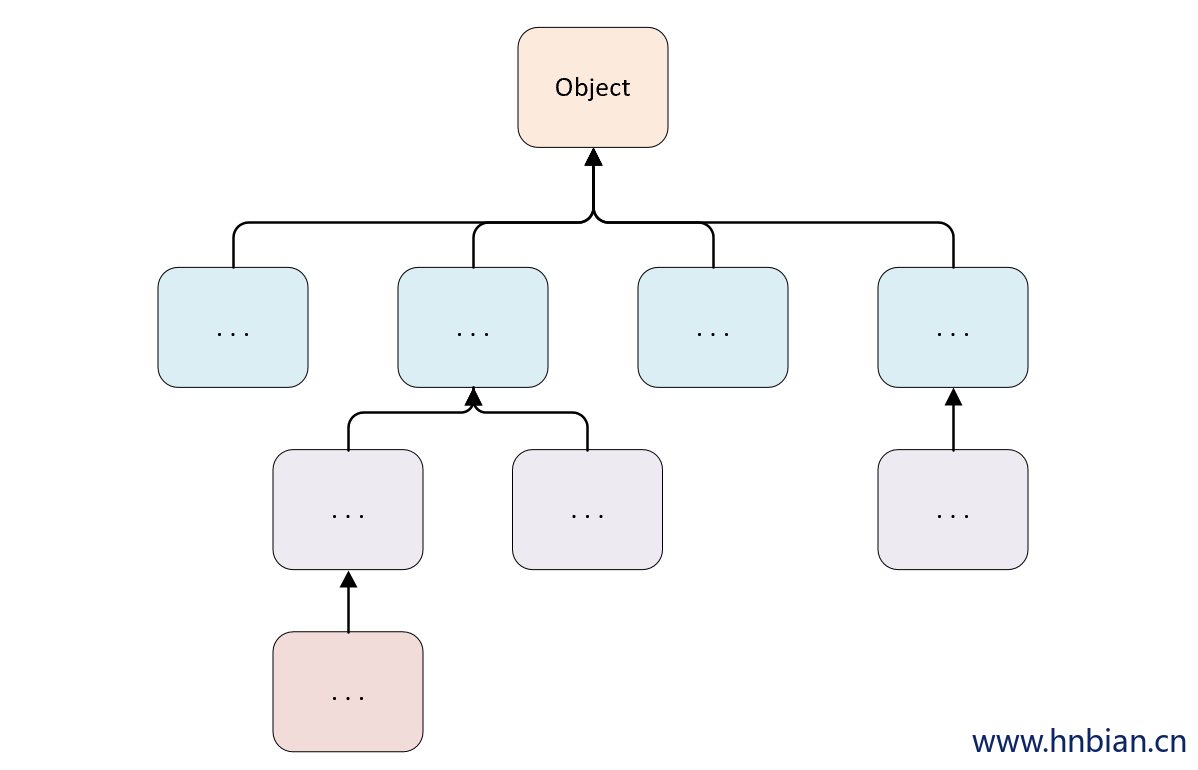
Java Object 类是所有类的父类,也就是说 Java 的所有类都继承了 Object,子类可以使用 Object 的所有方法。
Object 类位于 java.lang 包中,编译时会自动导入,我们创建一个类时,如果没有明确继承一个父类,那么它就会自动继承 Object,成为 Object 的子类。
Object 类可以显示继承,也可以隐式继承。
1.2 方法列表
| 方法 | 作用 |
|---|---|
| protected Object clone( ) | 创建并返回一个对象的拷贝 |
| boolean equals( Object obj ) | 比较两个对象是否相等 |
| protected void finalize( ) | 当 GC ( 垃圾回收器 ) 确定不存在对该对象的有更多引用时, 由对象的垃圾回收器调用此方法。 |
| Class getClass( ) | 获取对象的运行时对象的类 |
| int hashCode( ) | 获取对象的 hash 值 |
| void notify( ) | 唤醒在该对象上等待的某个线程 |
| void notifyAll( ) | 唤醒在该对象上等待的所有线程 |
| String toString( ) | 返回对象的字符串表示形式 |
| void wait( ) | 让当前线程进入等待状态。 直到其他线程调用此对象的 notify() 方法或 notifyAll() 方法。 |
| void wait(long timeout) | 让当前线程处于等待(阻塞)状态, 直到其他线程调用此对象的 notify() 方法或 notifyAll() 方法, 或者超过参数设置的timeout超时时间。 |
| void wait(long timeout, int nanos) | 与 wait( long timeout ) 方法类似, 多了一个 nanos 参数,这个参数表示额外时间(以纳秒为单位,范围是 0-999999)。 所以超时的时间还需要加上 nanos 纳秒。。 |
2. Equals 方法
2.1 概述
Object 的
equals()方法用于比较两个对象是否相等。equals()方法判断的是两个对象引用是否指向了同一个对象,即比较对象的内存地址是否相等。如果重写了
equals()方法,也需要重写hashCode()方法- 如 String 类就重写 equals() 方法,同时也重写了 hashCode() 方法
public class Object01_Equals01 {
    public static void main(String[] args) {
        Object obj1 = new Object();
        Object obj2 = new Object();

        // equals 判断 obj1 与 obj2 是否相等
        // 内存地址不同,不同对象,不相等,返回 false
        System.out.println(obj1.equals(obj2)); // false

        // obj1 赋给 obj3
        // 对象引用,内存地址相同,相等,返回 true
        Object obj3 = obj1;
        System.out.println(obj1.equals(obj3)); // true
    }
}
2.2 == 和equals 对比
==是一个比较运算符==既可以判断基本类型, 又可以判断引用类型object 只能用于比较引用类型是否相等
==如果判断基本类型, 判断的是值是否相等, 如 ing i=10; double j = 10.0==如果判断引用类型,判断的是地址是否相等, 即判断是不是同一个对象
public class Object02_Equals02 {
    public static void main(String[] args) {
        int i1 = 10;
        int i2 = 10;
        // 基本类型直接比较对象的值
        System.out.println("i1 == i2 = "+(i1 == i2)); // i1 == i2 = true
        Object o1 = new Object();
        // 引用拷贝, 将j1 赋值给j2
        Object o2 = o1;
        // 引用类型比较引用地址
        System.out.println("o1 == o2 = "+(o1 == o2)); // o1 == o2 = true
        System.out.println("o1.equals(o2) = "+(o1.equals(o2))); // o1.equals(o2) = true
        // 创建一个新的 J 对象
        Object o3 = new Object();
        // 引用类型比较引用地址
        System.out.println("o1 == o3 = "+(o1 == o3)); // o1 == o3 = false
        System.out.println("o1.equals(o3) = "+(o1.equals(o3))); // o1.equals(o3) = false
    }
}
3.2.3 String.equals 源码
String 类把 Object 的 equals 方法重写了, 改成比较两个字符串的值是否相等
- Jdk 11这种 String 类的equals 方法源码
public boolean equals(Object anObject) {
    // 比较是否是同一个对象
    if (this == anObject) {
        // 如果是同一个对象返回 true
        return true;
    }
    if (anObject instanceof String) { // 判断是否是字符串
        String aString = (String)anObject; // 向下转型
        if (coder() == aString.coder()) {
          // 为了确保使用不同编码的相同内容计算结果一致,计算时同样要区分编码
          return isLatin1() ? // 三目运算符
                StringLatin1.equals(value, aString.value) // 直接比较 value 的每一个值是否相等
                :
                StringUTF16.equals(value, aString.value); // 将byte[]转化为char类型之后,逐位比较每个char是否相等
        }
    }
    return false;
}

// LATIN1 编码表示1个字符占用1个byte
// UTF16 编码表示1个字符占用2个byte- String 类型 测试 equals 方法
public class EqualsTest02 {
    public static void main(String[] args) {

        String a = "hello";
        String b = "hello";

        // a,b 共同指向了常量池中的 “hello”
        System.out.println(a == b); // true
        System.out.println(a.equals(b)); // true

        // 先创建两个String对象, 然后赋值
        String c = new String("world");
        String d = new String("world");
        // == 比较内存地址, 因为两个对象不同, 所以为false
        System.out.println(d == c); // false
        // String equals 比较值,所以为 true
        System.out.println(d.equals(c)); // true
    }
}
3.2.4 重写 equals
判断两个 对象的内容是否相同,如果对象的属性值都一样, 则返回 true 否则返回false
public class EqualsOverride {
    public static void main(String[] args) {
        K k1 = new K("x", 20);
        K k2 = new K("x", 20);
        System.out.println("k1 equals k2 = "+k1.equals(k2)); // k1 equals k2 = true

        K k3 = new K("x", 21);

        System.out.println("k1 equals k3 = "+k1.equals(k3)); // k1 equals k3 = false

        // 打印hashcode
        System.out.println(k1.hashCode());
        System.out.println(k2.hashCode());
        System.out.println(k3.hashCode());
    }
}

class K {
    String name;
    int age;

    public K(String name, int age) {
        this.name = name;
        this.age = age;
    }

    @Override
    public boolean equals(Object o) {
        // 判断如果是同一个对象则返回true
        if (this == o) {
            return true;
        }
        // 传入的对象是 K 类型才会进行比较
        if (o instanceof K) {
            K k = (K) o;
            return (this.age ==k.age ) && (this.name.equals(k.name));
        }
        return false;
    }

    @Override
    public int hashCode(){
        return this.name.hashCode()+this.age;
    }
}
3. HashCode
Object hashCode方法能够返回对象的哈希值,返回的哈希值是一个整数, 表示在哈希表中的位置。能够提高具有哈希结构的容器的效率哈希值主要根据内存地址得来的, 但是不能将哈希值等价于内存地址
如果两个引用指向的是同一个对象, 那么哈希值一定是一样的,如果指向不同对象, 哈希值则不同
代码示例
public class HashCodeTest {
    public static void main(String[] args) {
        // Object 使用 hashCode()
        Object obj1 = new Object();
        System.out.println(obj1.hashCode());

        Object obj2 = new Object();
        System.out.println(obj2.hashCode());

        Object obj3 = obj2;
        System.out.println(obj3.hashCode());
    }
}
4.ToString 方法
默认返回 ``包名+类名+@+哈希值的16进制`,子类往往重写toString方法, 用于返回对象的属性信息
重写toString方法, 打印对象或者拼接对象时,都会自动调用该对象的toString形式
当直接输出一个对象时, toString方法会被默认的调用
Object.toString 源码
public String toString() {
        return getClass().getName() + "@" + Integer.toHexString(hashCode());
}- 代码示例
public class ToStringTest01 {
    public static void main(String[] args) {
        ToStringTest01 ts1 = new ToStringTest01();
        System.out.println(ts1.toString());
        // com.hnbian.object_.ToStringTest01@7c30a502

        Ts ts = new Ts("ts", "1001");
        // 重写对象的toString方法之后调用 toString方法
        System.out.println(ts.toString());
        // Ts{name='ts', id='1001'}

        // 输出对象, 默认会调用对象的toString 方法
        System.out.println(ts);
        // Ts{name='ts', id='1001'}
    }
}
class Ts{
    String name;
    String id;

    public Ts(String name, String id) {
        this.name = name;
        this.id = id;
    }

    // 重写 toString方法
    @Override
    public String toString() {
        return "Ts{" +
                "name='" + name + '\'' +
                ", id='" + id + '\'' +
                '}';
    }
}
5. Finalize
当对象被回收时,系统会自动调用该对象的 finalize 方法,子类可以重写该方法, 做释放资源等操作。
如果某个对象没有引用时,JVM 就会认为这个对象是一个垃圾对象,在出发垃圾回收机制时就会销毁该对象,但在销毁前,会先调用该对象的 finalize 方法。
垃圾回收机制的调用, 是由系统来决定的, 即JVM有自己的垃圾回收算法, 也可以通过System.gc()主动触发垃圾回收机制。
- 代码示例
public class FinalizeTest {
    public static void main(String[] args) {
        // 创建一个 新的 A 对象
        A a = new A("A");
        // 当把null 赋值给a 之后, 堆内存中的 实际的 a 对象就没有了引用指向它, 也就变成了垃圾
        // 垃圾回收器会回收该垃圾对象, 在销毁对象前,就会调用finalize 方法
        // 我们可以在 finalize 方法中写入自己的逻辑, 比如释放资源等
        // 如果我们重写了 finalize 方法则调用重写的finalize 方法, 如果没重写则调用object 的finalize 方法
        a = null;
        System.gc();
    }
}
class A{
    String name;

    public A(String name) {
        this.name = name;
    }
    @Override
    public void finalize() throws Throwable {
        System.out.println("A 的 finalize 方法被调用");
    }
}
6. Clone 方法
6.1 概述
Object clone()方法用于创建并返回一个对象的拷贝。clone方法是浅拷贝,对象内属性引用的对象只会拷贝引用地址,而不会将引用的对象重新分配内存,相对应的深拷贝则会连引用的对象也重新创建。Object 的 clone() 方法是一个受保护 ( protected ) 的方法
由于 Object 本身没有实现 Cloneable 接口,所以不重写 clone 方法并且进行调用的话会发生 CloneNotSupportedException 异常。
6.2 cloneable 接口
如果未重写 clone 方法的情况下, 想调用 Object 的 clone 方法时需要实现 cloneable 接口
cloneable 其实就是一个标记接口, 此类实现了Cloneable接口,以指示 Object 的 clone() 方法 可以合法地对该类实例进行按字段复制
如果在没有实现 Cloneable 接口的实例上调用 Object 的 clone() 方法,则会导致抛出
CloneNotSupporteddException
6.3 clone 方法使用示例
public class CloneTest implements Cloneable {
    int age;
    String name;

    // 构造方法
    public CloneTest(int age, String name) {
        this.age = age;
        this.name = name;
    }

    public static void main(String[] args) {
        CloneTest ct1 = new CloneTest(18, "晓明");
        System.out.println("ct1.age = "+ct1.age+", ct1.name = "+ct1.name);

        try {
            CloneTest ct2 = (CloneTest) ct1.clone();
            System.out.println("ct2.age = "+ct2.age+", ct2.name = "+ct2.name);
        } catch (CloneNotSupportedException e) {
            e.printStackTrace();
        }
    }
}
6.4 浅拷贝(shallow clone)
- 上面的代码调用 clone() 方法实现对象的克隆, 是属于浅拷贝,浅拷贝有一下几个特点:
- 使用默认的 clone 方法
- 对于原始数据域进行值拷贝
- 对于引用类型仅拷贝引用
- 执行快,效率高
- 不能做到数据的 100% 分离
- 如果一个对象只包含原始数据域 或者 不可变对象域,推荐使用浅拷贝
- 验证浅拷贝的数据分离情况
public class CloneShallow implements Cloneable{
    String name;
    int age;
    P p;

    public CloneShallow(String name, int age,P p) {
        this.name = name;
        this.age = age;
        this.p = p;
    }

    public static void main(String[] args) throws CloneNotSupportedException {

        CloneShallow aa = new CloneShallow("AA", 18,new P("ss"));
        System.out.println("aa.name = "+ aa.name); // aa.name = AA
        System.out.println("aa.p.name = "+ aa.p.name); // aa.p.name = ss
        // 克隆 aa 对象
        CloneShallow bb = (CloneShallow) aa.clone();
        // 修改 aa.name = AAAA
        aa.name = "AAAA";
        aa.p.name="ssss";
        // 这里发现 aa 与 bb 是浅拷贝的, 但是修改 aa. name 后竟然未影响 bb。name
        // 原因是  String 是 final 的,这里修改了aa.name 并未修改原来的引用, 而是新开辟了一块内存重新赋予给了 aa.name
        System.out.println("aa.name = "+ aa.name); // aa.name = AAAA
        System.out.println("bb.name = "+ bb.name); // bb.name = AA

        // 这里因为 浅拷贝拷贝的是引用,数据没有完全隔离, 所以当 aa 中修改后, bb 中的数据也会受到影响
        System.out.println("aa.p.name = "+ aa.p.name); // aa.p.name = ssss
        System.out.println("bb.p.name = "+ bb.p.name); // bb.p.name = ssss
    }

    @Override
    public Object clone() throws CloneNotSupportedException {
        return super.clone();
    }
}

class P{
    String name;

    public P(String name) {
        this.name = name;
    }
}
6.5 深拷贝(deep clone)
- 深拷贝有一下几个特点
- 做到了原对象与克隆对象之间100%数据分离
- 深拷贝比浅拷贝要更加耗时,效率更低
如果是对象存在引用类型的属性,建议使用深拷贝,深拷贝需要重写clone方法,不仅仅只调用父类的方法,还需调用属性的clone方法
- 通过 clone 方法实现深拷贝
public class CloneDeep implements Cloneable {
    String name;
    int age;
    S s;

    public CloneDeep(String name, int age, S s) {
        this.name = name;
        this.age = age;
        this.s = s;
    }

    public static void main(String[] args) throws CloneNotSupportedException {
        CloneDeep aa = new CloneDeep("AA", 18,new S("ss"));

        System.out.println("aa.name = "+ aa.name); // aa.name = AA
        System.out.println("aa.p.name = "+ aa.s.name); // aa.p.name = ss

        // 克隆 aa 对象
        CloneDeep bb = (CloneDeep) aa.clone();

        // 修改 aa.name = AAAA
        aa.name = "AAAA";

        aa.s.name="ssss";
        // 这里发现 aa 与 bb 是浅拷贝的, 但是修改 aa. name 后竟然未影响 bb。name
        // 原因是  String 是 final 的,这里修改了aa.name 并未修改原来的引用, 而是新开辟了一块内存重新赋予给了 aa.name
        System.out.println("aa.name = "+ aa.name); // aa.name = AAAA
        System.out.println("bb.name = "+ bb.name); // bb.name = AA

        // 这里因为 深拷贝拷贝的是引用,数据完全隔离, 所以当 aa 中修改后, bb 中的数据不会受到影响
        System.out.println("aa.s.name = "+ aa.s.name); // aa.p.name = ssss
        System.out.println("bb.s.name = "+ bb.s.name); // bb.p.name = ss
    }

    @Override
    public Object clone() throws CloneNotSupportedException {
        // 调用父类的 clone 方法
        CloneDeep cd = (CloneDeep) super.clone();
        // 对属性进行拷贝, 调用clone 方法
        cd.s = (S) s.clone();
        return cd;
    }
}

class S implements Cloneable {
    String name;

    public S(String name) {
        this.name = name;
    }

    @Override
    public Object clone() throws CloneNotSupportedException {
        return super.clone();
    }
}- 通过序列化方式实现深拷贝
public class CloneDeepSerializable implements Serializable {
    private static final long serialVersionUID = 1L;

    String name;
    int age;
    public D d;

    public CloneDeepSerializable(String name, int age, D d) {
        this.name = name;
        this.age = age;
        this.d = d;
    }

    public static void main(String[] args) {

        CloneDeepSerializable cd1 = new CloneDeepSerializable("AA", 18, new D("dd"));
        CloneDeepSerializable cd2 = cd1.copy();

        cd1.name="AAAA";
        cd1.d.name="DDDD";
        System.out.println("cd1.name = "+cd1.name); // cd1.name = AAAA
        System.out.println("cd2.name = "+cd2.name); // cd2.name = AA
        System.out.println("cd1.d.name = "+cd1.d.name); // cd1.d.name = DDDD
        System.out.println("cd2.d.name = "+cd2.d.name); // cd2.d.name = dd
    }

    /**
     * 拷贝对象,
     * 将对象序列化之后在反序列化
     * @return
     */
    public CloneDeepSerializable copy() {
        CloneDeepSerializable copy = null;
        try {
            ByteArrayOutputStream baos = new ByteArrayOutputStream();
            ObjectOutputStream oos = new ObjectOutputStream(baos);
            oos.writeObject(this);

            ByteArrayInputStream bais = new ByteArrayInputStream(baos.toByteArray());
            ObjectInputStream ois = new ObjectInputStream(bais);
            copy = (CloneDeepSerializable) ois.readObject();
        } catch (IOException e) {
            e.printStackTrace();
        } catch (ClassNotFoundException e) {
            e.printStackTrace();
        }
        return copy;
    }
}

class D implements Serializable{
    private static final long serialVersionUID = 2L;
    public String name = "";

    public D(String name) {
        this.name = name;
    }
}
7. GetClass
Object getClass() 方法用于获取对象的运行时对象的类
public class GetClassTest {
    public static void main(String[] args) {
        Object o = new Object();
        System.out.println(o.getClass());
        // class java.lang.Object

        String s = new String("s");
        System.out.println(s.getClass());
        // class java.lang.String

        Gc gc = new Gc();
        System.out.println(gc.getClass());
        // class com.hnbian.object_.Gc
    }
}

class Gc{ }
8. wait 方法 -
Object wait() 方法让当前线程进入等待状态。直到其他线程调用此对象的 notify() 方法 或 notifyAll() 方法。
当前线程必须是此对象的监视器所有者,否则还是会发生 IllegalMonitorStateException 异常。
如果当前线程在等待之前或在等待时被任何线程中断,则会抛出 InterruptedException 异常。
- 代码示例
import java.util.Collections;
import java.util.LinkedList;
import java.util.List;

public class WaitTest {
    private List synchedList;

    public WaitTest() {
        // 创建一个同步列表
        synchedList = Collections.synchronizedList(new LinkedList());
    }

    // 删除列表中的元素
    public String removeElement() throws InterruptedException {
        synchronized (synchedList) {

            // 列表为空就等待
            while (synchedList.isEmpty()) {
                System.out.println("List is empty...");
                synchedList.wait();
                System.out.println("Waiting...");
            }
            String element = (String) synchedList.remove(0);

            return element;
        }
    }

    // 添加元素到列表
    public void addElement(String element) {
        System.out.println("Opening...");
        synchronized (synchedList) {

            // 添加一个元素,并通知元素已存在
            synchedList.add(element);
            System.out.println("New Element:'" + element + "'");

            synchedList.notifyAll();
            System.out.println("notifyAll called!");
        }
        System.out.println("Closing...");
    }

    public static void main(String[] args) {
        final WaitTest wt = new WaitTest();

        Runnable runA = new Runnable() {

            public void run() {
                try {
                    String item = wt.removeElement();
                    System.out.println("" + item);
                } catch (InterruptedException ix) {
                    System.out.println("Interrupted Exception!");
                } catch (Exception x) {
                    System.out.println("Exception thrown.");
                }
            }
        };

        Runnable runB = new Runnable() {

            // 执行添加元素操作,并开始循环
            public void run() {
                wt.addElement("Hello!");
            }
        };

        try {
            Thread threadA1 = new Thread(runA, "Google");
            threadA1.start();

            Thread.sleep(500);

            Thread threadA2 = new Thread(runA, "Runoob");
            threadA2.start();

            Thread.sleep(500);

            Thread threadB = new Thread(runB, "Taobao");
            threadB.start();

            Thread.sleep(1000);

            threadA1.interrupt();
            threadA2.interrupt();
        } catch (InterruptedException x) {
        }
    }
}
9. wait(long timeout) -
Object wait(long timeout) 方法让当前线程处于 阻塞 状态,long timeout 参数单位为毫秒
如果 时间超过 timeout 设置的时间当前线程会继续执行,或者其他线程调用此对象的 notify() 方法 或 notifyAll() 方法。
如果 timeout 参数为 0,则不会超时,会一直进行等待,类似于 wait() 方法。
当前线程必须是此对象的监视器所有者,否则还是会发生 IllegalMonitorStateException 异常。
如果当前线程在等待之前或在等待时被任何线程中断,则会抛出 InterruptedException 异常。
如果传递的参数不合法,则会抛出 IllegalArgumentException 异常。
- 代码示例
public class WaitLongTest {

    private List synchedList;

    public WaitLongTest(){
        // 创建一个同步列表
        synchedList = Collections.synchronizedList(new LinkedList());
    }

    public static void main(String[] args) {
        final WaitLongTest wlt = new WaitLongTest();

        Runnable runA = new Runnable() {

            public void run() {
                try {
                    String item = wlt.delElement();
                    System.out.println("--" + item);
                } catch (InterruptedException ix) {
                    System.out.println("Interrupted Exception!");
                } catch (Exception x) {
                    System.out.println("Exception thrown.");
                }
            }
        };

        Runnable runB = new Runnable() {

            // 执行添加元素操作,并开始循环
            public void run() {
                wlt.addElement("Hello!");
            }
        };

        try {
            Thread threadA1 = new Thread(runA, "Google");
            threadA1.start();

            Thread.sleep(500);

            Thread threadA2 = new Thread(runA, "Runoob");
            threadA2.start();

            Thread.sleep(500);

            Thread threadB = new Thread(runB, "Taobao");
            threadB.start();

            Thread.sleep(1000);

            threadA1.interrupt();
            threadA2.interrupt();
        } catch (InterruptedException x) {
        }
    }


    /**
     * 删除列表中的元素
     * @return
     * @throws InterruptedException
     */
    public String delElement() throws InterruptedException {
        synchronized (synchedList) {
            // 列表为空就等待
            while (synchedList.isEmpty()) {
                System.out.println("List is empty...");
                synchedList.wait(10000); // 设置等待时间
                System.out.println("Waiting...");
            }
            String element = (String) synchedList.remove(0);

            return element;
        }
    }


    /**
     * 添加元素到列表
     * @param element
     */
    public void addElement(String element) {
        System.out.println("Opening...");
        synchronized (synchedList) {

            // 添加一个元素,并通知元素已存在
            synchedList.add(element);
            System.out.println("New Element:'" + element + "'");

            synchedList.notifyAll();
            System.out.println("notifyAll called!");
        }
        System.out.println("Closing...");
    }

}
10. Notify 方法 -
Object notify() 方法用于唤醒一个在此对象监视器上等待的线程。
如果所有的线程都在此对象上等待,那么只会选择一个线程,选择是任意性的,并在对实现做出决定时发生。
一个线程在对象监视器上等待可以调用 wait() 方法。
notify() 方法只能被作为此对象监视器的所有者的线程来调用。
一个线程要想成为对象监视器的所有者,可以使用以下 3 种方法:
- 执行对象的同步实例方法
- 使用 synchronized 内置锁
- 对于 Class 类型的对象,执行同步静态方法
一次只能有一个线程拥有对象的监视器。
如果当前线程不是此对象监视器的所有者的话会抛出 IllegalMonitorStateException 异常。
- 代码示例
import java.util.Collections;
import java.util.LinkedList;
import java.util.List;

public class NotifyTest {
    private List synchedList;

    public NotifyTest() {
        // 创建一个同步列表
        synchedList = Collections.synchronizedList(new LinkedList());
    }

    // 删除列表中的元素
    public String removeElement() throws InterruptedException {
        synchronized (synchedList) {

            // 列表为空就等待
            while (synchedList.isEmpty()) {
                System.out.println("List is empty...");
                synchedList.wait();
                System.out.println("Waiting...");
            }
            String element = (String) synchedList.remove(0);

            return element;
        }
    }

    // 添加元素到列表
    public void addElement(String element) {
        System.out.println("Opening...");
        synchronized (synchedList) {

            // 添加一个元素,并通知元素已存在
            synchedList.add(element);
            System.out.println("New Element:'" + element + "'");

            synchedList.notifyAll();
            System.out.println("notifyAll called!");
        }
        System.out.println("Closing...");
    }

    public static void main(String[] args) {
        final NotifyTest nt = new NotifyTest();

        Runnable runA = new Runnable() {

            public void run() {
                try {
                    String item = nt.removeElement();
                    System.out.println("" + item);
                } catch (InterruptedException ix) {
                    System.out.println("Interrupted Exception!");
                } catch (Exception x) {
                    System.out.println("Exception thrown.");
                }
            }
        };

        Runnable runB = new Runnable() {

            // 执行添加元素操作,并开始循环
            public void run() {
                nt.addElement("Hello!");
            }
        };

        try {
            Thread threadA1 = new Thread(runA, "Google");
            threadA1.start();

            Thread.sleep(500);

            Thread threadA2 = new Thread(runA, "Runoob");
            threadA2.start();

            Thread.sleep(500);

            Thread threadB = new Thread(runB, "Taobao");
            threadB.start();

            Thread.sleep(1000);

            threadA1.interrupt();
            threadA2.interrupt();
        } catch (InterruptedException x) {
        }
    }
}
11. NotifyAll 方法 -
Object notifyAll() 方法用于唤醒在该对象上等待的所有线程。
notifyAll() 方法跟 notify() 方法 一样,区别在于 notifyAll() 方法唤醒在此对象监视器上等待的所有线程,notify() 方法是一个线程。
如果当前线程不是对象监视器的所有者,那么调用 notifyAll() 方法同样会发生 IllegalMonitorStateException 异常。
- 代码示例
import java.util.Collections;
import java.util.LinkedList;
import java.util.List;

public class NotifyAllTest {
    private List synchedList;

    public NotifyAllTest() {
        // 创建一个同步列表
        synchedList = Collections.synchronizedList(new LinkedList());
    }

    // 删除列表中的元素
    public String removeElement() throws InterruptedException {
        synchronized (synchedList) {

            // 列表为空就等待
            while (synchedList.isEmpty()) {
                System.out.println("List is empty...");
                synchedList.wait();
                System.out.println("Waiting...");
            }
            String element = (String) synchedList.remove(0);

            return element;
        }
    }

    // 添加元素到列表
    public void addElement(String element) {
        System.out.println("Opening...");
        synchronized (synchedList) {

            // 添加一个元素,并通知元素已存在
            synchedList.add(element);
            System.out.println("New Element:'" + element + "'");

            synchedList.notifyAll();
            System.out.println("notifyAll called!");
        }
        System.out.println("Closing...");
    }

    public static void main(String[] args) {
        final NotifyAllTest nat = new NotifyAllTest();

        Runnable runA = new Runnable() {

            public void run() {
                try {
                    String item = nat.removeElement();
                    System.out.println("" + item);
                } catch (InterruptedException ix) {
                    System.out.println("Interrupted Exception!");
                } catch (Exception x) {
                    System.out.println("Exception thrown.");
                }
            }
        };

        Runnable runB = new Runnable() {

            // 执行添加元素操作,并开始循环
            public void run() {
                nat.addElement("Hello!");
            }
        };

        try {
            Thread threadA1 = new Thread(runA, "Google");
            threadA1.start();

            Thread.sleep(500);

            Thread threadA2 = new Thread(runA, "Runoob");
            threadA2.start();

            Thread.sleep(500);

            Thread threadB = new Thread(runB, "Taobao");
            threadB.start();

            Thread.sleep(1000);

            threadA1.interrupt();
            threadA2.interrupt();
        } catch (InterruptedException x) {
        }
    }
}![13.[Java 面向对象] 多态](https://images.hnbian.cn/Fof-p2iJ5oEvuNECBIVcpbpFMsTy)
![12.[Java 面向对象] 封装与继承](http://images.hnbian.cn//FnOR4M3_xBUAkoKen_sHq7MyHLAY)